Just a Wee Bit Irish Free Printable Iron-On

Happy St. Patrick’s Day! As the queen of the last minute blog post (seriously… it’s March 17!) I decided to make the easiest St. Patrick’s Day craft out there. A free printable where all you need is iron-on paper and a onesie or t-shirt! I’ve had this idea for a month but I was just finally able to work on it this weekend. Since Hailey is just a wee bit Irish (12.5%, to be precise!) I thought it would be really fun to make her this onesie! And since I'm generous, I'm sharing the printable with you totally for free! Also… I feel really foolish for having to use iron-on paper for dark fabrics YET AGAIN. I totally didn’t learn my lesson from Halloween but I’m going to order a new set for white fabrics, stat! Also, can we talk about how tiny newborn Hailey was. I’m not crying, you’re crying.

Looking for an easy St. Patrick’s Day craft for your baby or toddler? How about a free St. Patrick’s Day printable?! Get your for free now! #stpatricksday #freeprintable #ironon

You will need:

White onesies (here)
Iron-on paper (here)
Iron
Printer (I have this one and love it!)
Free Printable

The printable is available in my resource library, which you can get totally FREE access to, just by signing up. What exactly do you get? Access to all my printables, including party planning guides, checklists, and my projects. By signing up, you'll have access to all projects- past, present and future! 

Looking for an easy St. Patrick’s Day craft for your baby or toddler? How about a free St. Patrick’s Day printable?! Get your for free now! #stpatricksday #freeprintable #ironon

Isn’t she sooo stinkin’ cute in this little outfit?! If you want to create this super easy onesie for your little baby, get the free printable and get crackin’!

I’ll also add for a second time… your printable won’t have this white border if you get the right iron-on paper! You want to use one for light-colored fabrics.

The printable is available in my resource library, which you can get totally FREE access to, just by signing up. What exactly do you get? Access to all my printables, including party planning guides, checklists, and my projects. By signing up, you'll have access to all projects- past, present and future! 

DIY Rainbow Alphabet Blocks

Call it a mother's intuition but I made this project before I even knew I was pregnant! I wanted them for an Instagram challenge I have since put aside, but hey... they're pretty cute and I've used them for a few blog posts already too! You probably saw them make a cameo in my Easter party post, my baby post and my Painted Notebook post. They're too awesome (and useful) to resist. Find out how to make a set for yourself!

Colorful rainbow alphabet baby blocks? Yes please! Find out how to make a set for yourself. Click for the full how-to!

Disclaimer: I do not have children, and therefore I do not know what age this would be for. I’m going to say 3+, but please use your discretion! Mine will be mainly for decorative purposes. I don’t want any children getting hurt with toxic paint or swallowing a loose letter. Please use caution when giving this project to children!!!

You will need:

1.5" blocks (here)
Painter’s tape 1 inch (here)
Paint in your choice of colors (similar here)*
Wood letters (from Michael’s, similar here)
Paintbrushes (similar here)
Super glue or wood glue (here)
Newspaper or similar to cover workspace

*My colors were Martha Stewart Pink Dahlia, Apple Barrel Pink Parfait, Martha Stewart Wild Salmon, Martha Stewart Yellow Jacket, Martha Stewart Diving Board, Apple Barrel Parrot Blue, Apple Barrel Bimini Blue, Craft Smart Grape Taffy

Directions:

Colorful rainbow alphabet baby blocks? Yes please! Find out how to make a set for yourself. Click for the full how-to!
  1. Pick the colors for your paint, and decide on whether you want a pattern. I wanted to do a rainbow, so I assigned each letter a color and counted out how many of each block I needed from that.

  2. Find the best side of your block to be the front, and add tape to the center as a “stripe”. I did this on two sides so that I would have the ability to add extra letters or something else to the back. Or at least, if gave me an extra option in case one side looked funky!

  3. Once you’ve taped a few (or all) of your blocks, begin painting them. Each round, I painted the “front” of the block with two stripes, 2 sides full color, and the “back” with two stripes. I did the stripes first, then the sides, and went and did a second coat on the stripes before letting it dry.

  4. Peel your tape off your blocks and save it for round 2. Make sure your blocks dry fully before doing round 2!

  5. While your blocks dry, start painting your letters. I did the front and all the sides with a few coats.

  6. Take your tape, and reposition it on the sides with the stripes, this time going the other direction to form a “border” of color around the edge. Paint the stripes on the front, back, and opposite sides. And let dry fully.

  7. Glue your letters into your blocks and let dry according to directions.

Colorful rainbow alphabet baby blocks? Yes please! Find out how to make a set for yourself. Click for the full how-to!

Alternatives:

  1. For a safer alternative, you can paint or stamp the letters onto the blocks so that there is no choking hazard

  2. Instead of matching all the blocks and letters, try mixing them up or color blocking with different shades of the same color! I tested that below.

  3. Add stamps to the sides of the blocks for extra learning fun!

  4. Add numbers for a complete block set

Colorful rainbow alphabet baby blocks? Yes please! Find out how to make a set for yourself. Click for the full how-to!

Ahhh! I mean, how stinking cute are these!? They'd also be really cute as decor with just the letters of your baby or child's name. I love love love these! Are you planning to make a set for your kids? Let me know in the comments below!

Spice Girls Rainbow Spa Slumber Party

Happy 20-year anniversary of the Spice World release in the US!!! That's right, the movie itself is almost old enough to be able to drink!! Do you remember the first time you went to see it? We waited just a little bit too long and it was out of most theaters, but there was this small theater by my grandma's house in Hells Kitchen and they still had it on! So my parents took us along with grandma (who barely spoke English, since she was from Greece) and we all watched it together. After watching it, my sister and I literally wanted to re-create the whole thing with our Barbies, so we turned our doll house into the Spice Tour Bus and made our Barbies into the Spice Girls. Ugh, it was such a magical time! This movie brings me so much nostalgia.

Anyway, before I start to REALLY ramble... one of my favorite scenes in Spice World was the one where the girls are all laying in robes under a magically colored tent. It's such a short scene, but I always wanted to recreate that party and hang out there! Unfortunately, it's winter here in NYC and it's fudging COLD so I decided to virtually create this scene for anyone to attempt! 

Ever wished you could be the Spice Girls? Throw yourself a rainbow spa slumber party just like the one in Spice World! You'll be sure to make everyone jealous.

1. White Paper Lanterns 2. Toe Separators 3. Orange Robe 4. Nail Scrub Brushes 5. Pedicure Slipper 6. Green Robe 7. Yellow Robe 8. Chupa Chups Lollipops 9. Diet Pepsi 10. Purple Robe 11. White Tent 12. Pink Robe 13. Orange Blanket 14. Blue Pillows 15. Cow Print Pillow Cover 16. Curtain Panels

Setting Up

To set the scene, you’ll want to set up your tent in the grass, or even indoors if it’ll fit. Lay down your orange blanket (1 or 2, depending on the size of your tent) and throw some pillows around to make it comfy. If you’re putting the tent on the grass, you may want to get a waterproof liner for your blanket so you don’t end up with a moist blanket and wet butts!  Then, take your curtain panels and go around the tent to hang them for some privacy and color. Depending on the style of your tent, I recommend using hook clips for an affordable and easy method of hanging! 

I really wanted this party to have that same cozy feel as the one in the movie, plus the really bright and quirky 90’s ridiculousness we all loved. Since we don’t really have an occasion to set up a tent and sit around lounging in the grass like the Spice Girls, I figured a slumber party/spa day would be the perfect excuse! You can get some super affordable items, like spa flip flops, scrubber brushes, and colorful toe separators. Invite each girl to bring their favorite shade of bright polish, or order a set of these rainbow nail polishes so everyone can choose their fave. It would make a great party favor!

Getting in the 90's Mood

Play your favorite 90’s playlist, or blast some Spice Girls as you get pampered in style. Or, you can even grab a portable DVD player or your laptop to play Spice World in the background.

The girls all wear these plush, oversized robes in bright pink, orange, green, yellow, and a purplish-blue for Posh. Super appropriate, right? Haha. The girls are drinking Pepsi and enjoying their candy of choice, chupa chups, so I included those as well.  You can always opt for something healthier, like cucumber water and a fruit and veggie platter. Or, go all out 90's with some of your favorite 90's snacks, like Fruit by the Foot, Gusher's, and Ring Pops.

Say You'll Be There

Are you guys just dying to throw this party?! It's fulfilling all my 90's dreams, I'll tell you that much! So, which scene from Spice World did you want to recreate? And, which Spice Girl was your favorite? Let me know in the comments below! (PS- I loved Ginger!)

DIY Wood Bead Tassel Necklace

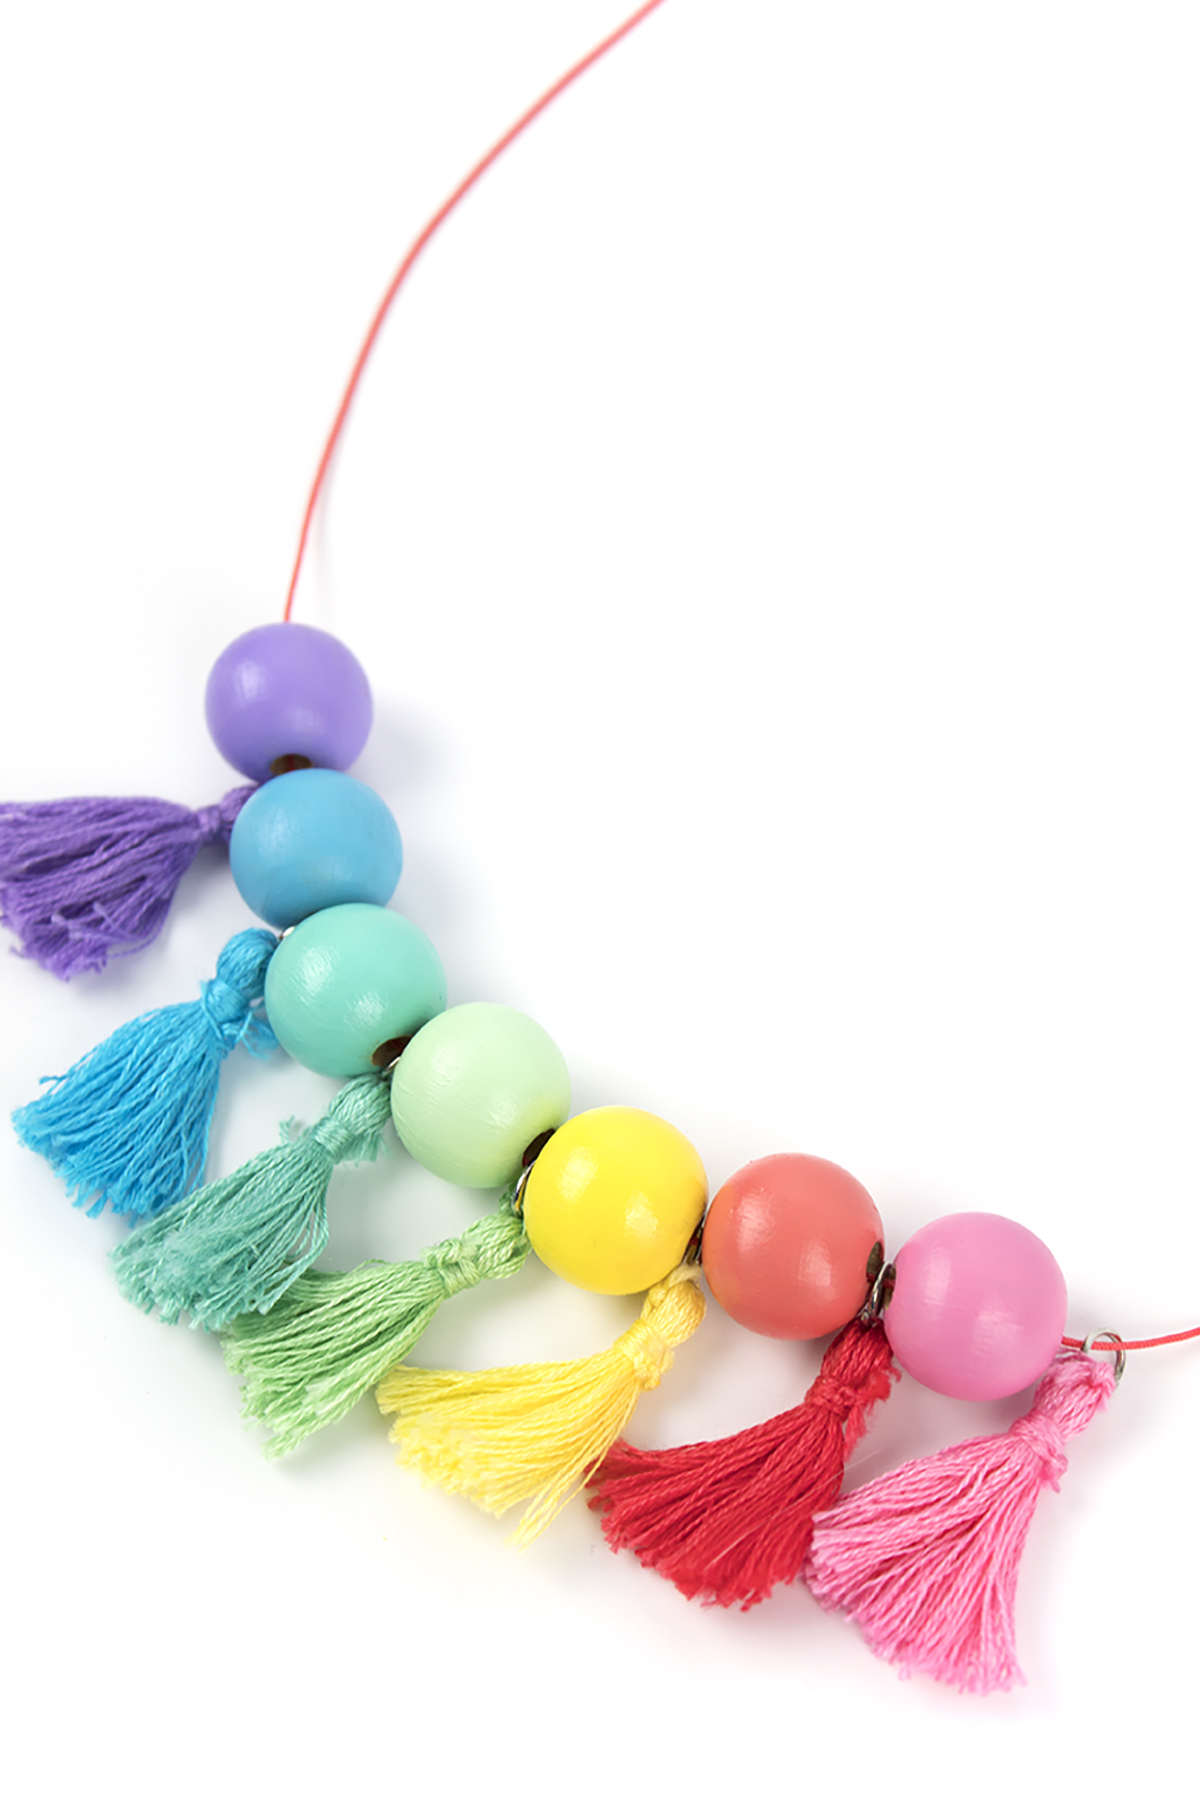
Happy March! Wow, I can't believe it's nearly spring already and St. Patrick's day is next week! St. Patrick's Day was always one of my favorite holidays for some reason. I like almost all of them, but I think it's something about how everyone goes crazy and gets all dresses up that makes me like St. Patrick's Day a lot. Instead of doing a traditional St. Patrick's Day craft, I decided to switch it up a little with a pastel rainbow necklace. My fiancé is a quarter Irish, and he said St. Patrick's Day does not involve rainbows. However, there's no way to find a pot of gold without a rainbow. So, at least in the Hallmark version of the holiday, there's definitely rainbows! If you want to add a little bit of celebration to your St. Patrick's Day outfit this year without looking like you belong in a parade, try wearing this necklace! Honestly, it works well all year round and I think it's perfect for the spring!

Add a little color to your wardrobe with this DIY Wood Bead Tassel Necklace. It features painted beads, DIY tassels, and a customizable palette. Make one for your closet today! #diyjewelry #rainbow #stpatricksday
DIY Wood Bead Tassel Necklace
Add a little color to your wardrobe with this DIY Wood Bead Tassel Necklace. It features painted beads, DIY tassels, and a customizable palette. Make one for your closet today! #diyjewelry #rainbow #stpatricksday

You Will Need:

DIY Wood Bead Tassel Necklace

Embroidery floss (similar here)
Wood beads (similar here)
Nylon cord (here)
Jump rings & clasps (similar here)
Paint (similar here)
Paintbrush (mine are from Michael's, similar here)
Styrofoam (here)
Kebab sticks (here)
Washi tape (similar here)
Jewelry tools (here)
Scissors (here)

DIY Wood Bead Tassel Necklace

1. Take your skewer and wrap it in washi tape. You'll want enough so that the beads won't slide down as you're painting. Put your beads on and paint them. I used bright rainbow colors. Put your skewer into some styrofoam to dry. While you wait...

Add a little color to your wardrobe with this DIY Wood Bead Tassel Necklace. It features painted beads, DIY tassels, and a customizable palette. Make one for your closet today! #diyjewelry #diytassels

2. Cut a piece of cardboard that is the size you want your finished tassels to be. I wanted mine to be around the same size as my beads, so I used that as a template. Wrap the embroidery floss around the cardboard 25 times. You can do less or more, depending on how thick or thin you want your tassels to be. Cut a small piece of floss, thread it through the underside of the top, and tie a few tight knots.

DIY Wood Bead Tassel Necklace

3. Slide the floss off the cardboard and onto a pencil or stir stick. Take a piece of embroidery floss and wrap it around just below the stick. Tie several knots, then cut your embroidery floss. Then, take a jump ring and thread it through the top piece of embroidery floss. Comb your tassel to loosen the weave of the embroidery floss and create and fluffy tassel.

DIY Wood Bead Tassel Necklace

(Psst. if you want to save time and buy your tassels, check out this link).

DIY Wood Bead Tassel Necklace

5. Attach your clasp to one crimp, and your jump ring to another crimp, and attach them to your cord. I wanted my necklace to be long, but be warned- I made mine WAY too long. With the clasps on, it came down to about my belly button! Haha. So, I added a few clasps along the way so I could adjust the length if I wanted to.

DIY Wood Bead Tassel Necklace

6. Thread your beads and tassels. I decided to use a coordinating bead and tassel combo, but you can also mix it up.

Add a little color to your wardrobe with this DIY Wood Bead Tassel Necklace. It features painted beads, DIY tassels, and a customizable palette. Make one for your closet today! #diyjewelry #rainbow #stpatricksday

7. Wear and enjoy! I've gotten so many compliments on this necklace the few times I've worn it so far. I truly love it! If you want to add a fun pop of color to your outfit, this necklace is essential.

DIY Wood Bead Tassel Necklace

Oh, did you know I have not one, but THREE cats? This is Roger and he's probably the friendliest cat on the planet. I found him in my backyard in Astoria and decided to keep him. He's the coolest, funniest dude.

Add a little color to your wardrobe with this DIY Wood Bead Tassel Necklace. It features painted beads, DIY tassels, and a customizable palette. Make one for your closet today! #diyjewelry #rainbow #stpatricksday

I love love loveeeeee this necklace. The pastel rainbow colors are just magical! Would you wear a necklace like this? What do you think of it? Let me know in the comments below!

Add a Pop of Color- My Top Picks!

When I passed by HGTV Home's Pop of Color issue last month, I couldn't help but get it! I decided to go with neutral paint colors in my home. Since I'm not a fan of beige, I ended up choosing a lot of grays. This prompted my dad to nickname my house "50 shades of gray". HGTV Home Magazine really inspired me to add in some bright and colorful furniture items to get my house ready for summer. I decided to round up some of my favorite items to add pops of color to your home.  The best part- they're all under $250!

Add some color to your home with my top home decor picks! These items will give you some colorful home decor that won’t overpower your decor, but it will stand out! Give your home a refresh today! #homedecor #colorfulhome #homedecorideas

*This post contains affiliate links.

I just love this turquoise stool.  It would look super cute around your kitchen island or outside on your deck.  

If you're into a subtle pop of color, this table fits the bill perfectly!

I love this rug!  It's the perfect pop of color for my neutral home.

This stool will make a big impact without taking up a lot of space.

This red bookcase would brighten up any space.

Add this mirror for a burst of energy!

Though a bit pricey, this pillow is both fun and sassy.

I want this adorable headboard for my room! How dreamy is this?

I love this colorful table! It's a perfect little writing desk that can fit in a small area or corner.

Looking for more inspiration? Be sure to follow my home decor Pinterest board!

How do you add pops of color in your home? Let me know!