Pink Painted Door Makeover (The Easy Way!)

This spring, I decided to tackle something that's been on my to-do list for a long time- repainting my front door! It's been a boring shade of brick red since we bought the house over 3 years ago and I was ready to give it the facelift it deserved. There was one major thing stopping me though- how do I remove all this hardware to paint it? I wanted to paint the door without all the hard work, so I decided to partner up with FrogTape to give this door a much-needed makeover.

*This post was sponsored by FrogTape. All content and opinions are my own.

On Wednesday’s we paint our door pink!! With the help of FrogTape, I was able to paint my door without having to remove the hardware. It was easy peasy lemon squeezy, and left such crisp clean lines! Head to the blog for all the details so you can g…

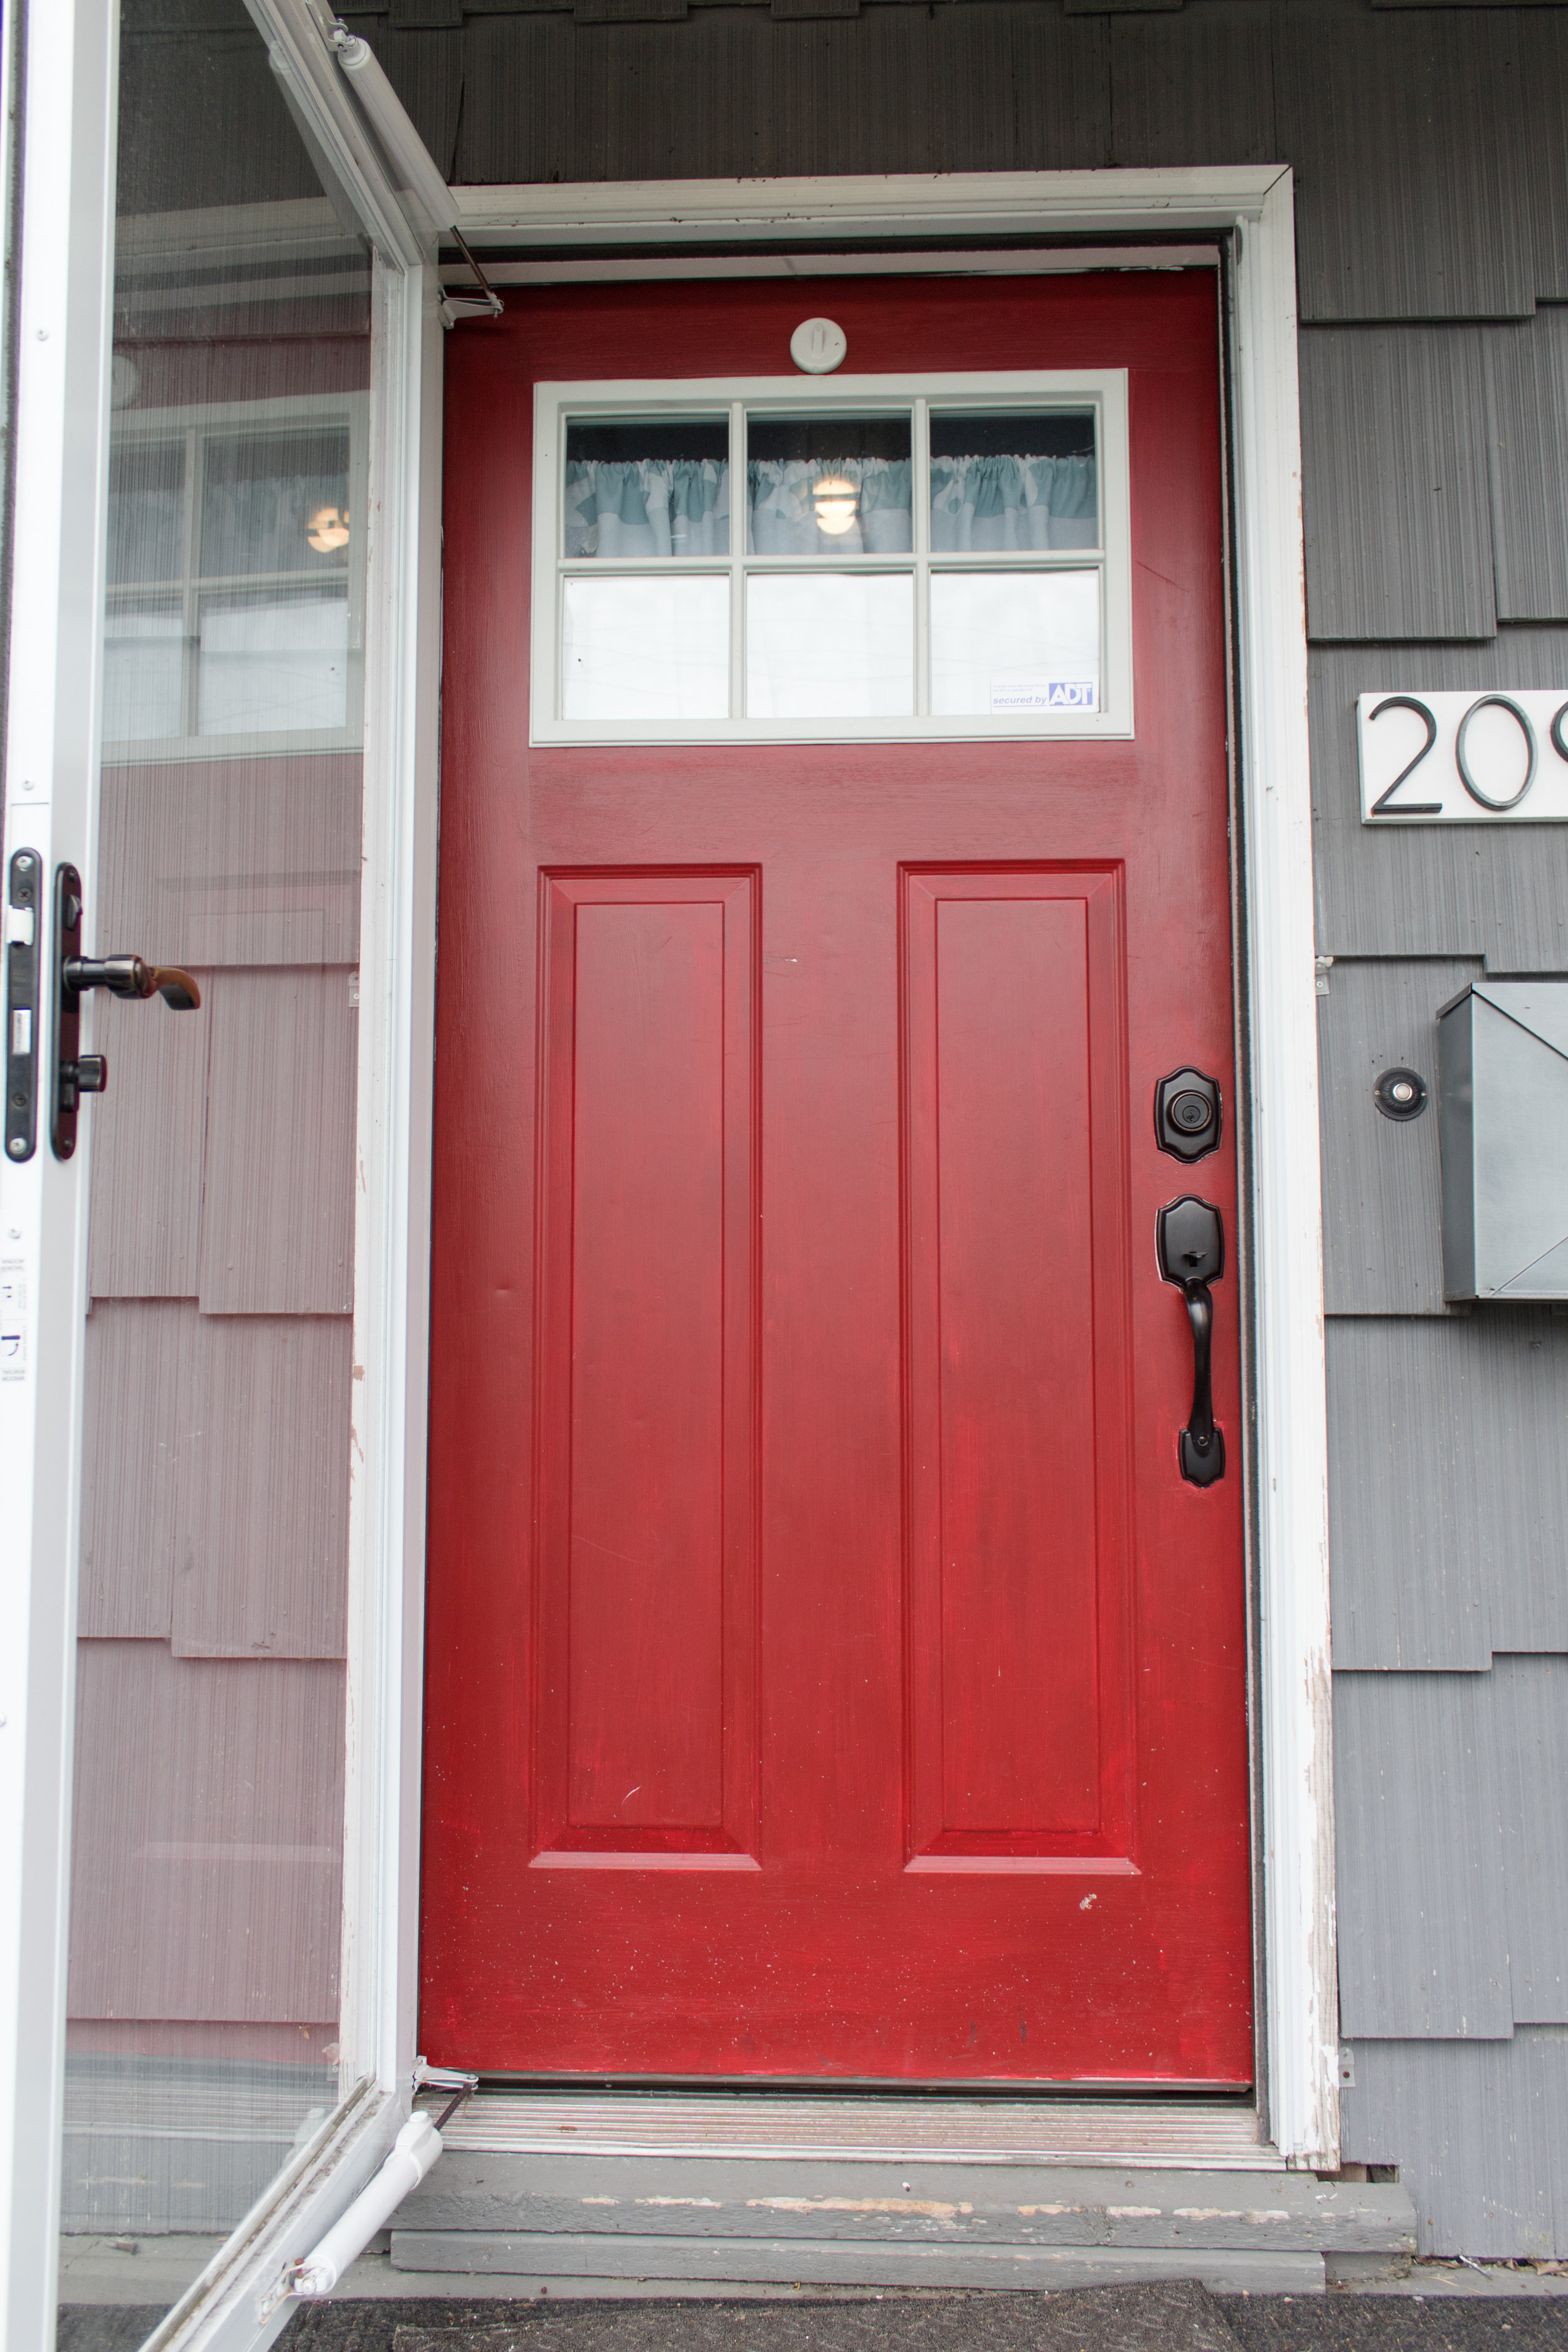
Before we begin, let's take a look at my door before the makeover. It seems like it had been painted around the hardware, but BADLY. All the strokes were in random directions. We actually replaced the door hardware when we bought the house, but the previous ones were covered in paint along the edges. It wasn't a neat job, and the door had a sheer hue to it- you could see every paint stroke and even the white door underneath. It looked like it only got one sad, lonely coat of paint.

On Wednesday’s we paint our door pink!! With the help of FrogTape, I was able to paint my door without having to remove the hardware. It was easy peasy lemon squeezy, and left such crisp clean lines! Head to the blog for all the details so you can g…

Prepping To Paint Your Door

Ok, before you begin painting your door you'll want to prep it. I started by giving it a gentle sanding to get all the dirt and debris off of it. Even with a storm door over it, a lot of stuff got stuck to the door!

On Wednesday’s we paint our door pink!! With the help of FrogTape, I was able to paint my door without having to remove the hardware. It was easy peasy lemon squeezy, and left such crisp clean lines! Head to the blog for all the details so you can g…

Once it was cleaned and sanded, I taped off all my edges with FrogTape. It's the only tape with PaintBlock® Technology, which ensures no paint seeps through. The result is sharp paint lines and a professional-looking paint job. Plus, it removes cleanly from most surfaces for up to 21 days!

On Wednesday’s we paint our door pink!! With the help of FrogTape, I was able to paint my door without having to remove the hardware. It was easy peasy lemon squeezy, and left such crisp clean lines! Head to the blog for all the details so you can g…

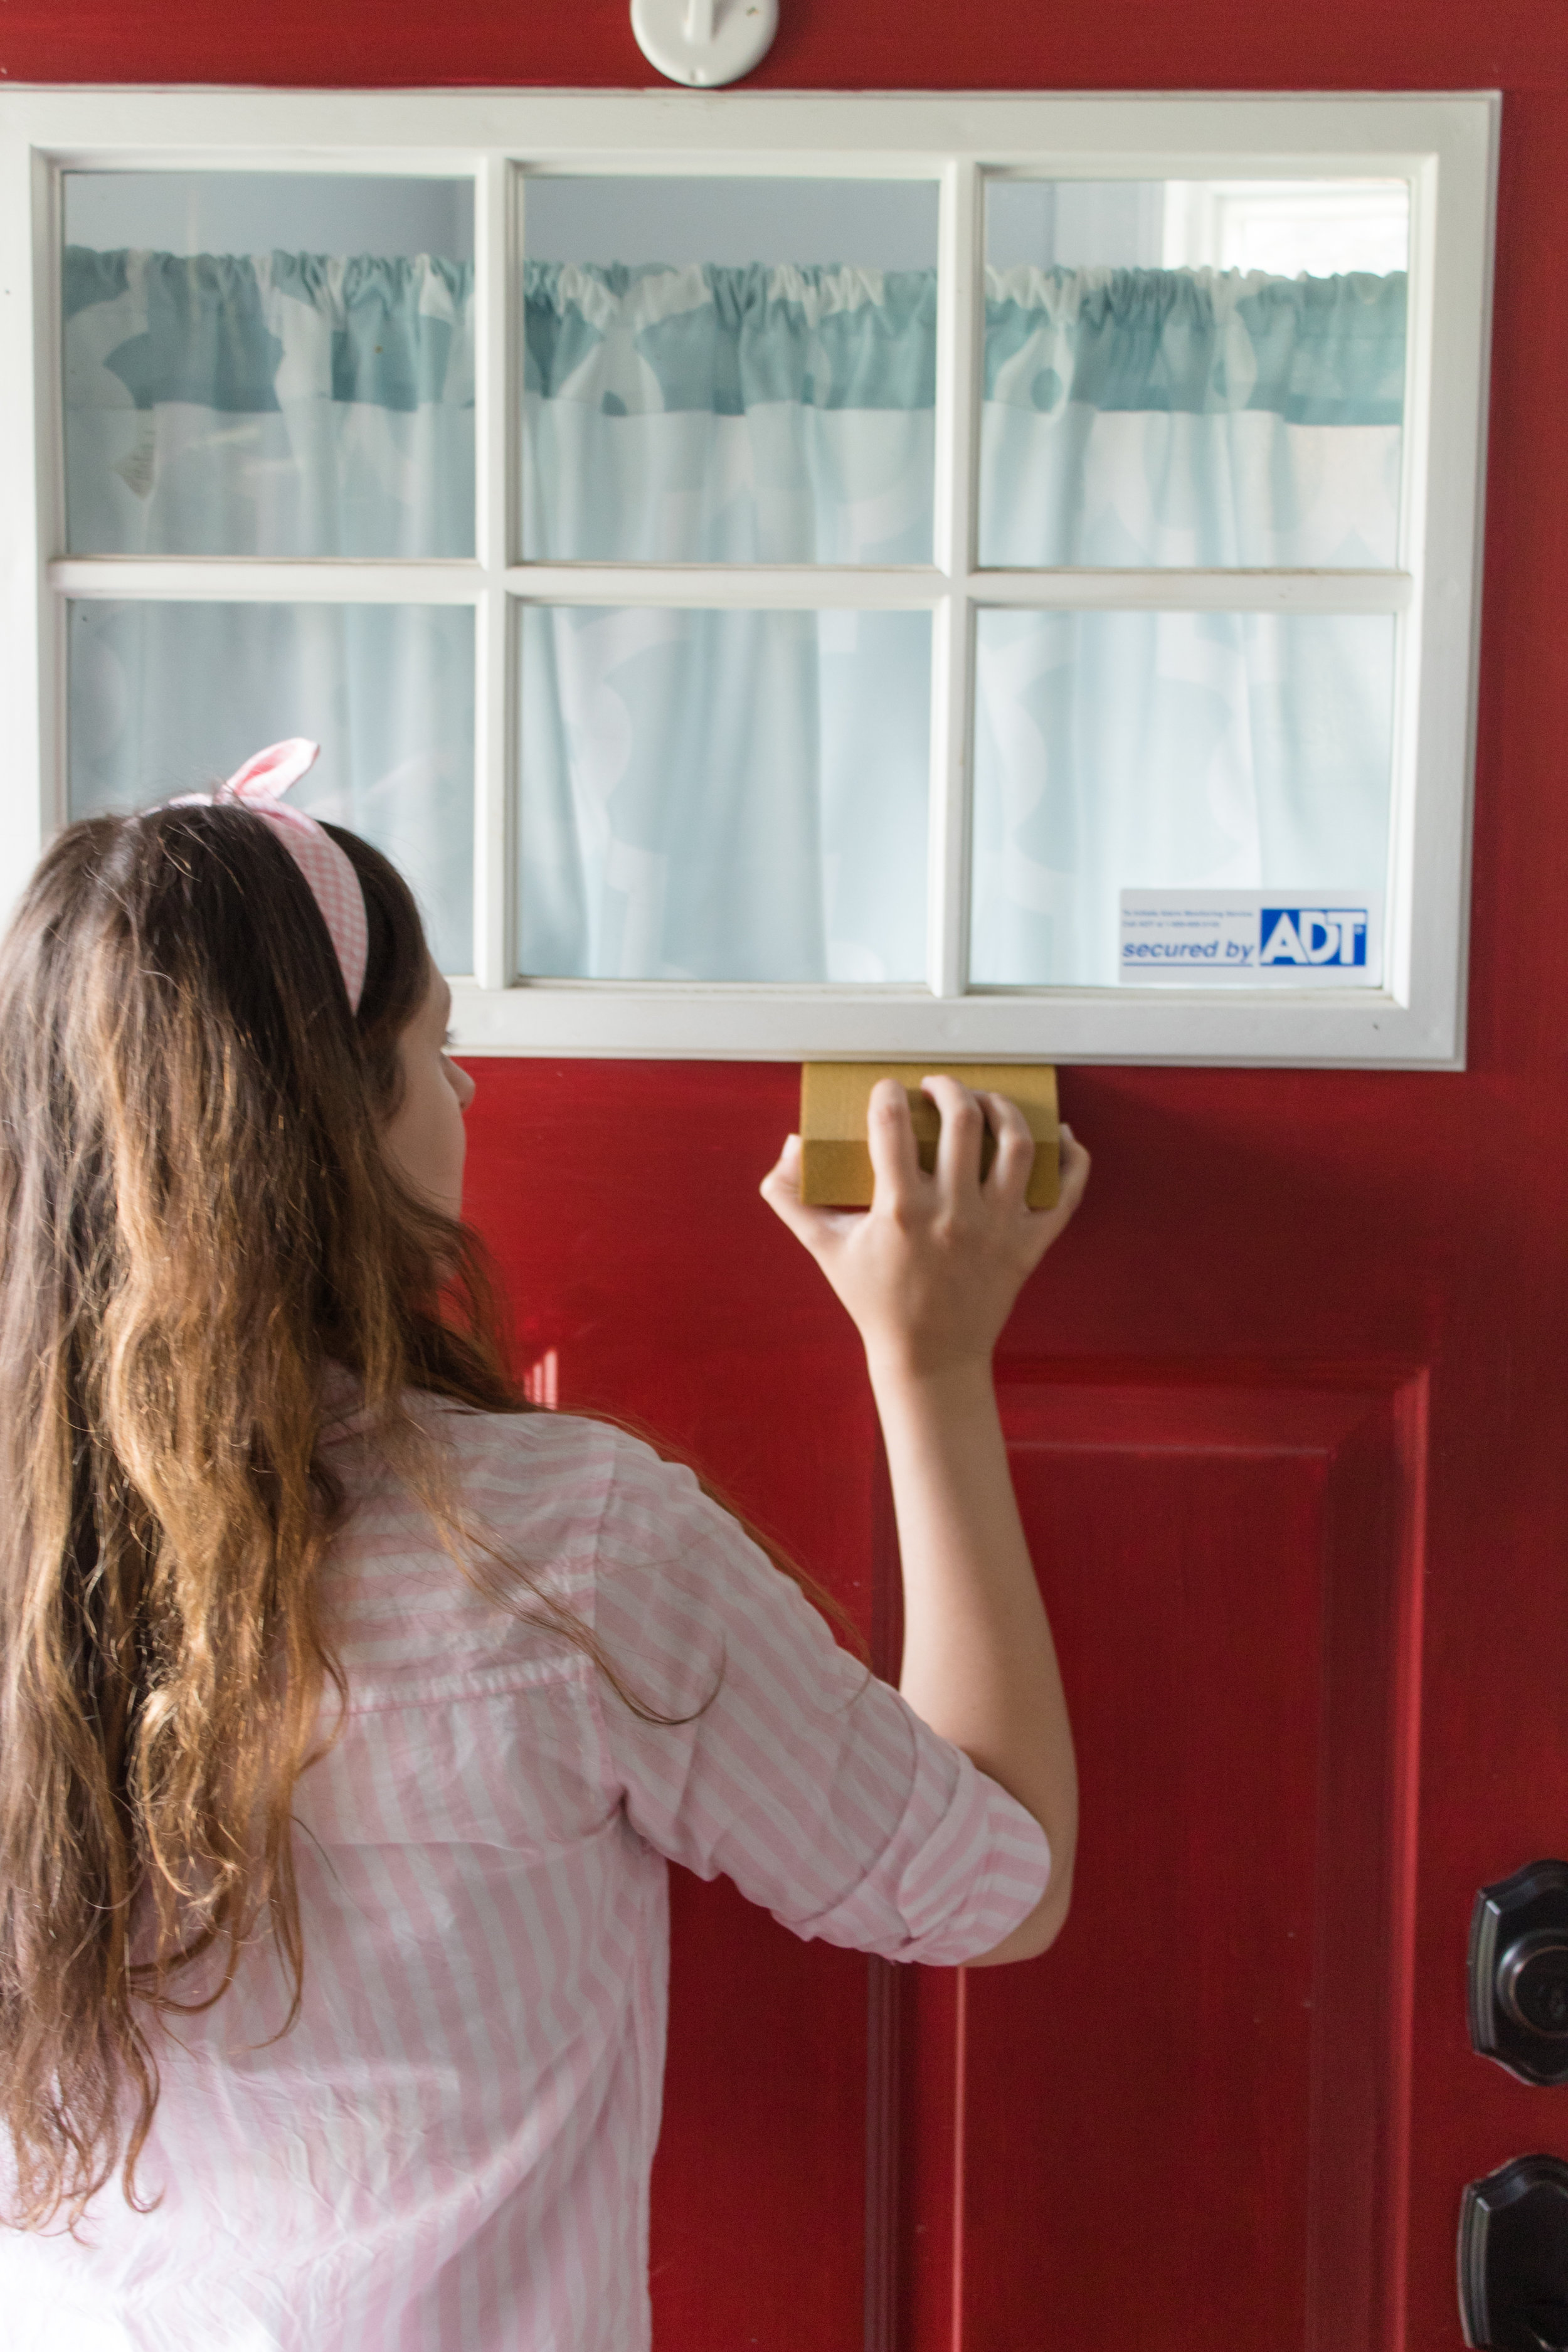
I used the FrogTape to cover all my hardware, plus I made a border to protect the white window. It was really easy to use! Within a few minutes, I was ready to get my paint on. All of this was done under the supervision of my trusty helper, Lexie. I’m not sure how she didn’t get any paint on her, but I guess she’s a real pro.

On Wednesday’s we paint our door pink!! With the help of FrogTape, I was able to paint my door without having to remove the hardware. It was easy peasy lemon squeezy, and left such crisp clean lines! Head to the blog for all the details so you can g…

Painting Your Door

Now that your door is all taped up with FrogTape, it's time to start painting! I began by outlining the panels with paint using a small angled brush. I also used this brush along the edges near the window and hardware to ensure everything got a nice even coat of paint.

On Wednesday’s we paint our door pink!! With the help of FrogTape, I was able to paint my door without having to remove the hardware. It was easy peasy lemon squeezy, and left such crisp clean lines! Head to the blog for all the details so you can g…

After everything was outlined, I used my roller to cover the rest of the surface area in this really fun pink paint! My poor husband said he didn’t care what color I picked, as long as it wasn’t pink. Well…. sorry honey! I promise, I meant to do it a brighter shade of red, but this color (Hint of Cherry by Valspar) stopped me in my tracks and I had to do it. It was calling to me! And, while I was at the paint counter doubting my choice, there was another person there that picked the EXACT SAME COLOR so I think it was fate. A pink door was meant to be.

While I wasn’t sure exactly how my husband would react to this color, I knew using FrogTape was the right decision. I could paint with confidence, because I knew FrogTape's PaintBlock® Technology would ensure no paint would seep under the tape and ruin my hardware.

On Wednesday’s we paint our door pink!! With the help of FrogTape, I was able to paint my door without having to remove the hardware. It was easy peasy lemon squeezy, and left such crisp clean lines! Head to the blog for all the details so you can g…

I slathered on the first coat of paint and started to get excited. In between coats, I put my supplies in a large trash bag with a little bit of water to prevent it from drying it. This meant that I didn’t have to wash them between coats, which was a HUGE timesaver!

On Wednesday’s we paint our door pink!! With the help of FrogTape, I was able to paint my door without having to remove the hardware. It was easy peasy lemon squeezy, and left such crisp clean lines! Head to the blog for all the details so you can g…

Once everything was fully painted, I pulled off the tape for the grand reveal! I have to admit I was a little but nervous, but FragTape did an AMAZING job. All the edges were crisp and beautiful.

On Wednesday’s we paint our door pink!! With the help of FrogTape, I was able to paint my door without having to remove the hardware. It was easy peasy lemon squeezy, and left such crisp clean lines! Head to the blog for all the details so you can g…

It took about 3 coats of paint, but my door is now fresh and ready to go! Every time I look at it, I get so happy. It's the only pink door on the block, and possibly even in the neighborhood! I've gotta give a huge shout-out to FrogTape for helping me get this project off my to do list. It felt amazing, and looks even better! If you’re looking to give your front door a new look, head over to your local hardware store and grab yourself a roll of FrogTape and a quart of paint.

On Wednesday’s we paint our door pink!! With the help of FrogTape, I was able to paint my door without having to remove the hardware. It was easy peasy lemon squeezy, and left such crisp clean lines! Head to the blog for all the details so you can g…

Thanks to FrogTape, I did this project in just one day, and I’m ready to tackle the next one on my to do list! What color would you paint your front door? Let me know in the comments below!

#SparkJoy: My Intro to KonMari

Anyone who knows me or my family knows we are messy. I can't remember a time that we weren't messy, dating back to when I was a small kid. And I don't mean the fake "oh no don't look at my house, it's such a mess!" but there's only 2 socks on the floor and 3 dishes in the sink. I mean the type where an entire overhaul is needed each time people come over. And I have literally (half) joked that part of the reason I like to have events at my house is that it forces me to clean it regularly. It's a lifestyle I'm used to but hate with a great passion. I'm afraid that one day, it'll all become too much and next thing I know, I'll be surrounded by far too many things. This happened in my bedroom at my parent's house, the 1-bedroom apartment John and I shared, and now it was slowly but surely happening in our house. My attic, which is one of the biggest rooms in the house (which I have all to myself for my studio) had become packed, stuffed... HOARDED. It's a word I'm familiar with and fight to my very core. But I had all the makings of a hoarder and I was heading there on local train. Sure it made stops where I could get off, but I was riding it to the end. Like magic, as soon as I got pregnant, I had enough. Call it nesting, call it a miracle, call it whatever you please but it was a long time coming and needed to happen. 

KonMari Basics Web.jpg

I had looked around my house and noticed the clutter for the last time. Finally frustrated to the point of desperation, I purchased The Life Changing Magic of Tidying Up. People were always boasting about it, mainly for closet clean outs, and I always said I'd check it out "someday" but that day never came for me. Cleaning out my closet would be cool, for sure, but I needed a whole house overhaul. I was desperate, frustrated, and honestly a little scared of what my future would hold. I purchased the book after way too much deliberation and probably years of procrastinating, and I set out to read it right away. 

The Life Changing Magic of Tidying Up

The book starts with the author, Marie Kondo, explaining her history with tidying. She had been doing it all her life, with an almost obsessive need to clean. But she always failed. She explained the reasoning for this was that she was doing it all wrong. I think that for a lot of us, a messy home is equivalent to laziness. Things we know we should have done, but we prolonged it. Well, Marie Kondo was telling us that she didn't have this laziness- but she still failed at keeping her home clean. And that's because "tidy a little a day and you'll be tidying forever". I won't get into too many specifics about the book, because honestly it's a short, easy read and I think that she does the very best job of explaining it. But I know that reading her 100% success rate had me hooked from the very beginning. If I did this process and did it RIGHT, I could have a clean home by the end of it too. 

Putting the book into practice

I decided to read the book before attempting to clean any part of my house. Having been a borderline hoarder and shopaholic all my life, I wanted to do this once, the right way. I wanted to change my life. 

I didn’t realize the impact the book had on me (before even cleaning a single thing!!) until I had a stressed-out crying session. I was stressed about a whole bunch of things, and in my husband’s attempt to console me, he had only made it worse. A few tears turned into full-on bawling. And I shouted something like, “you don’t understand! There’s just so much I need to do and I feel the weight of it all on me! I feel like I just can’t get anything done!” And it hit me... I needed to do things in my business, yes, but I also majorly needed to clean my home. And the thought of just how badly I needed to clean my home was weighing on me to the point of exhaustion. I knew this, but it’s like for the first time I actually realized it in a way that could spark change. I had finally had a breakthrough: I’m really freakin tired of being a slob, and living a life overall that I’m unhappy with. This was my start. 

As I laid in bed that night, I began to think of all the other times I felt this feeling without understanding it. I thought of all those times I was about to do something (with excitement, I might add!) before realizing I hadn’t finished something else. I couldn’t even go up and work in my attic studio, and for a good reason- all my unfinished projects, all my abandoned hobbies, all my clutter, was literally... physically... preventing me from advancing. And I thought to myself, what sparks less joy than going up to make some magic while surrounded by your failures. Of course my studio didn’t bring out the best in me. Instead of showing myself the best, all my accomplishments and the things I loved, I was crippling myself with clutter, and doubt, and neglect. These were not the feelings I wanted to invoke. Not in my studio, not in my home, and surely not in my life. I had to make changes. And I had to do it soon. 

Slow Progress

I'm now about 3 months into the KonMari method and I have to say I fell off the wagon a little bit. I know that procrastination is my biggest weakness, but I had somehow managed to procrastinate this process even further. It's funny, because you often don't notice the passage of time until you look back and realize just how much has gone by. Just like clutter. You don't realize just how much there is until you literally can't function with it anymore. I've been meaning to write this blog post since April and I'm just now getting to it. I am tired of sitting idly by, doing things that don't serve me. I am going to be proactive and set goals for myself and achieve them. And I hope that you guys can join me in doing so!

Join Me! Your Homework

If you want to join me on this insane process of cleaning my house, I urge you to buy The Life Changing Magic of Tidying Up. I only fully used the KonMari method in one room (my closet) but I gotta say that for the past 3 months, it worked. And for those of you thinking that you have a whole family or a partner that makes a mess and needs to contribute, she covers this in her book as well. I'm going to pop in here more often with before and afters, advice on my journey to a clean home, and hopefully an incredible home reveal by the end of the year. With Baby Sunshine coming at the end of September, this is no time to push this off any longer. And for once in my life, cleaning sounds WAY better than procrastinating. And that feels amazing.

So, tell me about your struggles. Have you tried cleaning before but failed? Do you truly hate cleaning? Are you messy, a hoarder, or just really great at hiding your mess? Let me know in the comments below!
Wire Cactus Potted Plant

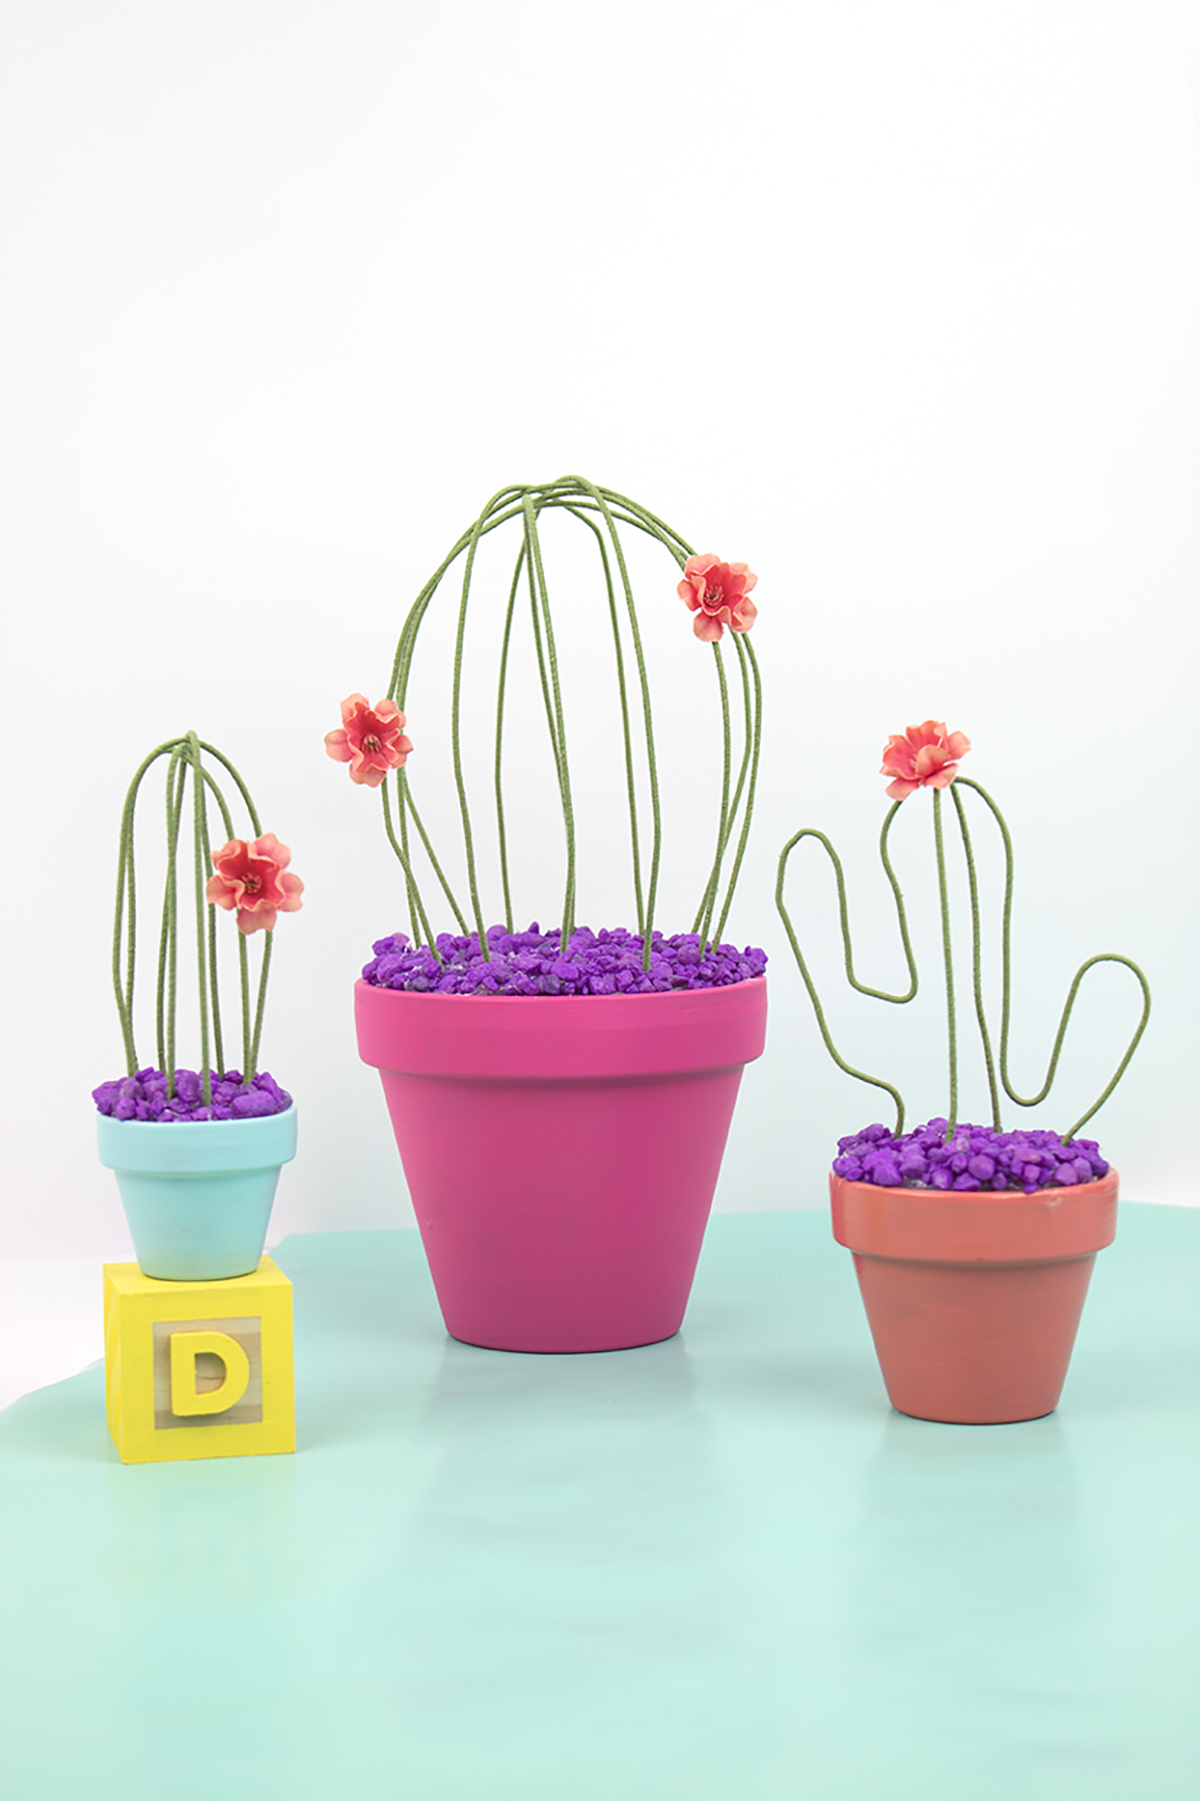
Although I am creating life within me, I am absolutely terrible at keeping plants alive. I even got succulents because I thought they were supposed to be easy to care for. Um... nope. They all dried up and died! In an effort to save the plants, I’ve decided I’d better stick to fake plants from now on. So, I decided to make these little beauties! They’re actually really simple to make, so its pretty funny that I started working on them about a year ago (!!!) and never got around to finishing them. Since one of my 29 goals for this year is to finish what I started, it seems like an appropriate task to cross of my to do list! After all, it’s been on there for so long. So grab your supplies, and maybe a friend, and let’s get crafting! 

Do you somehow kill all your plants like I do? In an effort to save the plants, I’ve decided I’d better stick to fake plants from now on. So, I decided to make these little beauties! This wire cactus is perfect for your home. Click for the full…

You will need:

Wire (similar here)
Styrofoam Cones (similar here)
Acrylic paint (similar here)
Ceramic pots (from the local craft store)
Aquarium rocks (here)
Small flowers (similar here)
Glue gun (similar here)
Wire cutters (here)
Long knife or small saw (similar here)

Directions:

Do you somehow kill all your plants like I do? In an effort to save the plants, I’ve decided I’d better stick to fake plants from now on. So, I decided to make these little beauties! This wire cactus is perfect for your home. Click for the full…
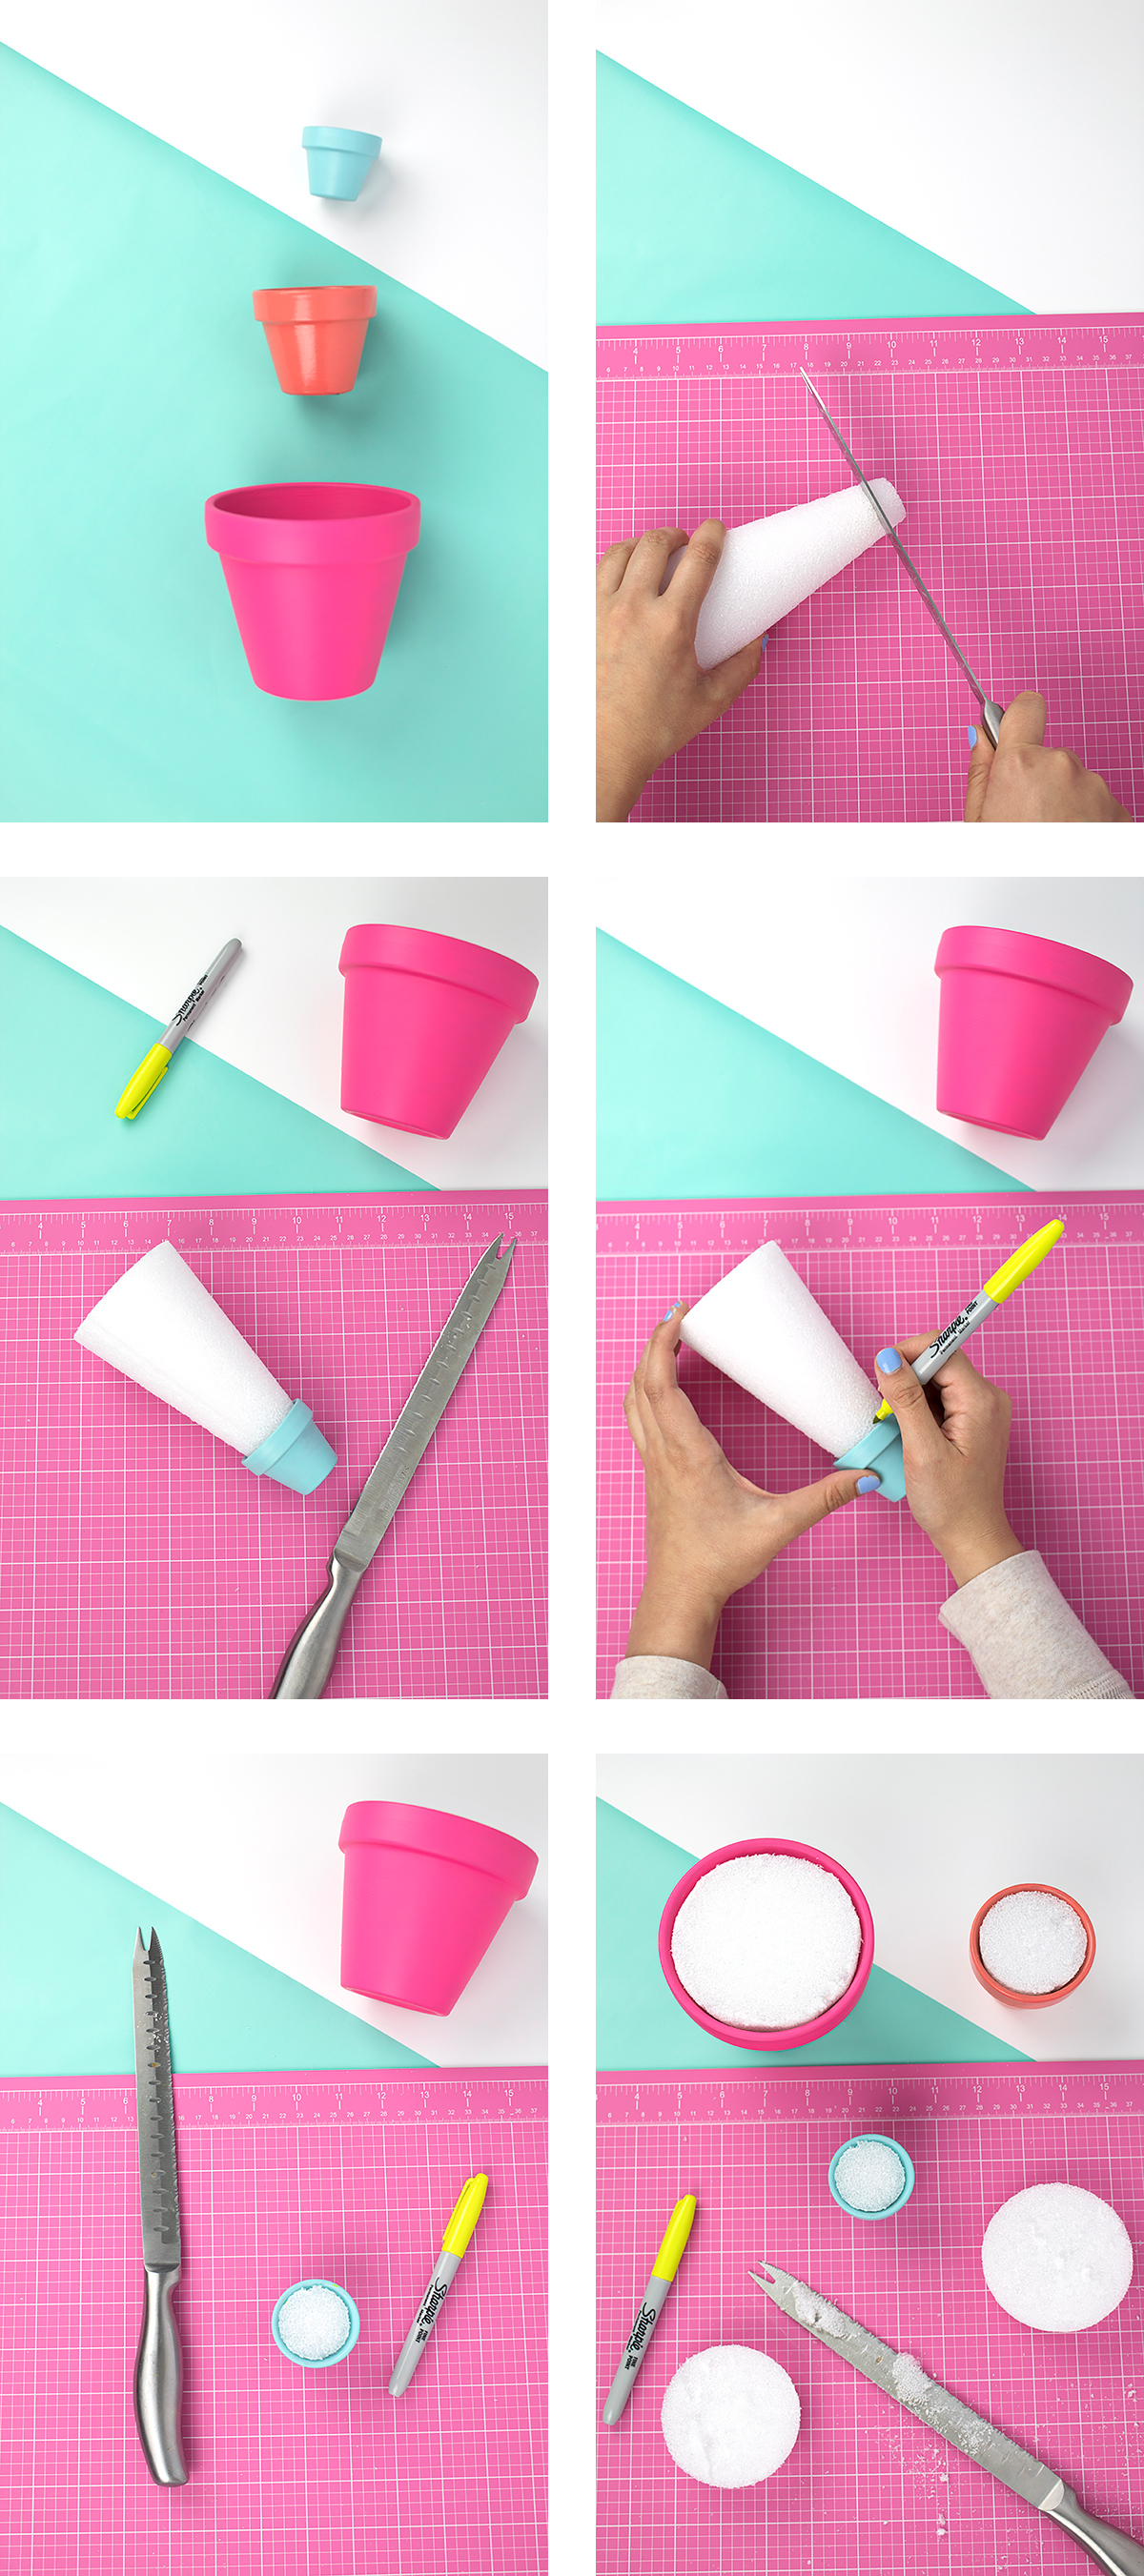
  1. Paint your ceramic pots in your choice of color and let dry. 
  2. Take your styrofoam cone and place it inside your pot, starting with the smallest one. Mark where you need to cut. 
  3. Using your knife or saw and a cutting mat, carefully cut the styrofoam cone in a straight line. Test that it fits, and adjust if necessary. Repeat for all 3 pots.

Directions: Small Cactus Plant

Do you somehow kill all your plants like I do? In an effort to save the plants, I’ve decided I’d better stick to fake plants from now on. So, I decided to make these little beauties! This wire cactus is perfect for your home. Click for the full…
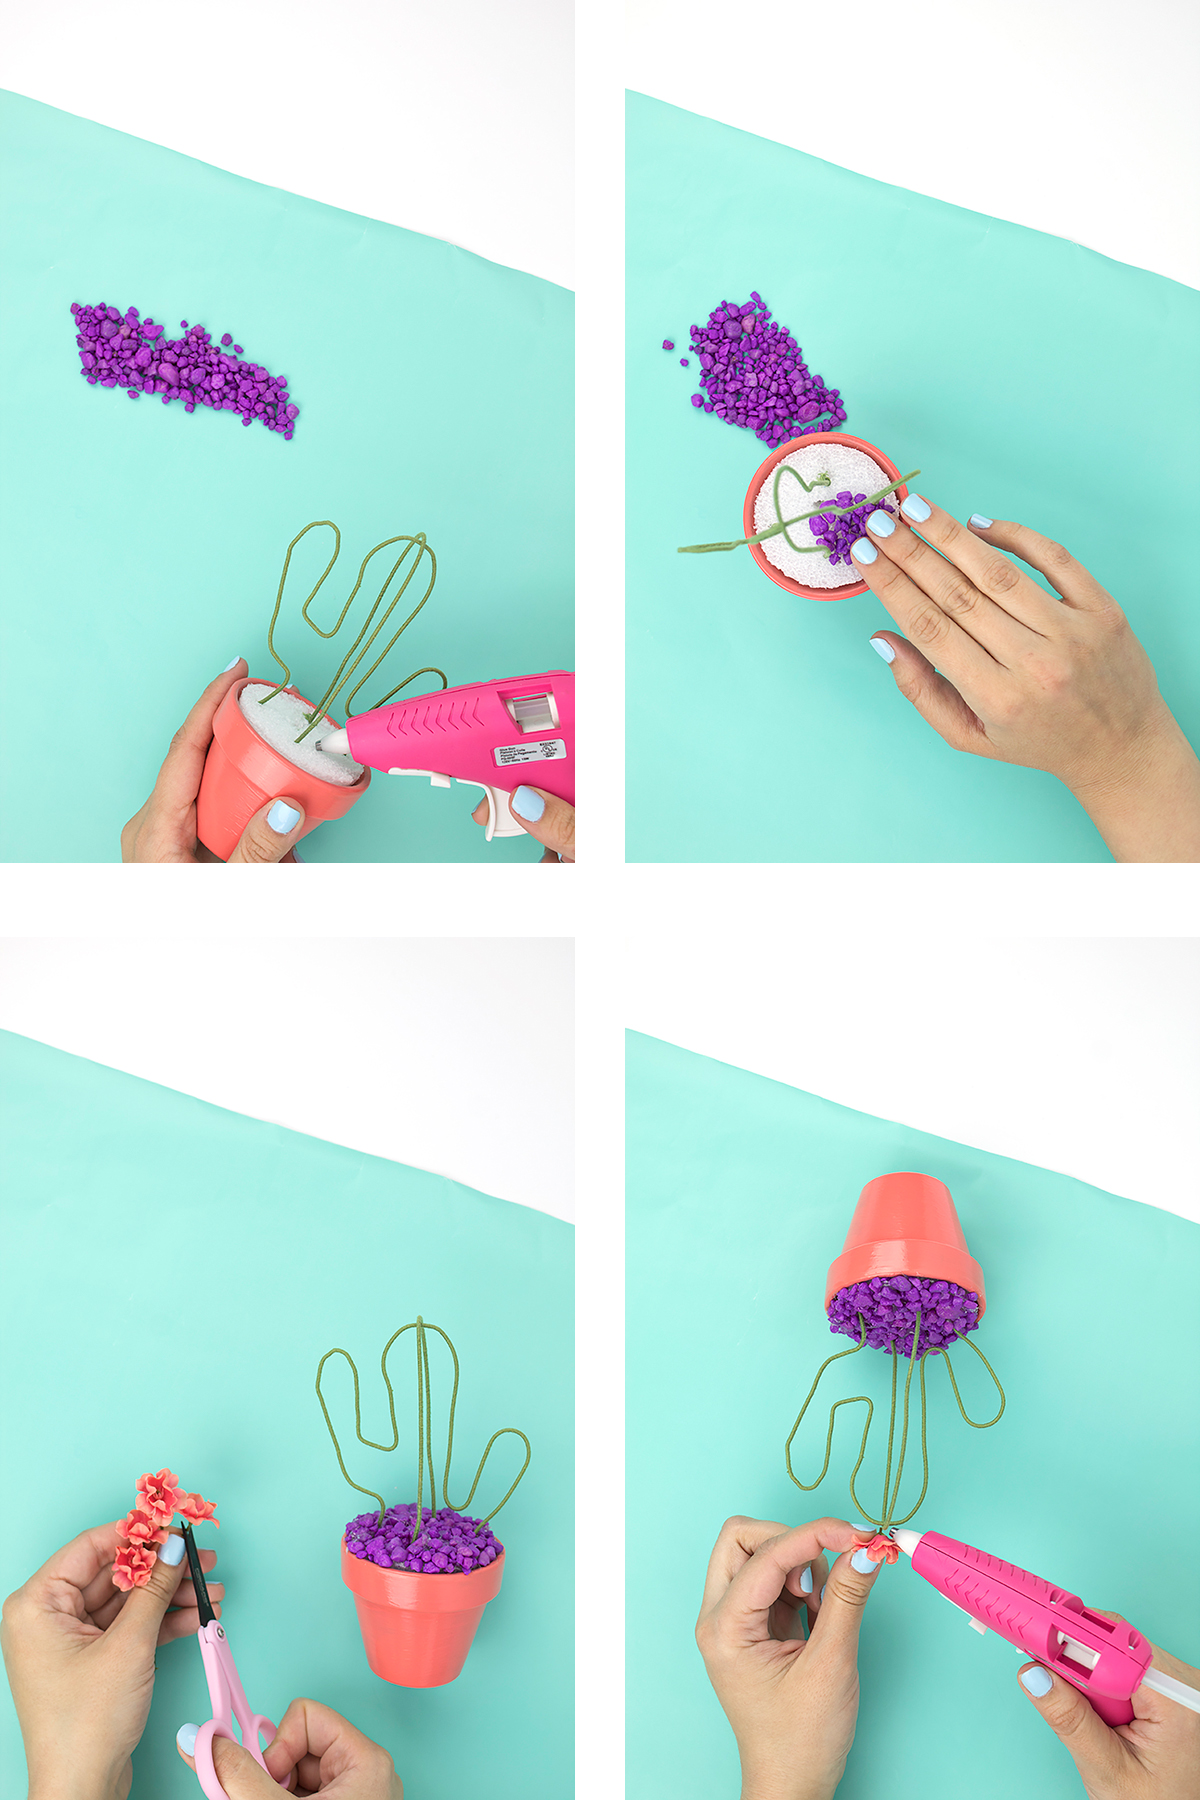
  1. Take your wire and fold it in half. Cut the wire. Repeat so you have 4 parts. 
  2. Fold your half wire loosely into a U shape and place into the styrofoam. Take another piece and do the same, crossing over the first piece of wire. 
  3. Repeat for the remaining pieces. Adjust if necessary. 

Directions: Medium Cactus Plant

Do you somehow kill all your plants like I do? In an effort to save the plants, I’ve decided I’d better stick to fake plants from now on. So, I decided to make these little beauties! This wire cactus is perfect for your home. Click for the full…
  1. Take a long piece of wire and fold it in half. 
  2. Turn the wire so the curve is at the top. Bend the wire up then down to create cactus arms. 
  3. Take a new piece of wire. Fold it in half, and measure so that it covers the arm cactus. Trim. 
  4. Place the arm cactus into the styrofoam, then add the loop you made to fit. 

Directions: Adding the Rocks

Do you somehow kill all your plants like I do? In an effort to save the plants, I’ve decided I’d better stick to fake plants from now on. So, I decided to make these little beauties! This wire cactus is perfect for your home. Click for the full…

Once you are happy with the placement of your wires, you’re ready to add the rocks! 

  1. Using your glue gun, add a small patch of hot glue in the center of your cactus. 
  2. Cover your glue with a hefty handful of rocks. Press them into the glue gently. 
  3. Give it a moment, then tilt the plant to get rid of any excess rocks that are not glued on. Repeat until your styrofoam is covered. 
  4. Note: for the large cactus, I had to remove one side to create a hole big enough for my hand. Just make sure you remember to put it back before you cover the whole thing up :)
  5. Add a few small flowers on your wire to dress up your cactus. 
Do you somehow kill all your plants like I do? In an effort to save the plants, I’ve decided I’d better stick to fake plants from now on. So, I decided to make these little beauties! This wire cactus is perfect for your home. Click for the full…

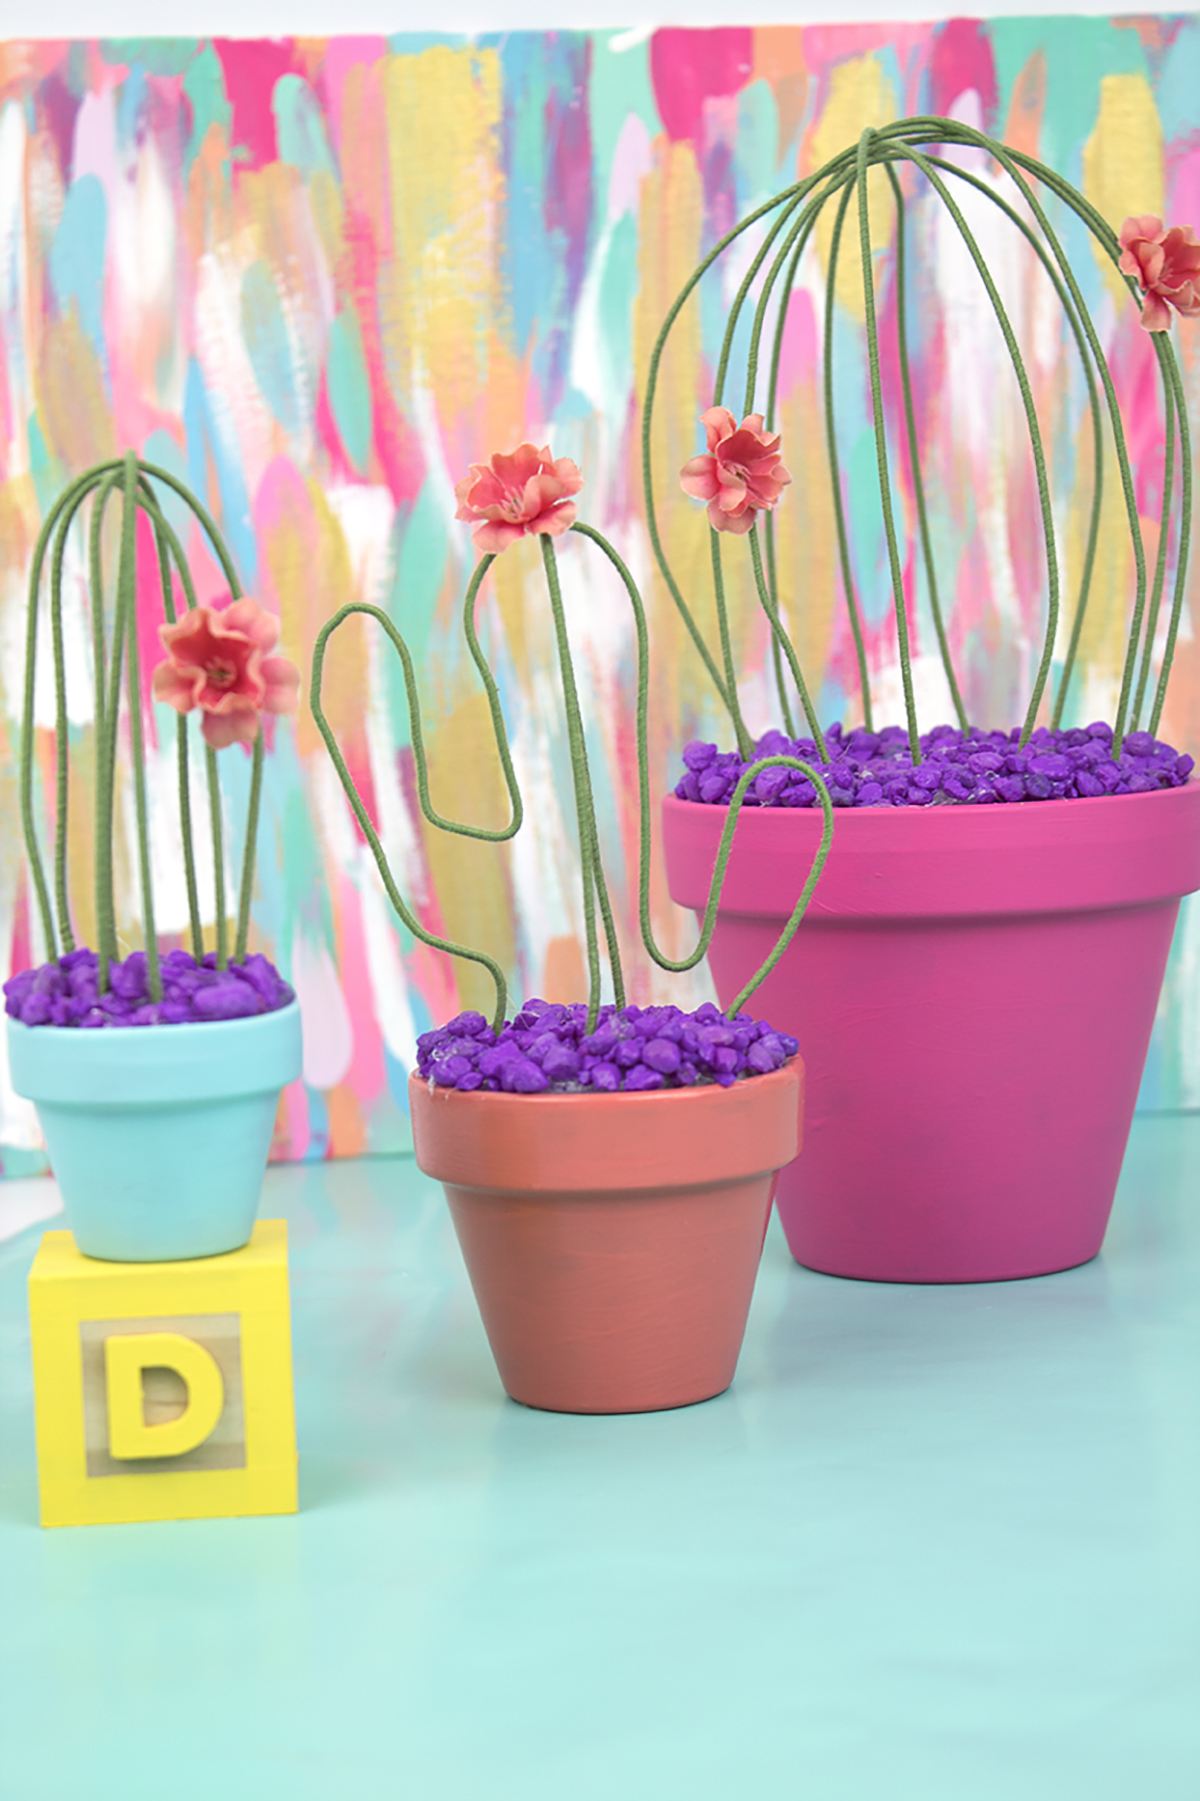
Artwork can be found here and blocks DIY can be found here.

Do you somehow kill all your plants like I do? In an effort to save the plants, I’ve decided I’d better stick to fake plants from now on. So, I decided to make these little beauties! This wire cactus is perfect for your home. Click for the full…

Love it! Here are some photos of the cacti in action at the Cinco de Mama party.

Do you somehow kill all your plants like I do? In an effort to save the plants, I’ve decided I’d better stick to fake plants from now on. So, I decided to make these little beauties! This wire cactus is perfect for your home. Click for the full…

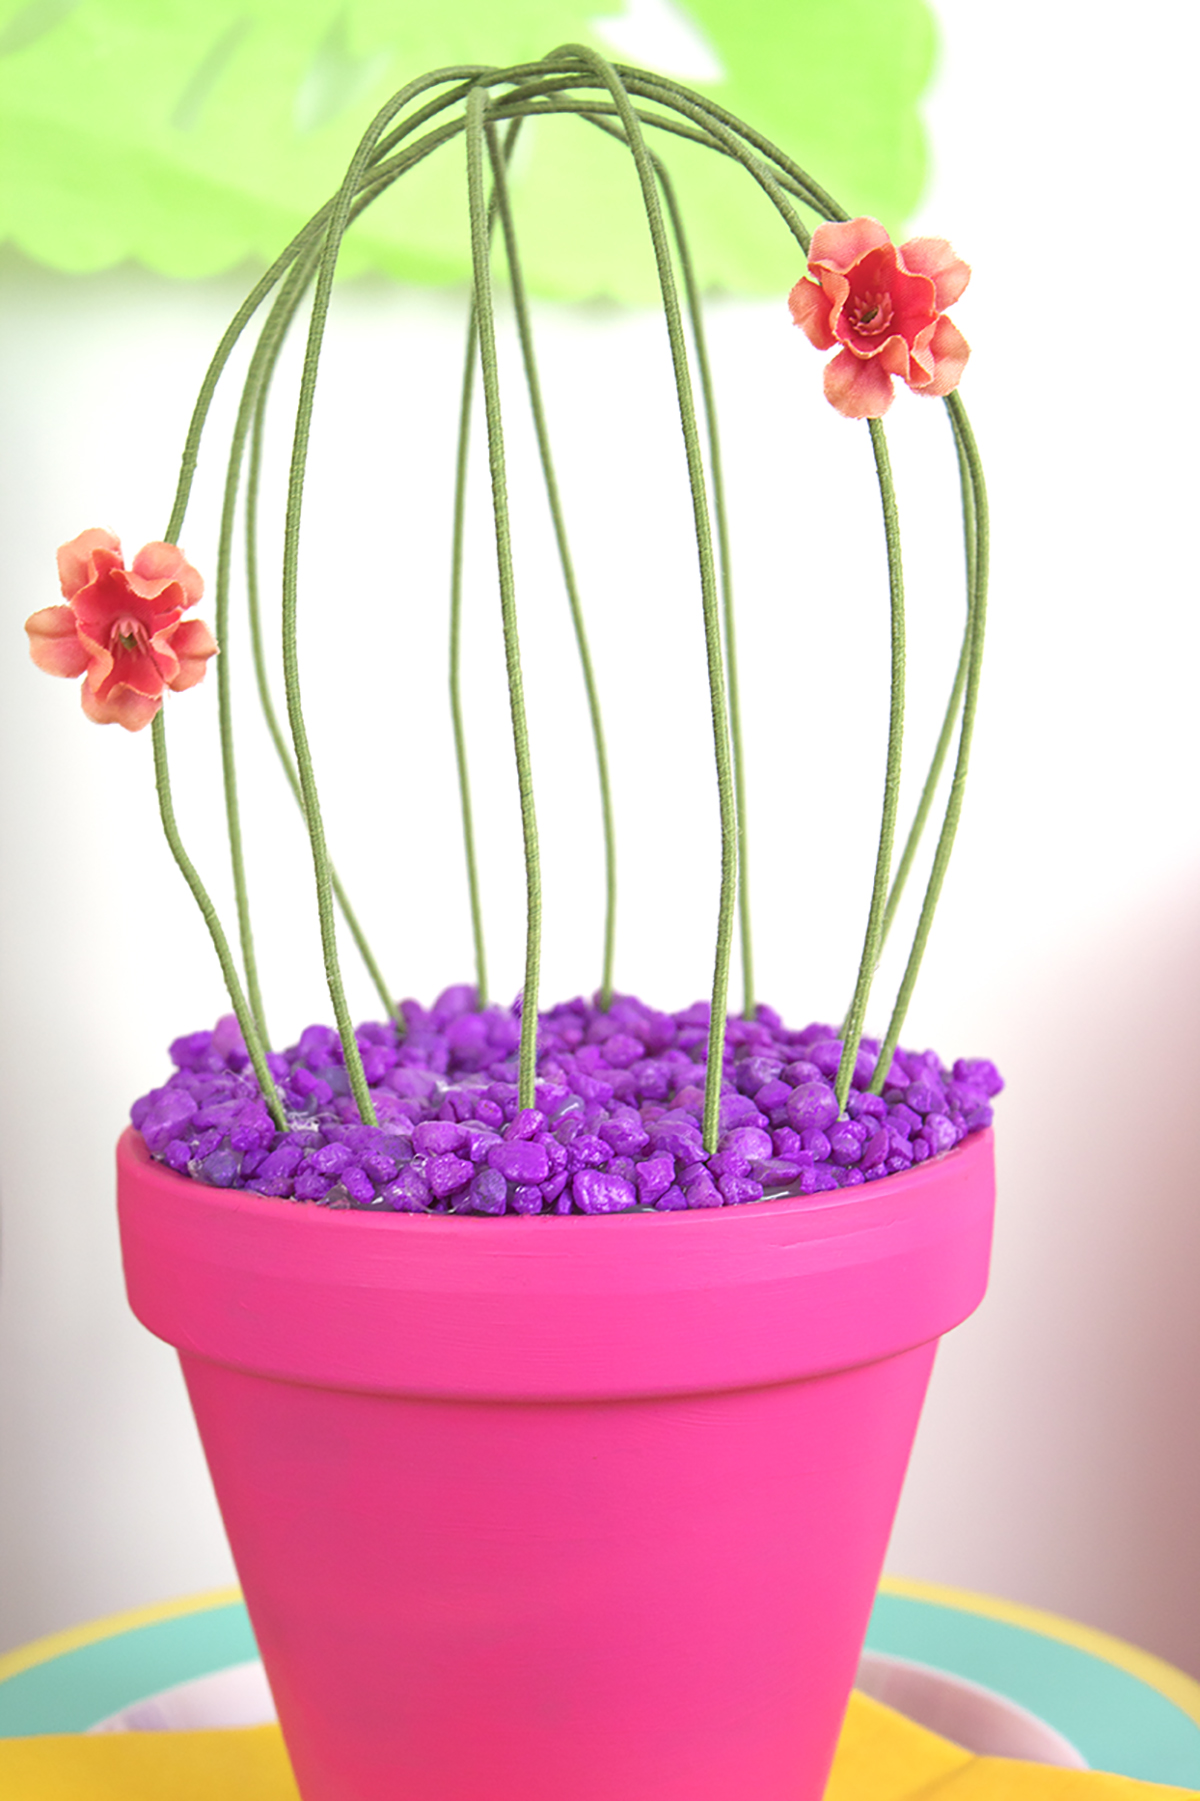
This plant is perfect for those of us who don't have a green thumb. You can make them as big or as small as you'd like, in any color you want. You could probably even use pipe cleaners if you wanted to! 

So, what do you think of this wire cactus? Perfect for your home, or do you prefer real plants? Let me know in the comments below!

Happy Home: Colorful Bar Decor

Earlier this week, I showed you how to make easy and affordable book art. Today, I wanted to show you how I styled my bar! We've had this piece of furniture since we lived at our small apartment, so it held all our drinking glasses and acted as an entry table. Now that we have a larger home, it's only the bar. It's been a bit neglected, so I wanted to spruce it up after I added our artwork. 

*This post contains affiliate links

Add a pop of color to your bar decor! Click to see how I styled mine for everyday use.

We bought our bar at Home Goods, but I found similar ones herehere and here. I wanted to set up my bar so that it would feature all my favorite items, while still being really colorful and simple to use. You don't really want to cover it in junk that needs to be removed every time you want to make a drink, right? 

Add a pop of color to your bar decor! Click to see how I styled mine for everyday use.

I started by using my zebra tray for a drink station. I added some cute cactus glasses and my adorable confetti shaker. I love paper straws, since they are more colorful and better for the environment. I added some of my faves for easy access, and stored them in a tall shot glass/champagne flute. I put the cups on my cute glitter coasters and added painted animal and disco ball drink stirrers. I also featured my adorable Life is the Bubbles champagne flute that's handmade and oh so cute!

Add a pop of color to your bar decor! Click to see how I styled mine for everyday use.

Since there was a random empty spot in the middle, I needed something with height that didn't block the light switch. I decided to add some fun and colorful books. I don't really read these books too often (if at all) so I thought they would look nice featured on the bar instead of stuffed on my bookshelf for a change. I also added my painted sketch book that I use a lot to sketch blog post ideas, home decor ideas, etc. It added some color and pizzazz to the whole thing.

Add a pop of color to your bar decor! Click to see how I styled mine for everyday use.

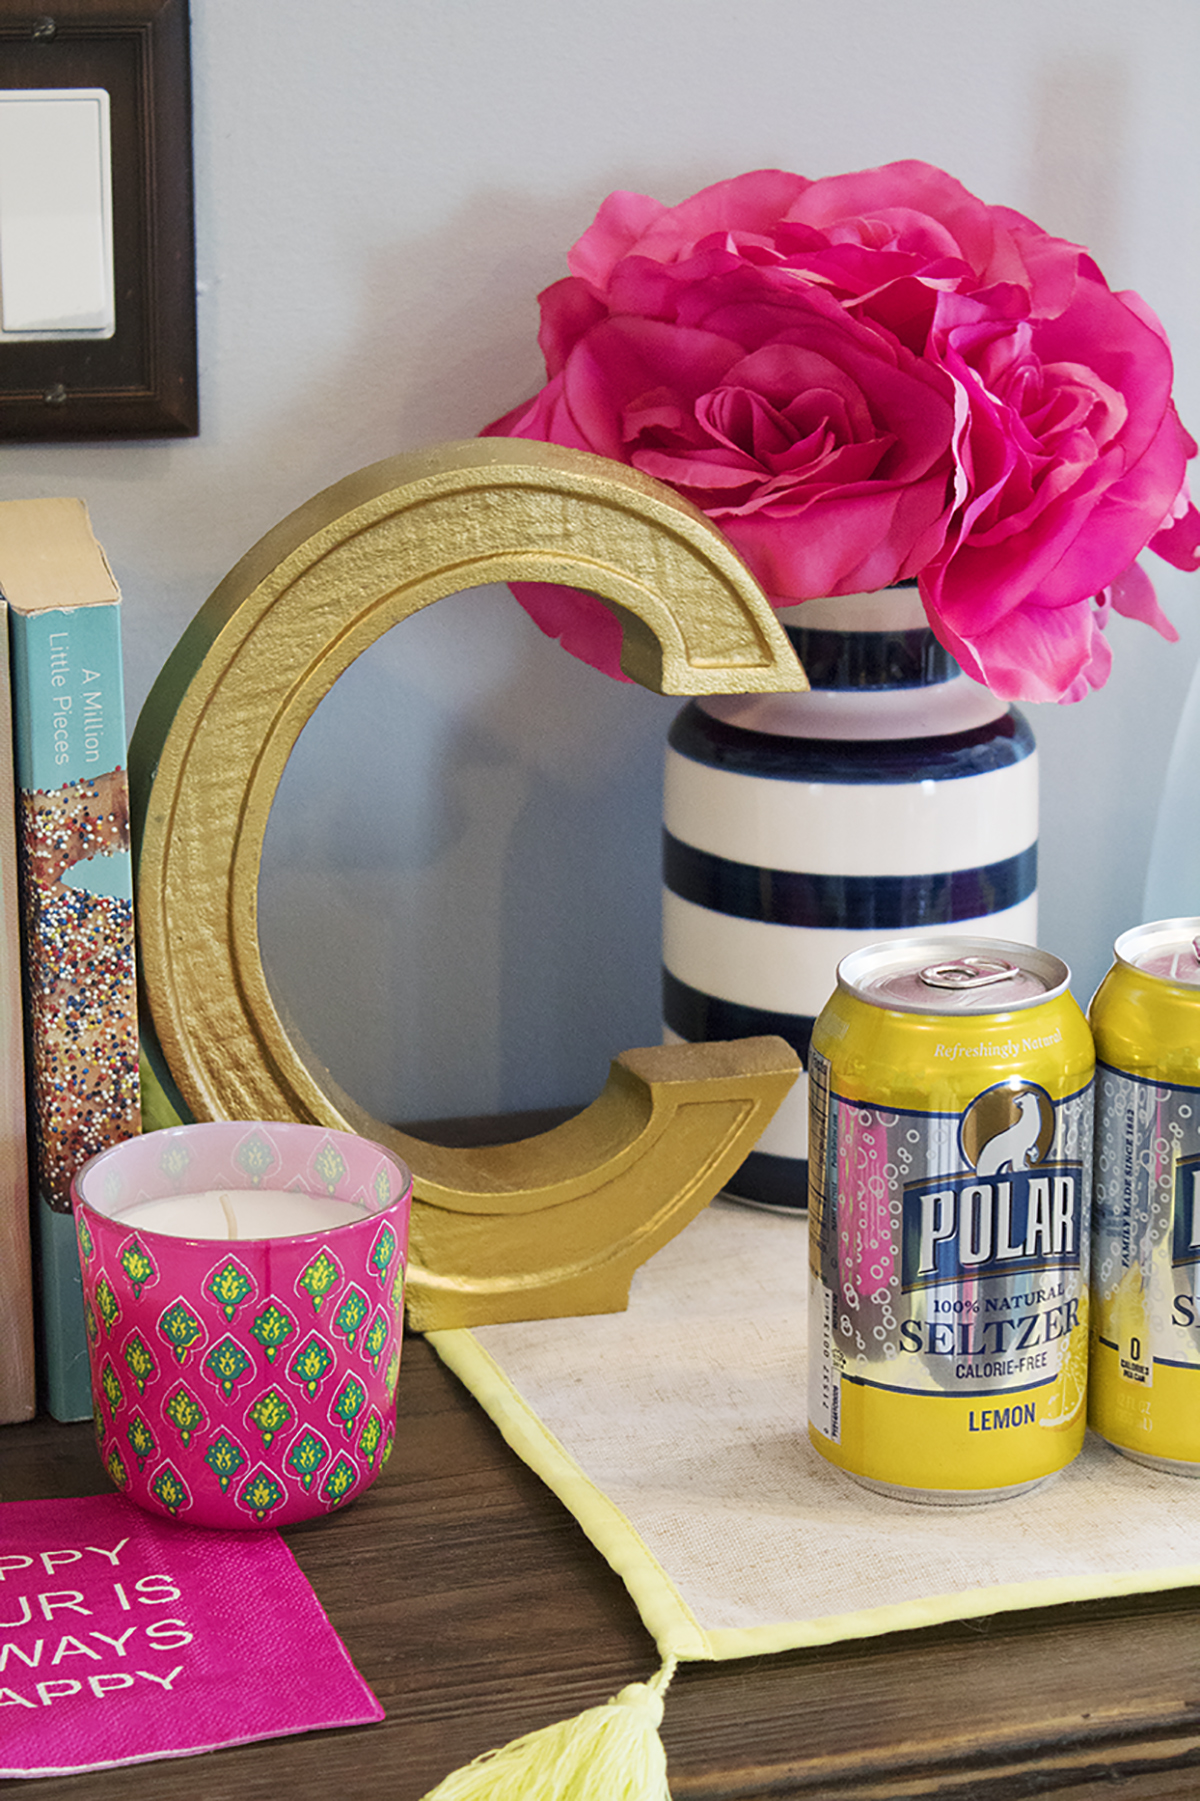
In the corner, I featured some of my favorite liquors (or are they liqueurs?) and my favorite drinking glass, a pink ombre wine glass (similar). I had two but one sadly broke, so it's extra special to me now haha. Some Polar seltzers as mixers help guests to serve themselves, while fake flowers add some elegance without any upkeep.

Add a pop of color to your bar decor! Click to see how I styled mine for everyday use.

I placed these items on an extra placemat I had from my dining table, and a C (for Cardona) statue thingy that I usually put on my entry table. I thought it looked really elegant amongst all the colorful bar items. For a finishing touch, I added my pineapple garland to add a bit of whimsy to the space.

Add a pop of color to your bar decor! Click to see how I styled mine for everyday use.

To fill in the gaps, I gathered some random decor items from my home. I had these fake potted plants from an Easter DIY so I added them in for some color. I love these candles that I got from Ikea so I added those as well. Some appropriately themed napkins added a finishing touch and an extra pop of color.

Add a pop of color to your bar decor! Click to see how I styled mine for everyday use.

If you want to have a bar in your home for parties but don't have room for a permanent piece of furniture, I highly recommend this foldable bar cart. It's really compact, sturdy and it works indoor and out! It's really versatile and I love mine. It's also a great add-on for bigger parties.

Do you have bar cart at home? How do you style it? Let me know in the comments below!

DIY Affordable Book Art

As I mentioned in my last post, I've got a serious lack of artwork in my home! I wanted to find some cute and colorful cocktail-related images for above my bar, but everything was either cheesy or expensive. Also, the space is a weird size- there's a light fixture above and a light switch below, so I only had about 2 feet in between for art. I had a book of cocktails that I rarely used, which had some GORGEOUS photos inside. That's when it hit me- why hide the images in the book, when I could display them proudly on the wall?! I went to Michael's to pick up some cute and simple white frames with a mat so the images would take up enough space while also "popping" against the frame. I'm sooo happy with the result that I decided to show you guys exactly how I did it.

Got a spot that needs some artwork? Why not save some money and use some artwork from your books?! It's affordable and easy as can be. Click for the full how-to.

The best part is that you can use any type of book or magazine that you have. My suggestions? HGTV books and magazines for cool and colorful homes, Cooking Magazines or Recipe Books with tasty recipes for the kitchen, and Artwork Books and Magazines for the rest of the home. Even National Geographic would be great with its artistic animal photos!

*This post contains affiliate links

You will need: 

Frame (from Michaels, similar here)
Books (here)
 

Directions:

Got a spot that needs some artwork? Why not save some money and use some artwork from your books?! It's affordable and easy as can be. Click for the full how-to.
  1. Flip through your book or magazine to find your favorite images. Tear them out as close to the spine as you can.
  2. Remove the back of your frame and take out the placeholder image and the mat.
  3. My mat was double layered white and gray, so I carefully pulled off the gray one from underneath to leave only the white one. It worked perfectly!
  4. Position your artwork within the mat, and tape in place if needed.
  5. Place the mat and artwork into the frame, and close up the back. Make sure there is no dust or hairs on the inside of the glass before you do!
Got a spot that needs some artwork? Why not save some money and use some artwork from your books?! It's affordable and easy as can be. Click for the full how-to.

I mean... how cute does this artwork look?! This is such an affordable way to add some artwork to your home, especially if you have gorgeous books that you occasionally look at but don't use. This way, everyone can see the beauty within- right there on the walls! I also styled my bar with some really cute, colorful stuff. That blog post is coming later this week, so stay tuned!

Are you planning to create your own book art for your home? Let me know what you plan to use in the comments below!