DIY Pineapple Summer Shoes

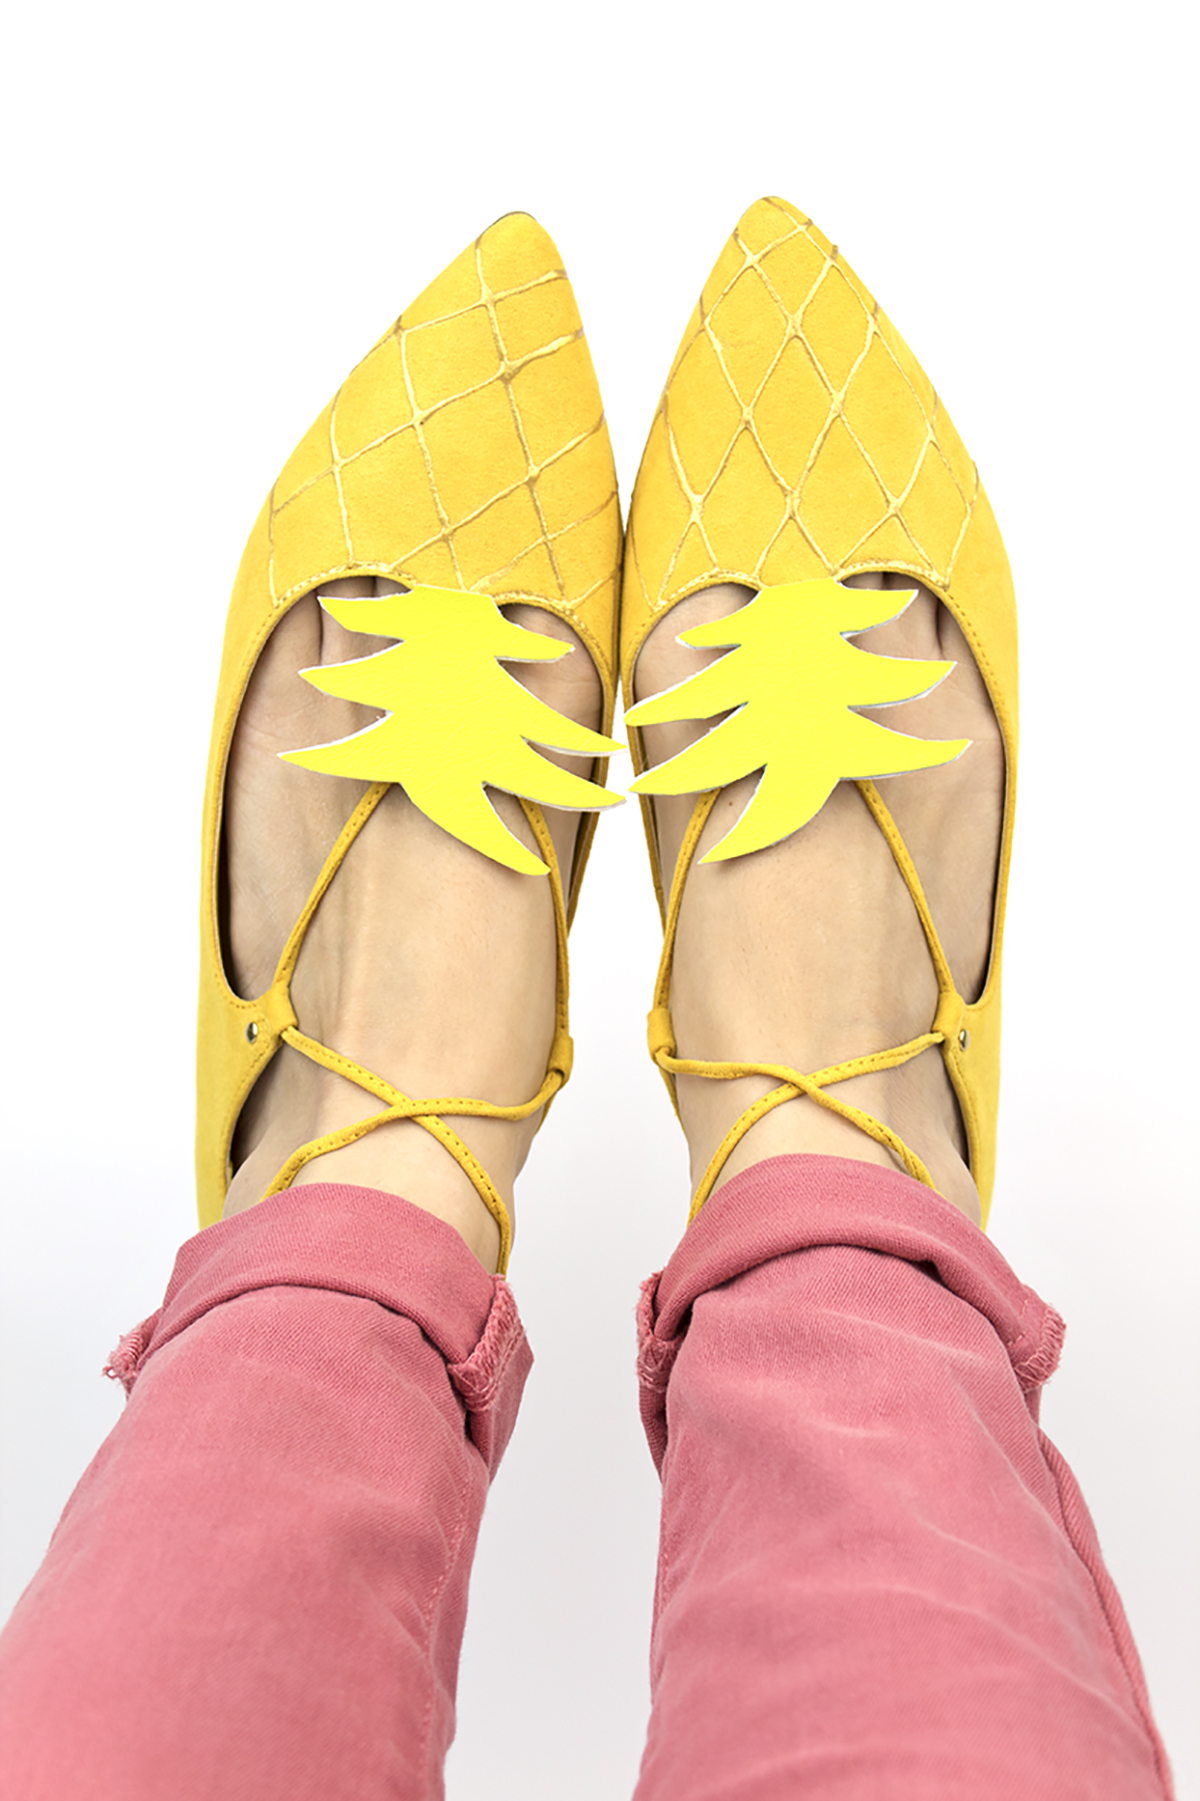
Happy Summer, everyone! I'm not sure what the weather has been like where you live, but here in NYC we've had muggy, spring-like weather for most of May and June. It's finally starting to get warm and sunny and summer-like! While warm weather and beach days are clearly the best part about summer (especially after a long NYC winter!) my other FAVORITE part is getting to switch up my wardrobe! I love adding in some of my summer staples, and kicking off my winter boots/rain boots and popping on some summer shoes, like flats and sandals. When it comes to summer shoes, I think the quirkier, the better. That's why I am head over heels in love with these pineapple shoes I made! They're the cutest and possibly most fun shoes I own (and I currently own a pair of sneakers covered in Barbie shoes!) I seriously cannot wait to wear them out and about. They're actually really easy to DIY yourself with a few craft supplies!

When it comes to summer shoes, I think the quirkier, the better. That's why I am head over heels in love with these pineapple shoes! Click for the DIY. #pineapple #pineapplediy #summercrafts

You will need:

Yellow Fabric Shoes (here or similar here)
Green Vinyl Fabric (I got mine from Joann Fabric)
Tailor's Chalk (here)
Gold 3D Fabric Paint (here)
Stiff Adhesive Felt (here)
Glue Gun
Scissors
Ruler

How to:

When it comes to summer shoes, I think the quirkier, the better. That's why I am head over heels in love with these pineapple shoes! Click for the DIY.

1. Using your tailor's chalk and ruler, create a grid pattern on your shoes. I used the top center of my shoe as the main point. 

When it comes to summer shoes, I think the quirkier, the better. That's why I am head over heels in love with these pineapple shoes! Click for the DIY.

2. Using your 3-d fabric paint, go over your chalk lines. I went section by section, since the paint would create gaps if the line was too long. Also, be careful of it spitting out a big glob of paint. If that happens, gently guide the paint away with the clean tip of the nozzle. Wipe the nozzle clean, and keep going.

3. Once your paint has dried for at least 24 hours, it's time to add the top! Draw a few pineapple tops on white paper and pick your favorite one. If you're not a good artist, find one online and print it out. 

4. Cut your pineapple top out and trace it onto your green vinyl (the back side). I wanted mine to mirror each other since they weren't exactly the same, so I flipped the paper stencil and traced it the other way. 

5. Cut out the pineapples from your vinyl, being as careful as you can. 

6. Cut out a small piece of felt.  Peel the adhesive lining off, put your pineapple top on it, and cut out. 

7. Using a glue gun, glue your pineapple topper to the shoe. Wear and enjoy! 

When it comes to summer shoes, I think the quirkier, the better. That's why I am head over heels in love with these pineapple shoes! Click for the DIY. #pineapple #pineapplediy #summercrafts

Oh, and if you're wearing a brand-spankin new pair of summer shoes, be sure to bring a backup pair in this handy Barbie Shoes Tote Bag

Ahh! Are you LOVING these shoes as much as I am?! What fruit would you want to wear on your feet? I'm thinking strawberry shoes could be another fun one! 

Painted Corkboard and Barbie Push Pins

I have a sliiight obsession with desk items. I've got a whole bunch of pens, some cute tape dispensers, and even a cute felt cactus on my desk. Hoarder is one word that can be used to describe me, but I prefer collector. Luckily the differentiator between a hoarder and a collector is how your items are presented and stored. As long as it's neat, there's nothing to worry about, right? 

I tend to hold onto papers and fortune cookie fortunes that are all too relatable, so I needed somewhere to keep them where I could actually see and use them. In addition, I wanted to have it be something really fun! In what is one of my easiest tutorials to date, I'll show you how to make your very own painted cork board and Barbie push pins!

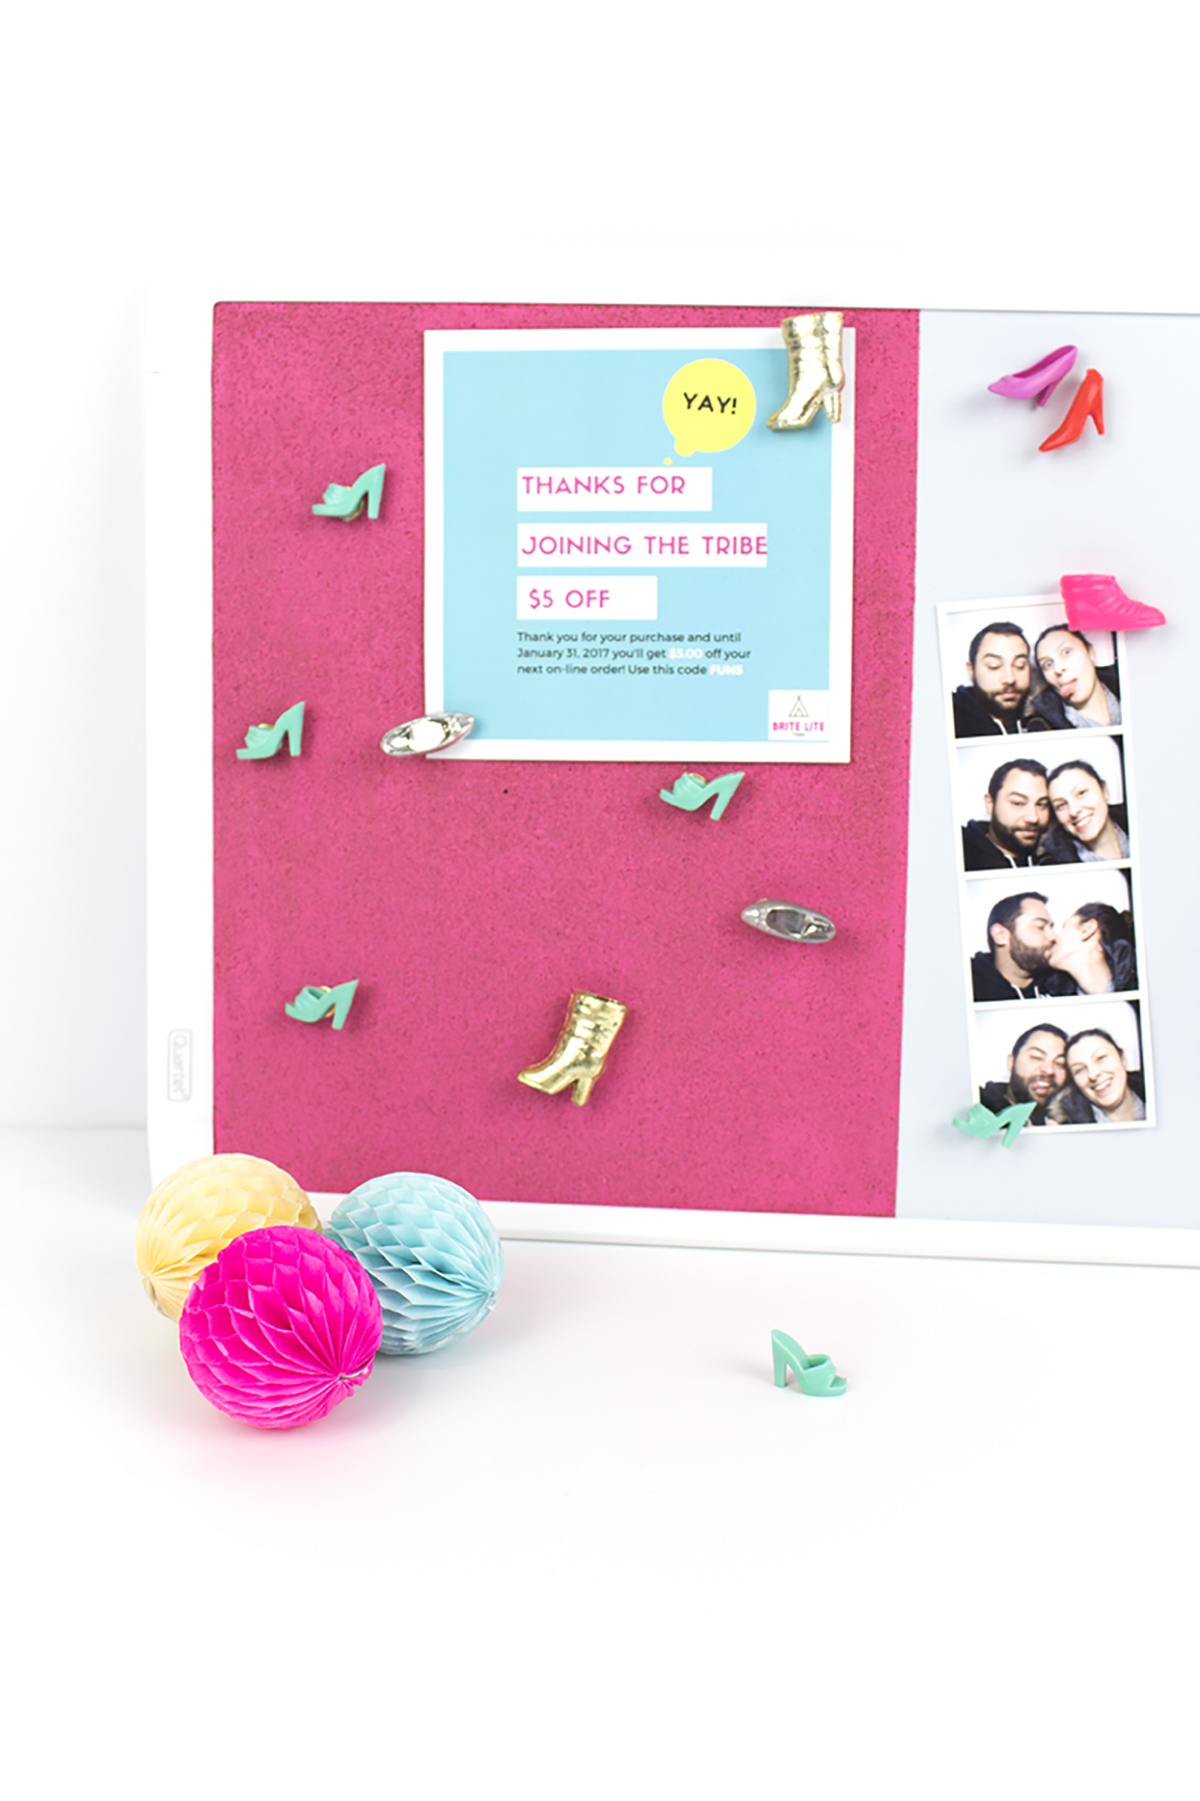
I decided to use my slight obsession with Barbie to create this awesome pink cork board with matching Barbie shoe magnets and thumbtacks. Click for the full tutorial! #deskorganization #barbieclothes #corkboardideas
I decided to use my slight obsession with Barbie to create this awesome pink cork board with matching Barbie shoe magnets and thumbtacks. Click for the full tutorial!

You will need:

Corkboard/magnetic whiteboard combo (here)
Small magnets (here)
thumbtacks (I used gold, but these are nice too!)
E6000 glue (here)
pink paint
toothpick
painters tape (here)
Barbie Shoes (authentic vintage ones from Ebay, or similar here)

Directions:

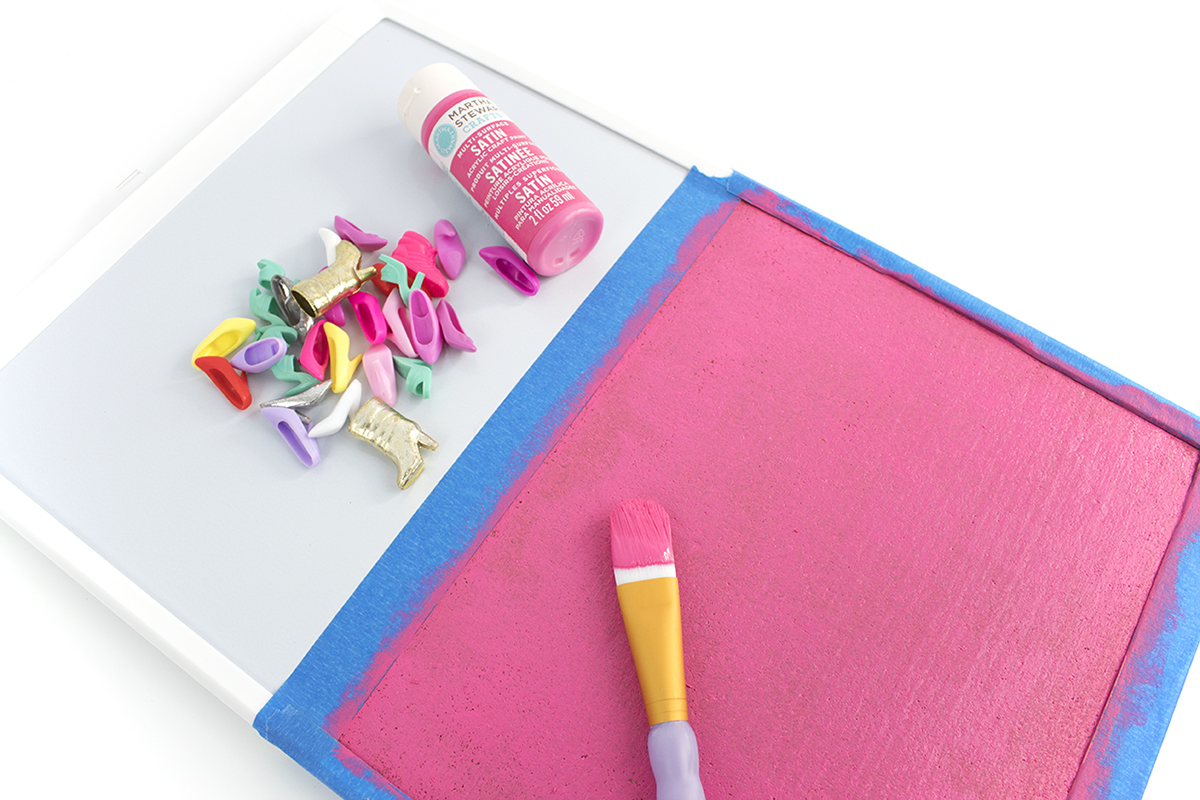
1. Tape off the sides of the corkboard.

I decided to use my slight obsession with Barbie to create this awesome pink cork board with matching Barbie shoe magnets and thumbtacks. Click for the full tutorial!

2. Paint the corkboard pink. I used Martha Stewart Satin Paint in Pink Dahlia.

I decided to use my slight obsession with Barbie to create this awesome pink cork board with matching Barbie shoe magnets and thumbtacks. Click for the full tutorial!

4. Peel off the tape while the paint is still kinda wet. Touch up the paint and use a toothpick to remove any extra paint from sides.

I decided to use my slight obsession with Barbie to create this awesome pink cork board with matching Barbie shoe magnets and thumbtacks. Click for the full tutorial!

5. Space out your magnets on the whiteboard and place a small glob of glue on each. Let cure for 2 minutes (or according to instructions) then place the shoe onto it. Hold for 30 seconds, then let dry for 24-48 hours. Please note that not all whiteboards are magnetic, so make sure you find one that is!

I decided to use my slight obsession with Barbie to create this awesome pink cork board with matching Barbie shoe magnets and thumbtacks. Click for the full tutorial!

 I did the opposite for all the thumbtacks, putting a small glob of glue onto the shoe itself, then placing a thumbtack on after it cured. Hold for 30 seconds, then let dry for 24-48 hours.

I decided to use my slight obsession with Barbie to create this awesome pink cork board with matching Barbie shoe magnets and thumbtacks. Click for the full tutorial!

Now, gather up all your cutest photos and postcards, and hang them up!

I decided to use my slight obsession with Barbie to create this awesome pink cork board with matching Barbie shoe magnets and thumbtacks. Click for the full tutorial! #deskorganization #barbieclothes #corkboardideas

You can also scribble notes on your whiteboard, like dinner dates and brunches with friends!

If you want more Barbie fun, be sure to check out my Barbie Shoes Tote Bag and Gift Guide for the Barbie Girl!

I decided to use my slight obsession with Barbie to create this awesome pink cork board with matching Barbie shoe magnets and thumbtacks. Click for the full tutorial! #deskorganization #barbieclothes #corkboardideas

I know I'm way too old for this, but I still really love Barbies. I peruse the doll aisle at Target every once in a while to see what they have. This cork board is a fun and nostalgic way to show off your Barbie love. So what do you think, will you be making one of these for your desk? Did you love Barbies as a kid, or were you over her faster than you can say "Barbie Dream House"? Do you still have a soft spot for her? Let me know in the comments below!