DIY Jingle Bell Christmas Tassel Earrings

As soon as it’s socially acceptable (aka, right after Thanksgiving!) I go into full-on Christmas mode. I can be found wearing a Christmas sweater, reindeer antlers, or Christmas accessory at any given moment. Sometimes, all of the above! A great way to add some Christmas spirit is to wear some holiday earring. One of my favorite types of earrings is tassel earrings! They always add such a fun pop of color to an outfit. They add a LOT of drama but weigh practically nothing. They’re perfect! Since I love decking myself out for the holidays, especially Christmas, I created this fun DIY project so you can jingle everywhere you go!

*This post contains affiliate links.

jingle-tassel-earrings-6.jpg

You will need:

Embroidery floss (similar here)
Jingle bells (similar here)
Earring hooks (similar here)
Jump rings, optional (similar here)
Jewelry tools (similar here)
Scissors (similar here)

collage.png
  1. Make your tassel earrings by following these instructions. If you want thicker tassels, follow these instructions. Also, a note: if you try to use the first method (where you use the entire spool) and it gets tangled up, you can try using the second method (where you use cardboard) instead!

  2. Brush out your tassels to give them a nice fluff. I recommend using a comb although I used what I had handy- a Barbie brush!

  3. Now that your tassels are made, it’s time to make them into earrings! Attach a jump ring to the top of your tassel by looping it through the first string you tied at the top. Then, loop your earring hook through and close it. You want to make sure that the knots are at the back, so figure that out before you put the earring hook on. You can also skip the jump ring altogether and attach the earring hook directly to the string at the top.

  4. A note: I’d recommend getting a set of these clear earring backs so you don’t lose your earrings. I sadly lost one of the Halloween ones I made!

  5. Using a piece of embroidery floss, thread on your jingle bells. You can either use floss that is the same color (or similar color) or an alternating shade.

jingle-tassel-earrings-7.jpg
Cathy-Christmas.jpg
jingle-tassel-earrings-8.jpg

These are a great stocking stuffer or even something to add to an advent calendar! If you want a fun way to display them, try this tutorial to turn them into fun ornaments!

What do you think about these tassel earrings? Will you be having a Christmas movie marathon and make them with your girlfriends? Let me know in the comments below!

DIY Halloween Tassel Earrings (with Googly Eyes!)

Eye have great news for you- Halloween is coming! Don’t turn a blind eye- add a little flair to your everyday outfits! You’ll SEE how many people enjoy it. Ok, I’m done with all the eye puns, but I have something really fun for you today! I always love adding some holiday accessories to my outfit, and it’s even better when they’re easy to make! These tassel earrings are so fun and easy that you can make a Halloween pair and then some basic ones for everyday. Don’t forget to pin them for later!

*This post contains affiliate links

LOOKING for a great halloween craft? EYE have a great one for you! These googly eye tassel earrings are the perfect halloween accessory. Plus they’re an easy craft! #halloweenearringsdiy #diytasselearrings #googlyeyecrafts

You will need:

Embroidery floss (similar here)
Beacon Gem-Tac (here)
Googly eyes (similar here and here)
Earring Hooks (similar here)
Jump ring (similar here)
Jewelry tools (similar here)
Scissors (similar here)
Toothpicks
Tweezers

LOOKING for a great halloween craft? EYE have a great one for you! These googly eye tassel earrings are the perfect halloween accessory. Plus they’re an easy craft! #halloweenearringsdiy #diytasselearrings #googlyeyecrafts

Directions:

  1. First, let’s create your tassels. For starters, pull a bit of embroidery floss out and cut 4 small-ish pieces. Mine were probably slightly longer than my pointer finger.

  2. Thread one of the strings through the loop at the top of your embroidery floss and tie a knot. I made a double knot to ensure it didn’t come loose. Repeat for the bottom.

  3. Take off the paper packaging that’s holding your embroidery floss in shape, and tie a knot at the top. Mine was about a fingertip’s width (not length) from the top. Repeat on the other bottom, making sure that they are the same size.

  4. Fold the embroidery floss in half to find the center, and then carefully cut across in a straight line to create two separate tassels.

  5. Optional: Comb out your embroidery floss so that your tassels are a little bit thinner and it looks less like embroidery floss! You can see how that looks here.

  6. Now that your tassels are made, it’s time to make the earring! Attach a jump ring to the top of your tassel by looping it through the first string you tied at the top. Then, loop your earring hook through and close it. You want to make sure that the knots are at the back, so figure that out before you put the earring hook on.

  7. Get a scrap of paper, and place some GemTac on it. Take a toothpick and place a small dab of glue on your tassels, then use tweezers to place your tiny googly eye onto your glue. Repeat until you have enough tiny google eyes to fill the top. For the larger googly eye, you can probably just use hot glue.

LOOKING for a great halloween craft? EYE have a great one for you! These googly eye tassel earrings are the perfect halloween accessory. Plus they’re an easy craft! #halloweenearringsdiy #diytasselearrings #googlyeyecrafts

So, what do you think? Can you SEE yourself wearing these earrings? Will you be making a pair for yourself and everyone you know? I made these two pairs and I’m kinda wishing one of them was orange so I could have rotating pairs! Don’t forget to pin the DIY for later or share with a friend who LOVES halloween!

DIY Tassel Halloween Pins

Halloween is coming. This is not a drill! I am SO excited since it’s one of my favorite holidays. Did you know that my husband hates Halloween? So, that means that I need to pick up the slack and celebrate twice as hard. As you’ve probably realized, I’m not a huge fan of black and spooky things, so I need to work a little harder to fulfill my Halloween desires in my chosen color palette. That results in a whole lot of DIY’s and I ain’t complaining about it! I also love love love tassels, so I figured why not bring them together? This little pin is perfect for Halloween but can also be adapted to basic fall colors! It would also be really fun to make for your child’s teacher or a coworker that loves fall. 

*This post contains affiliate links.

This little pin is perfect for Halloween but can also be adapted to basic fall colors! It would also be really fun to make for your child’s teacher or a coworker that loves fall. #halloweenpin #halloweenaccessoriesdiy #pumpkintassels

You will need:

Wood Halloween shapes ( here or similar here)
Acrylic paint (similar here)
Embroidery floss (similar here)
Glue gun (similar here)
Scissors (similar here)
Pin backs (similar here)

This little pin is perfect for Halloween but can also be adapted to basic fall colors! It would also be really fun to make for your child’s teacher or a coworker that loves fall. #halloweenpin #halloweenaccessoriesdiy #pumpkintassels

Directions:

  1. Paint your wood pieces in your choice of colors. I did just one coat, then let it dry. I recommend doing the edges first, then placing it down and painting the front. For one of the pumpkins, I painted only the edge and I left another natural wood. The choice is entirely yours!

  2. While the paint dries, create your tassels. I used a 7/8” piece of cardboard for mine. To learn how to make tassels, refer to this blog post. Remember, you don’t want them to be too thick/chunky so that they lay flat against your pumpkin and, therefore, your shirt. Make sure you don’t trim the little string at the top- we’ll need some length to glue it on! *In the blog post I linked, I had combed the tassels but for this one I didn’t. The choice is yours!

  3. If you want to add some faces to your wood shapes, now is the time! Use a toothpick and dab the paint on. For the ghost, I keep it simple with tiny dots for eyes and cheeks, with a small smile. On the cat, I just added a pink heart for the nose. You can also add googly eyes if you prefer!

  4. Decide on the order you want, then glue your tassels onto the back of your pumpkin using your glue gun. Trim down the excess floss at the top.

  5. Glue your pin onto the back of your pumpkin, covering the excess floss from the tassels.

This little pin is perfect for Halloween but can also be adapted to basic fall colors! It would also be really fun to make for your child’s teacher or a coworker that loves fall. #halloweenpin #halloweenaccessoriesdiy #pumpkintassels

Wear and enjoy. Show off your Halloween love to everyone you meet!

You’ll probably be finding this pin on my lapel until October 31, when I’ll take it off and switch to a Halloween costume! I’m so excited to celebrate this second Halloween with Hailey. Her first Halloween she was only a month old and definitely wasn’t aware of anything that happened. I can’t believe a year has already gone by and she’s so big!  You’re definitely tired of hearing me say that, but I probably won’t stop. It’s insanity. I mean, look at how tiny she was in her first blog post debut

So, how do you feel about Halloween? Are you into the cute and colorful trend, or do you follow the traditional spooky-ness? Love to dress up or hate it? Let me know your feelings in the comments below!

DIY Wood Bead Tassel Necklace

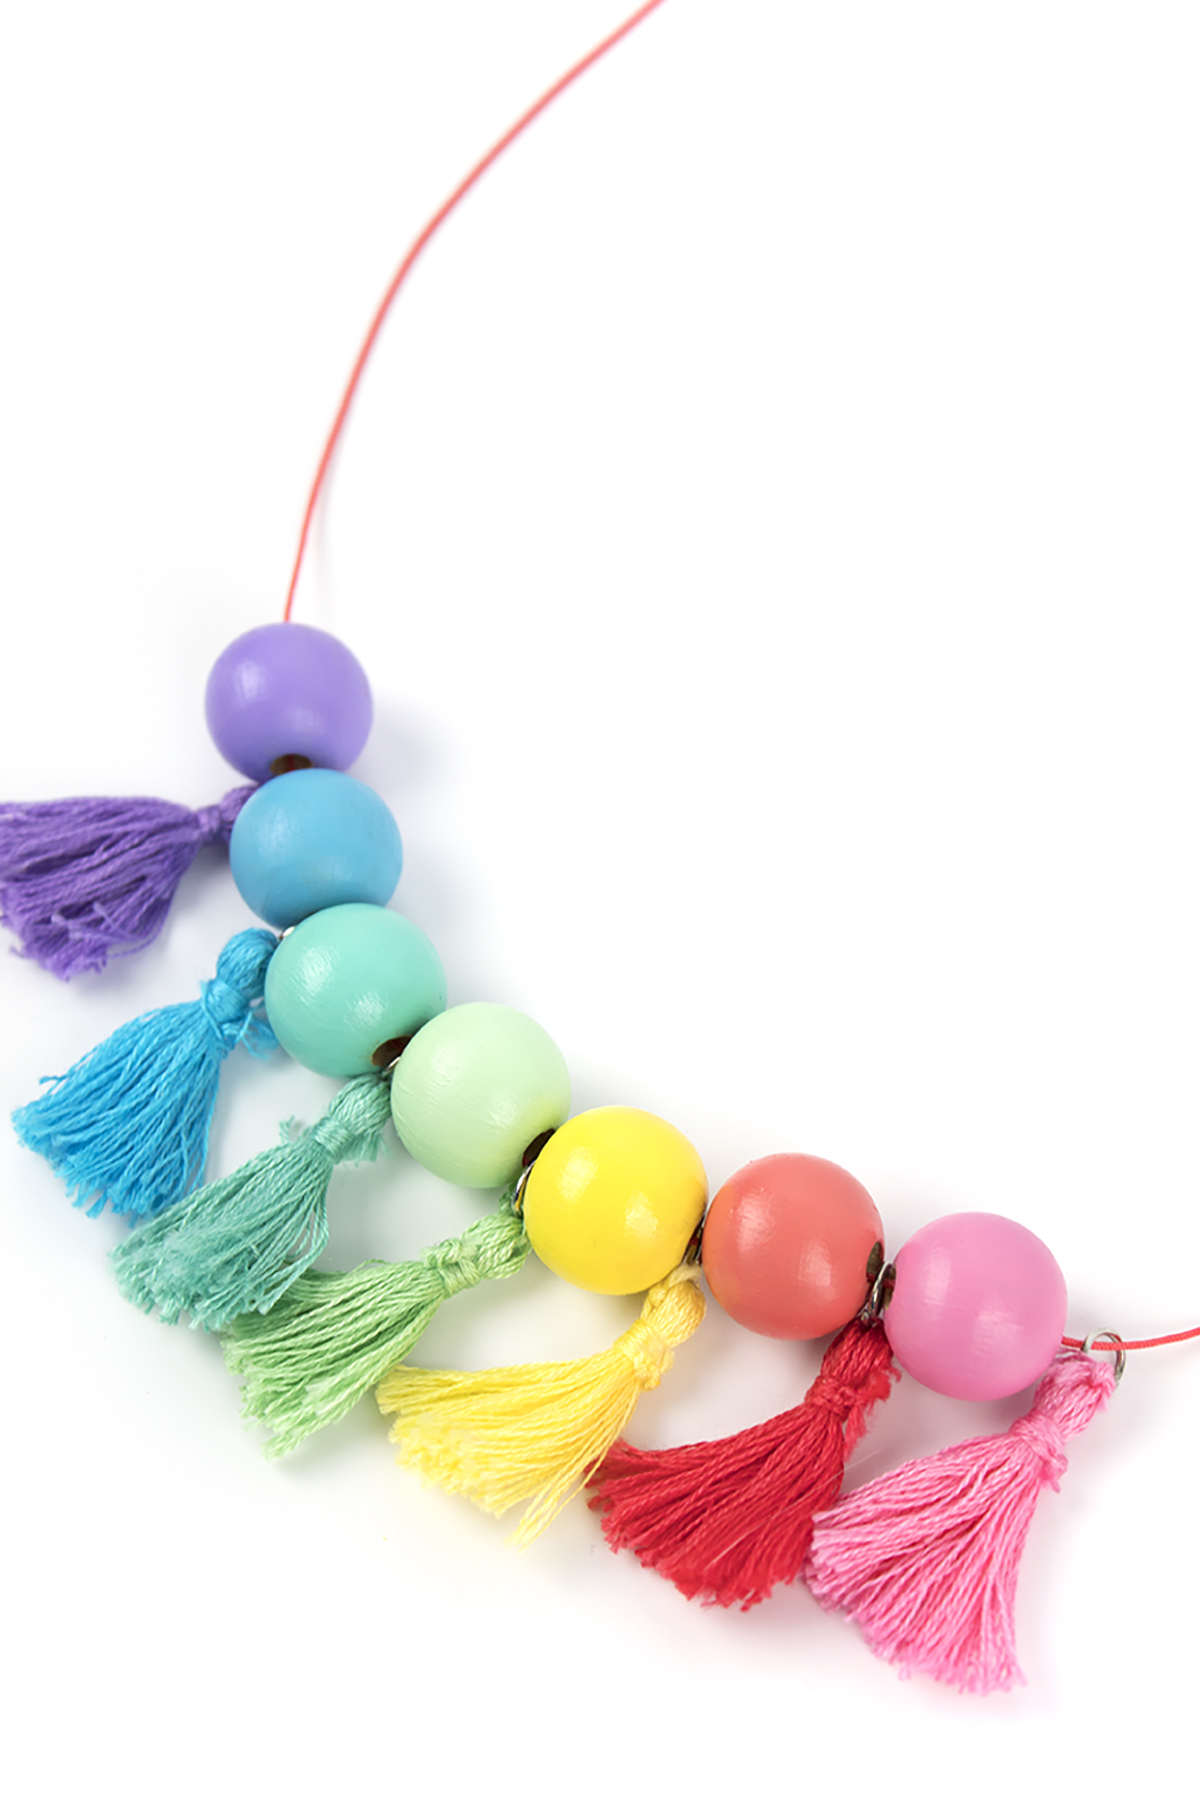
Happy March! Wow, I can't believe it's nearly spring already and St. Patrick's day is next week! St. Patrick's Day was always one of my favorite holidays for some reason. I like almost all of them, but I think it's something about how everyone goes crazy and gets all dresses up that makes me like St. Patrick's Day a lot. Instead of doing a traditional St. Patrick's Day craft, I decided to switch it up a little with a pastel rainbow necklace. My fiancé is a quarter Irish, and he said St. Patrick's Day does not involve rainbows. However, there's no way to find a pot of gold without a rainbow. So, at least in the Hallmark version of the holiday, there's definitely rainbows! If you want to add a little bit of celebration to your St. Patrick's Day outfit this year without looking like you belong in a parade, try wearing this necklace! Honestly, it works well all year round and I think it's perfect for the spring!

Add a little color to your wardrobe with this DIY Wood Bead Tassel Necklace. It features painted beads, DIY tassels, and a customizable palette. Make one for your closet today! #diyjewelry #rainbow #stpatricksday
DIY Wood Bead Tassel Necklace
Add a little color to your wardrobe with this DIY Wood Bead Tassel Necklace. It features painted beads, DIY tassels, and a customizable palette. Make one for your closet today! #diyjewelry #rainbow #stpatricksday

You Will Need:

DIY Wood Bead Tassel Necklace

Embroidery floss (similar here)
Wood beads (similar here)
Nylon cord (here)
Jump rings & clasps (similar here)
Paint (similar here)
Paintbrush (mine are from Michael's, similar here)
Styrofoam (here)
Kebab sticks (here)
Washi tape (similar here)
Jewelry tools (here)
Scissors (here)

DIY Wood Bead Tassel Necklace

1. Take your skewer and wrap it in washi tape. You'll want enough so that the beads won't slide down as you're painting. Put your beads on and paint them. I used bright rainbow colors. Put your skewer into some styrofoam to dry. While you wait...

Add a little color to your wardrobe with this DIY Wood Bead Tassel Necklace. It features painted beads, DIY tassels, and a customizable palette. Make one for your closet today! #diyjewelry #diytassels

2. Cut a piece of cardboard that is the size you want your finished tassels to be. I wanted mine to be around the same size as my beads, so I used that as a template. Wrap the embroidery floss around the cardboard 25 times. You can do less or more, depending on how thick or thin you want your tassels to be. Cut a small piece of floss, thread it through the underside of the top, and tie a few tight knots.

DIY Wood Bead Tassel Necklace

3. Slide the floss off the cardboard and onto a pencil or stir stick. Take a piece of embroidery floss and wrap it around just below the stick. Tie several knots, then cut your embroidery floss. Then, take a jump ring and thread it through the top piece of embroidery floss. Comb your tassel to loosen the weave of the embroidery floss and create and fluffy tassel.

DIY Wood Bead Tassel Necklace

(Psst. if you want to save time and buy your tassels, check out this link).

DIY Wood Bead Tassel Necklace

5. Attach your clasp to one crimp, and your jump ring to another crimp, and attach them to your cord. I wanted my necklace to be long, but be warned- I made mine WAY too long. With the clasps on, it came down to about my belly button! Haha. So, I added a few clasps along the way so I could adjust the length if I wanted to.

DIY Wood Bead Tassel Necklace

6. Thread your beads and tassels. I decided to use a coordinating bead and tassel combo, but you can also mix it up.

Add a little color to your wardrobe with this DIY Wood Bead Tassel Necklace. It features painted beads, DIY tassels, and a customizable palette. Make one for your closet today! #diyjewelry #rainbow #stpatricksday

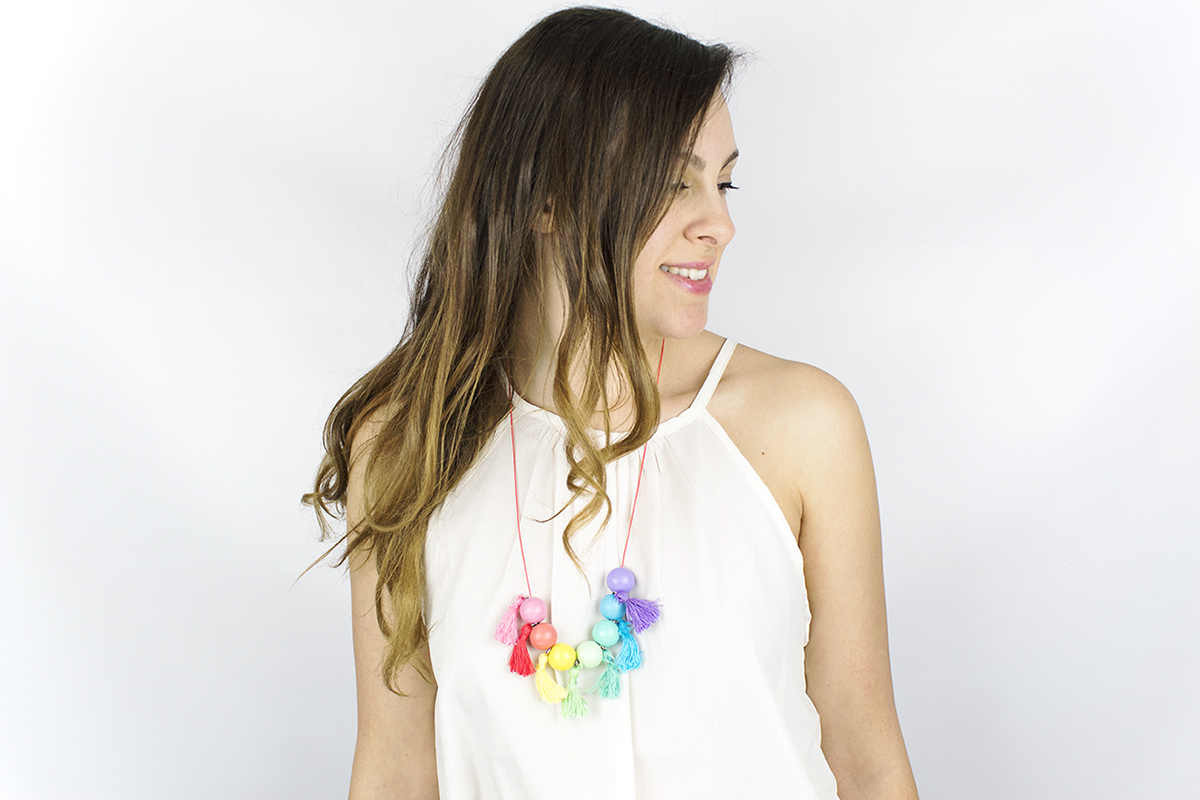
7. Wear and enjoy! I've gotten so many compliments on this necklace the few times I've worn it so far. I truly love it! If you want to add a fun pop of color to your outfit, this necklace is essential.

DIY Wood Bead Tassel Necklace

Oh, did you know I have not one, but THREE cats? This is Roger and he's probably the friendliest cat on the planet. I found him in my backyard in Astoria and decided to keep him. He's the coolest, funniest dude.

Add a little color to your wardrobe with this DIY Wood Bead Tassel Necklace. It features painted beads, DIY tassels, and a customizable palette. Make one for your closet today! #diyjewelry #rainbow #stpatricksday

I love love loveeeeee this necklace. The pastel rainbow colors are just magical! Would you wear a necklace like this? What do you think of it? Let me know in the comments below!