DIY Tassel Halloween Pins

Halloween is coming. This is not a drill! I am SO excited since it’s one of my favorite holidays. Did you know that my husband hates Halloween? So, that means that I need to pick up the slack and celebrate twice as hard. As you’ve probably realized, I’m not a huge fan of black and spooky things, so I need to work a little harder to fulfill my Halloween desires in my chosen color palette. That results in a whole lot of DIY’s and I ain’t complaining about it! I also love love love tassels, so I figured why not bring them together? This little pin is perfect for Halloween but can also be adapted to basic fall colors! It would also be really fun to make for your child’s teacher or a coworker that loves fall. 

*This post contains affiliate links.

This little pin is perfect for Halloween but can also be adapted to basic fall colors! It would also be really fun to make for your child’s teacher or a coworker that loves fall. #halloweenpin #halloweenaccessoriesdiy #pumpkintassels

You will need:

Wood Halloween shapes ( here or similar here)
Acrylic paint (similar here)
Embroidery floss (similar here)
Glue gun (similar here)
Scissors (similar here)
Pin backs (similar here)

This little pin is perfect for Halloween but can also be adapted to basic fall colors! It would also be really fun to make for your child’s teacher or a coworker that loves fall. #halloweenpin #halloweenaccessoriesdiy #pumpkintassels

Directions:

  1. Paint your wood pieces in your choice of colors. I did just one coat, then let it dry. I recommend doing the edges first, then placing it down and painting the front. For one of the pumpkins, I painted only the edge and I left another natural wood. The choice is entirely yours!

  2. While the paint dries, create your tassels. I used a 7/8” piece of cardboard for mine. To learn how to make tassels, refer to this blog post. Remember, you don’t want them to be too thick/chunky so that they lay flat against your pumpkin and, therefore, your shirt. Make sure you don’t trim the little string at the top- we’ll need some length to glue it on! *In the blog post I linked, I had combed the tassels but for this one I didn’t. The choice is yours!

  3. If you want to add some faces to your wood shapes, now is the time! Use a toothpick and dab the paint on. For the ghost, I keep it simple with tiny dots for eyes and cheeks, with a small smile. On the cat, I just added a pink heart for the nose. You can also add googly eyes if you prefer!

  4. Decide on the order you want, then glue your tassels onto the back of your pumpkin using your glue gun. Trim down the excess floss at the top.

  5. Glue your pin onto the back of your pumpkin, covering the excess floss from the tassels.

This little pin is perfect for Halloween but can also be adapted to basic fall colors! It would also be really fun to make for your child’s teacher or a coworker that loves fall. #halloweenpin #halloweenaccessoriesdiy #pumpkintassels

Wear and enjoy. Show off your Halloween love to everyone you meet!

You’ll probably be finding this pin on my lapel until October 31, when I’ll take it off and switch to a Halloween costume! I’m so excited to celebrate this second Halloween with Hailey. Her first Halloween she was only a month old and definitely wasn’t aware of anything that happened. I can’t believe a year has already gone by and she’s so big!  You’re definitely tired of hearing me say that, but I probably won’t stop. It’s insanity. I mean, look at how tiny she was in her first blog post debut

So, how do you feel about Halloween? Are you into the cute and colorful trend, or do you follow the traditional spooky-ness? Love to dress up or hate it? Let me know your feelings in the comments below!

DIY Colorful Summer Place Card Holder

Whenever I watch TV shows, they always seem to have these beautiful outdoor dinner parties, where everyone hangs out under a giant tree covered in string lights, on a long table where everyone has their own gorgeous place setting. There are, of course, candles all over the table and these amazing platters filled with delicious, vibrant, colorful food. It’s a far cry from my usual summer party- paper plates and hot dogs on the BBQ. So, I set out to take my BBQ and make it a little bit fancier.

This summer, create a one of a kind experience for your guests by making them this DIY place card holder that doubles as a party favor. It’s really easy to make with only paint, wood blocks, and wire. I’ve got the DIY over on the Giggles Galore blog so head on over there for the full DIY.

This summer, create a one of a kind experience for your guests by making them this DIY place card holder that doubles as a party favor. It’s really easy to make with only paint, wood blocks, and wire. You definitely want to whip this up before the s…

After the BBQ is done, your guests can take this place card holder home with them to put on their desk as a picture holder, note holder, recipe card holder- really, anything their heart desires! It’s a great way to show your friends how much you care about them, while also getting to flex your creativity muscle. So head over to the Giggles Galore blog for the full tutorial. Then, take a trip to the craft store to grab your supplies, pop on a summer rom-com and grab your glue gun- we’re about to get crafty!

This summer, create a one of a kind experience for your guests by making them this DIY place card holder that doubles as a party favor. It’s really easy to make with only paint, wood blocks, and wire. You definitely want to whip this up before the s…

So head on over to the Giggles Galore blog now to see the post and make your own! You definitely want to whip this up before the summer ends.

DIY Painted Wood Necklace

A few months ago, my boss went to Mexico and brought me back this really pretty necklace. I liked it a lot, but as soon as I saw it, I thought about how cute it would look with a pop of color! It’s such a fun shape, and the two-toned wood was awesome! Adding some rainbow paint took it to the next level for me, and made it match much more of my closet. It’s super easy to do if you have any jewelry, especially souvenirs, that aren’t quite your style!

*This blog post contains affiliate links.

Paint Necklace 10.jpg

You will need: 

Wood necklace (similar here or here)
Nylon cord (here)
Painters tape (here)
Jewelry closures (here)
Jewelry tools (here)
Paint in your choice of colors (similar here)
Scissors (here)
Paintbrush
Pencil & marker

Paint Necklace Collage.jpg

Directions:

  1. Decide on your pattern and tape off your wood pieces. If your tape is super sticky, you may want to make it less sticky by putting it onto something and pulling it off, like your pants, so that it has some lint as a buffer.

  2. If your necklace is like mine, now you cut it off the string. I wanted to be sure the lines for the tape matched up before cutting.

  3. Paint 2 coats. I only did the front and sides so that I didn’t have paint against my skin/clothes but it doesn’t matter either way. Whatever you prefer!

  4. Pull off the tape while paint is still wet and let dry fully.

  5. String your wood pieces back onto the string and tie a knot on the ends if necessary

  6. Add your closures after deciding on the appropriate length for the string.

Paint Necklace 8.jpg
Paint Necklace 11.jpg

I love making over items I already own to make them fit my style better. It’s so nice, especially with sentimental items that don’t get much use. What do you think about this project? Do you plan on making over some wooden jewelry sitting in your closet? Let me know in the comments below!

DIY Rainbow Alphabet Blocks

Call it a mother's intuition but I made this project before I even knew I was pregnant! I wanted them for an Instagram challenge I have since put aside, but hey... they're pretty cute and I've used them for a few blog posts already too! You probably saw them make a cameo in my Easter party post, my baby post and my Painted Notebook post. They're too awesome (and useful) to resist. Find out how to make a set for yourself!

Colorful rainbow alphabet baby blocks? Yes please! Find out how to make a set for yourself. Click for the full how-to!

Disclaimer: I do not have children, and therefore I do not know what age this would be for. I’m going to say 3+, but please use your discretion! Mine will be mainly for decorative purposes. I don’t want any children getting hurt with toxic paint or swallowing a loose letter. Please use caution when giving this project to children!!!

You will need:

1.5" blocks (here)
Painter’s tape 1 inch (here)
Paint in your choice of colors (similar here)*
Wood letters (from Michael’s, similar here)
Paintbrushes (similar here)
Super glue or wood glue (here)
Newspaper or similar to cover workspace

*My colors were Martha Stewart Pink Dahlia, Apple Barrel Pink Parfait, Martha Stewart Wild Salmon, Martha Stewart Yellow Jacket, Martha Stewart Diving Board, Apple Barrel Parrot Blue, Apple Barrel Bimini Blue, Craft Smart Grape Taffy

Directions:

Colorful rainbow alphabet baby blocks? Yes please! Find out how to make a set for yourself. Click for the full how-to!
  1. Pick the colors for your paint, and decide on whether you want a pattern. I wanted to do a rainbow, so I assigned each letter a color and counted out how many of each block I needed from that.

  2. Find the best side of your block to be the front, and add tape to the center as a “stripe”. I did this on two sides so that I would have the ability to add extra letters or something else to the back. Or at least, if gave me an extra option in case one side looked funky!

  3. Once you’ve taped a few (or all) of your blocks, begin painting them. Each round, I painted the “front” of the block with two stripes, 2 sides full color, and the “back” with two stripes. I did the stripes first, then the sides, and went and did a second coat on the stripes before letting it dry.

  4. Peel your tape off your blocks and save it for round 2. Make sure your blocks dry fully before doing round 2!

  5. While your blocks dry, start painting your letters. I did the front and all the sides with a few coats.

  6. Take your tape, and reposition it on the sides with the stripes, this time going the other direction to form a “border” of color around the edge. Paint the stripes on the front, back, and opposite sides. And let dry fully.

  7. Glue your letters into your blocks and let dry according to directions.

Colorful rainbow alphabet baby blocks? Yes please! Find out how to make a set for yourself. Click for the full how-to!

Alternatives:

  1. For a safer alternative, you can paint or stamp the letters onto the blocks so that there is no choking hazard

  2. Instead of matching all the blocks and letters, try mixing them up or color blocking with different shades of the same color! I tested that below.

  3. Add stamps to the sides of the blocks for extra learning fun!

  4. Add numbers for a complete block set

Colorful rainbow alphabet baby blocks? Yes please! Find out how to make a set for yourself. Click for the full how-to!

Ahhh! I mean, how stinking cute are these!? They'd also be really cute as decor with just the letters of your baby or child's name. I love love love these! Are you planning to make a set for your kids? Let me know in the comments below!

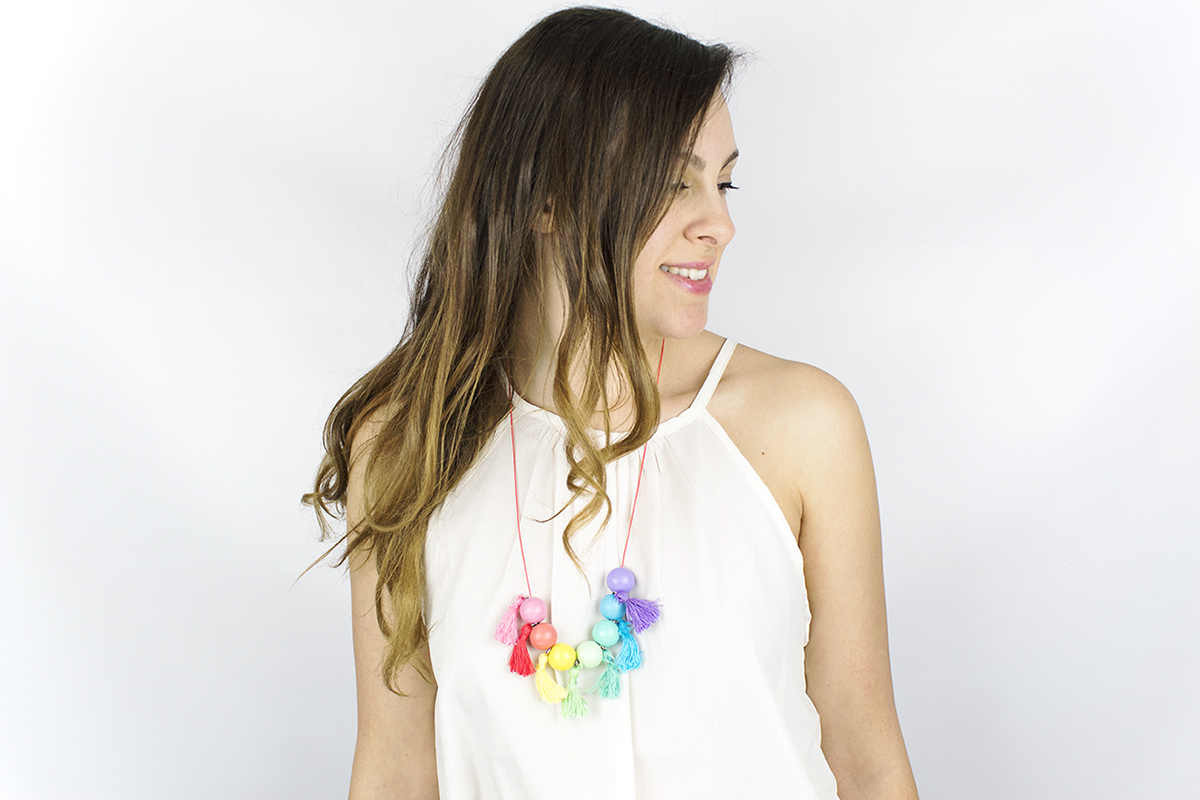
DIY Wood Bead Tassel Necklace

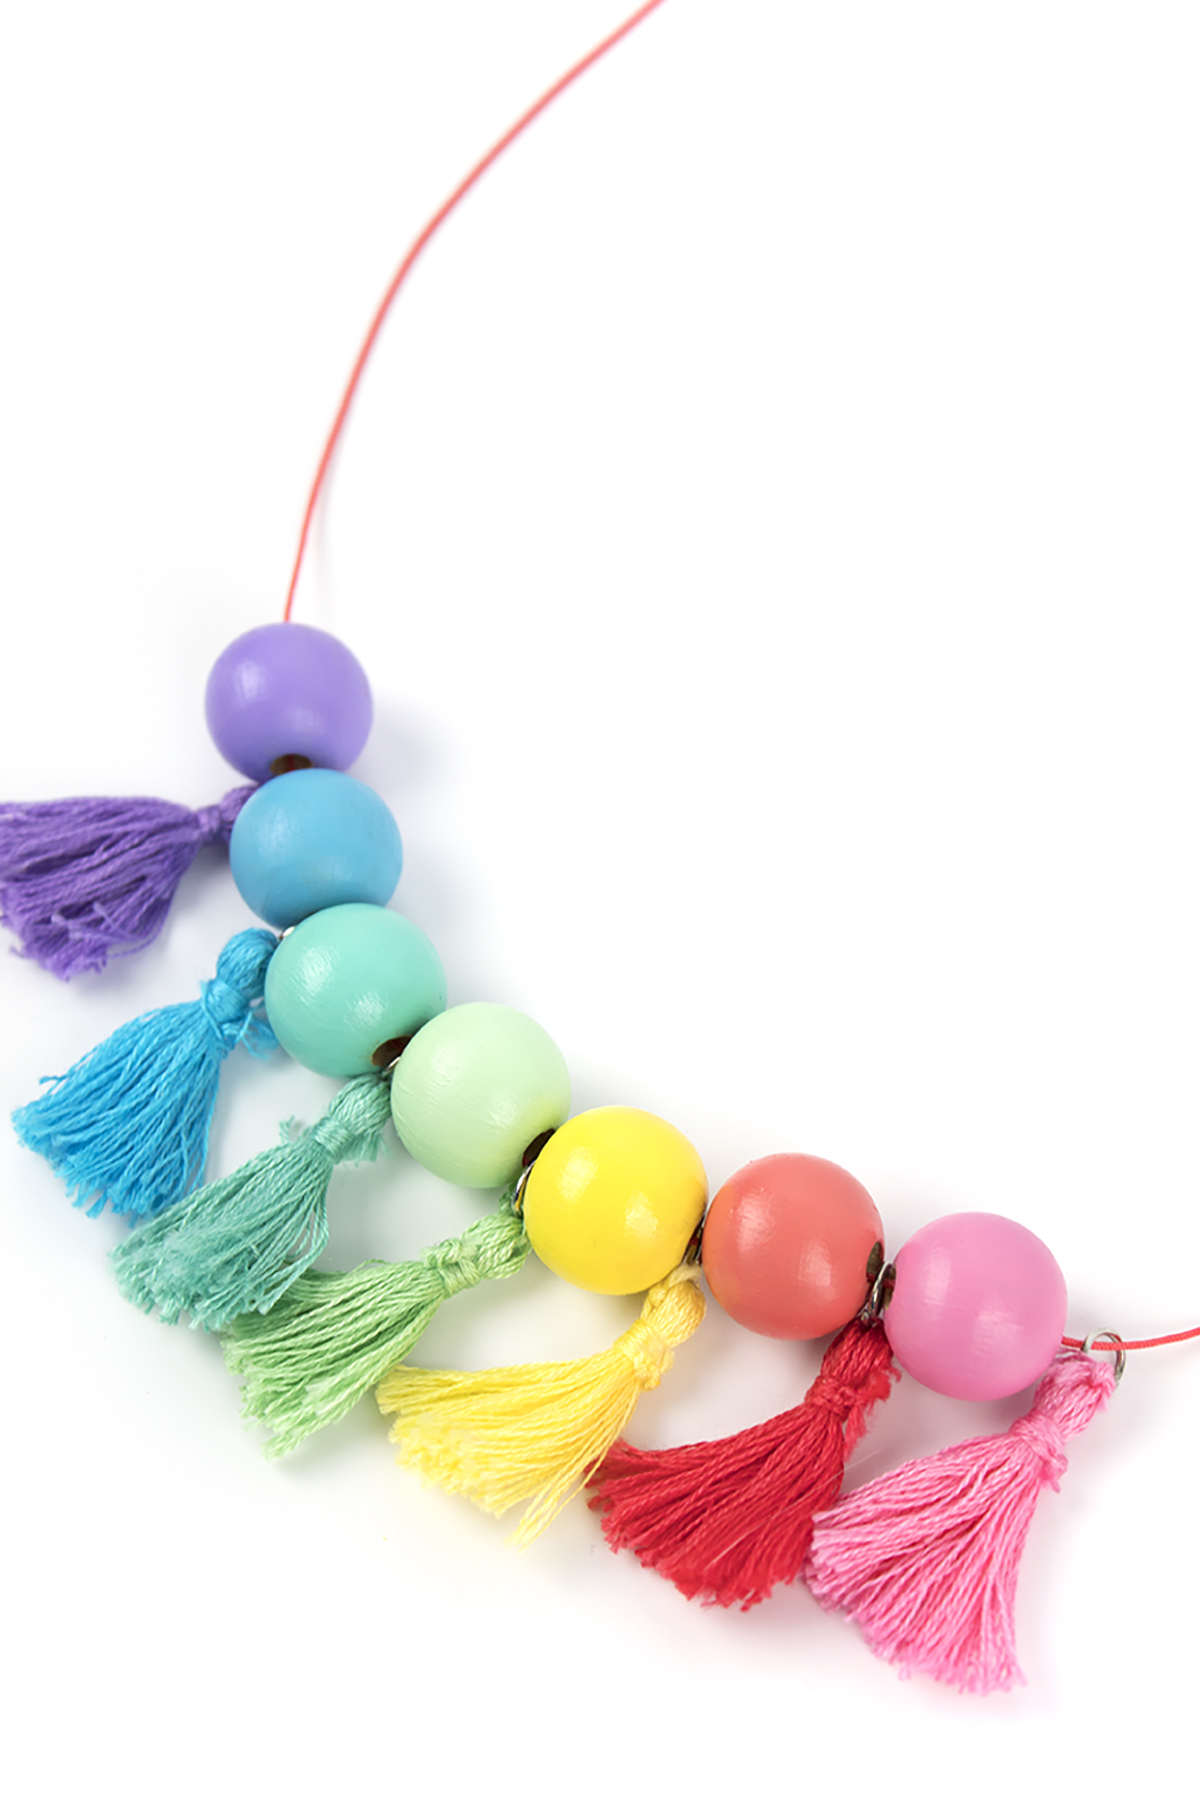
Happy March! Wow, I can't believe it's nearly spring already and St. Patrick's day is next week! St. Patrick's Day was always one of my favorite holidays for some reason. I like almost all of them, but I think it's something about how everyone goes crazy and gets all dresses up that makes me like St. Patrick's Day a lot. Instead of doing a traditional St. Patrick's Day craft, I decided to switch it up a little with a pastel rainbow necklace. My fiancé is a quarter Irish, and he said St. Patrick's Day does not involve rainbows. However, there's no way to find a pot of gold without a rainbow. So, at least in the Hallmark version of the holiday, there's definitely rainbows! If you want to add a little bit of celebration to your St. Patrick's Day outfit this year without looking like you belong in a parade, try wearing this necklace! Honestly, it works well all year round and I think it's perfect for the spring!

Add a little color to your wardrobe with this DIY Wood Bead Tassel Necklace. It features painted beads, DIY tassels, and a customizable palette. Make one for your closet today! #diyjewelry #rainbow #stpatricksday
DIY Wood Bead Tassel Necklace
Add a little color to your wardrobe with this DIY Wood Bead Tassel Necklace. It features painted beads, DIY tassels, and a customizable palette. Make one for your closet today! #diyjewelry #rainbow #stpatricksday

You Will Need:

DIY Wood Bead Tassel Necklace

Embroidery floss (similar here)
Wood beads (similar here)
Nylon cord (here)
Jump rings & clasps (similar here)
Paint (similar here)
Paintbrush (mine are from Michael's, similar here)
Styrofoam (here)
Kebab sticks (here)
Washi tape (similar here)
Jewelry tools (here)
Scissors (here)

DIY Wood Bead Tassel Necklace

1. Take your skewer and wrap it in washi tape. You'll want enough so that the beads won't slide down as you're painting. Put your beads on and paint them. I used bright rainbow colors. Put your skewer into some styrofoam to dry. While you wait...

Add a little color to your wardrobe with this DIY Wood Bead Tassel Necklace. It features painted beads, DIY tassels, and a customizable palette. Make one for your closet today! #diyjewelry #diytassels

2. Cut a piece of cardboard that is the size you want your finished tassels to be. I wanted mine to be around the same size as my beads, so I used that as a template. Wrap the embroidery floss around the cardboard 25 times. You can do less or more, depending on how thick or thin you want your tassels to be. Cut a small piece of floss, thread it through the underside of the top, and tie a few tight knots.

DIY Wood Bead Tassel Necklace

3. Slide the floss off the cardboard and onto a pencil or stir stick. Take a piece of embroidery floss and wrap it around just below the stick. Tie several knots, then cut your embroidery floss. Then, take a jump ring and thread it through the top piece of embroidery floss. Comb your tassel to loosen the weave of the embroidery floss and create and fluffy tassel.

DIY Wood Bead Tassel Necklace

(Psst. if you want to save time and buy your tassels, check out this link).

DIY Wood Bead Tassel Necklace

5. Attach your clasp to one crimp, and your jump ring to another crimp, and attach them to your cord. I wanted my necklace to be long, but be warned- I made mine WAY too long. With the clasps on, it came down to about my belly button! Haha. So, I added a few clasps along the way so I could adjust the length if I wanted to.

DIY Wood Bead Tassel Necklace

6. Thread your beads and tassels. I decided to use a coordinating bead and tassel combo, but you can also mix it up.

Add a little color to your wardrobe with this DIY Wood Bead Tassel Necklace. It features painted beads, DIY tassels, and a customizable palette. Make one for your closet today! #diyjewelry #rainbow #stpatricksday

7. Wear and enjoy! I've gotten so many compliments on this necklace the few times I've worn it so far. I truly love it! If you want to add a fun pop of color to your outfit, this necklace is essential.

DIY Wood Bead Tassel Necklace

Oh, did you know I have not one, but THREE cats? This is Roger and he's probably the friendliest cat on the planet. I found him in my backyard in Astoria and decided to keep him. He's the coolest, funniest dude.

Add a little color to your wardrobe with this DIY Wood Bead Tassel Necklace. It features painted beads, DIY tassels, and a customizable palette. Make one for your closet today! #diyjewelry #rainbow #stpatricksday

I love love loveeeeee this necklace. The pastel rainbow colors are just magical! Would you wear a necklace like this? What do you think of it? Let me know in the comments below!