Valentine’s Day Cupid’s Arrow Pins

It’s almost Valentine’s Day, so that means you have to wear your heart on your sleeve! Or, well… your lapel! With these super easy to make cupid’s arrow pins, you’ll be adorably decked out for work, shopping or even a Galentine’s day brunch! Best of all they’re fun to make for all your gal-pals with the tutorial I created for Giggles Galore.

Valentine’s Day Cupid’s Arrow Pins

There’s instructions for the 3 simple designs and you only need a few supplies to create a whole bunch of them. You can also make them for your coworkers, kids at school, or your family members to wear.

So, head on over to Giggles Galore blog so you can make your own!

DIY Polaroid Valentine

Ever since Hailey came along, it’s like people can’t get enough of her. I get it- she’s the cutest! So, instead of getting the grandmas and aunties chocolates that end up with a bite taken out (is it just me that taste tests each one?!) get them something they can keep forever- these magnets! I partnered up with Pinhole Press to create this adorable camera valentine for your family. This post was sponsored by Pinhole Press, but just know I LOVE their products- I ended up ordering an extra set of these magnets because everyone wanted one for themselves once they saw them!

These DIY polaroid valentines are perfect gifts for everyone in the family! It’s an easy DIY project to pop into your valentine box and make everyone jealous! #valentines #photovalentine #diyproject


I did a quick photoshoot for Hailey with v-day outfits to make these magnets extra special. Most of the pics can be seen in her 3 month update and you can easily do your own by popping a red or pink shirt onto the kiddos!

These DIY polaroid valentines are perfect gifts for everyone in the family! It’s an easy DIY project to pop into your valentine box and make everyone jealous! #valentines #photovalentine #diyproject

So, head on over to the Pinhole Press blog to see the post and order your own set!

DIY Boombox Music Valentines

Valentine’s Day is fast approaching, and I am still sorta in shock- wasn’t it Christmas 5 minutes ago?! Well, don’t worry- there’s still plenty of time to prepare some Valentines for the kiddos! While you can really easily purchase a stack of Minnie Mouse valentines at your local drugstore, I think it’s way more fun to make your own! Especially if you relate to every parent out there with a nostalgic boombox valentine. The full post is over on the Giggles Galore blog.

Looking to make something a little bit different this Valentine’s Day? Try these DIY boombox music valentines! They’re the perfect Valentine’s Day gift for a music lover, especially when paired with an iTunes gift card!

I think these would also be great if you paired them with an iTunes gift card for your kids or family members. Gone are the days when you needed to hang out by the radio with a cassette tape inside, waiting for your favorite song to play!

Looking to make something a little bit different this Valentine’s Day? Try these DIY boombox music valentines! They’re the perfect Valentine’s Day gift for a music lover, especially when paired with an iTunes gift card!

These cards are SUPER cheap to make- all you need is a pack of cardstock and some washi tape. That’s it! Some paper punches with make things a bit easier, but you don’t even need those. So, head on over to the Giggles Galore blog to see the full post!

DIY Mean Girls Conversation Hearts Banner (and how to use Cricut Iron On Vinyl!)

There are some movies that you watch once and enjoy, but never really have the desire to see again. Then, there are those movies that you watch over and over again until you've memorized practically every word. Mean Girls is one of those movies. If you can't recite at least one of those memorable quotes, then you can't sit with us! It's got Lindsay Lohan at the peak of her career, Tina Fey's comedy, Rachel McAdams & Amanda Seyfriend before they were super famous, and Lacey Chabert from everyone's favorite show, Party of Five (people liked that show, right? I never watched it...). Combine that with the awesome 2004 fashion sense, the catchy lines, the harsh reality of frenemies, and the fact that you always wanted to be popular, and you've pretty much got the makings of a FANTASTIC movie. It was basically made by girls, for girls, so there's no way it wouldn't succeed. PS, can we talk about how everyone in Mean Girls wore lip gloss?! I'm not sure about you guys, but I don't wear lip gloss anymore. Is that just a high school thing? Idk...

Give your sweetheart candies a little bit of attitude this year by making them into Mean Girls Conversation Hearts. So Fetch! Click for the full tutorial, along with how to use Cricut iron on vinyl.

With Valentine's Day coming up, I wanted to make something fun with some felt hearts I picked up at Target. They look to me like Conversation Hearts candy, which are usually boringly sweet. "U R CUTE"? "CALL ME"? C'mon.... But, what if they were sorta sassy instead? PERFECT OPPORTUNITY for a Mean Girls DIY. Just sayin'.

Go grab some popcorn, your Mean Girls DVD, and your glue gun. This is going to be Grool!

You will need:

Cricut iron-on vinyl is actually pretty simple to use, as long as you know which way the vinyl goes and how to make sure your letters aren't backwards. Click for the full tutorial, along with how to make some Mean Girls conversation hearts!

Cricut Explore Air Machine (here)
Pastel felt hearts (from Target)
Iron (here)
Red iron-on transfer (here)
Cricut tool kit or Tweezers (here)
Ribbon
Glue gun

I know what you're thinking..."How do I use Cricut iron on vinyl?" I knew you'd ask, so I have just the tutorial for you. How did I know? I have a fifth sense... It's like I have ESPN or something. The iron on vinyl is actually pretty simple to use, as long as you know which way the vinyl goes and how to make sure your letters aren't backwards.

How to Use Cricut Iron-On Vinyl

1. Open the Mean Girls Conversation Hearts Candy document in Cricut Design Space. 

Cricut iron-on vinyl is actually pretty simple to use, as long as you know which way the vinyl goes and how to make sure your letters aren't backwards. Click for the full tutorial, along with how to make some Mean Girls conversation hearts!

2. Take your red iron-on vinyl and place it on your cutting sheet, liner side down. You'll be cutting the vinyl (matte side), so that means the shiny side goes down.

Cricut iron-on vinyl is actually pretty simple to use, as long as you know which way the vinyl goes and how to make sure your letters aren't backwards. Click for the full tutorial, along with how to make some Mean Girls conversation hearts!

3. Set up the file to cut on your Cricut machine by following the steps below. 

a. Set your Cricut machine mode to vinyl +

Cricut iron-on vinyl is actually pretty simple to use, as long as you know which way the vinyl goes and how to make sure your letters aren't backwards. Click for the full tutorial, along with how to make some Mean Girls conversation hearts!

b. Press Go

Cricut iron-on vinyl is actually pretty simple to use, as long as you know which way the vinyl goes and how to make sure your letters aren't backwards. Click for the full tutorial, along with how to make some Mean Girls conversation hearts!

c. Set to mirror image! This is very important, since your text needs to be backwards so that it'll be the right way when you finish.

Cricut iron-on vinyl is actually pretty simple to use, as long as you know which way the vinyl goes and how to make sure your letters aren't backwards. Click for the full tutorial, along with how to make some Mean Girls conversation hearts!

c. Load your Cricut cutting mat and start cutting.

Cricut iron-on vinyl is actually pretty simple to use, as long as you know which way the vinyl goes and how to make sure your letters aren't backwards. Click for the full tutorial, along with how to make some Mean Girls conversation hearts!

d. Wait for the Cricut machine to cut your file. Mine wouldn't cut the full document in one shot (annoying!) so after it stopped each time, I would remove the ones it cut from the document/cutting mat, reload the mat, and start cutting again.

Cricut iron-on vinyl is actually pretty simple to use, as long as you know which way the vinyl goes and how to make sure your letters aren't backwards. Click for the full tutorial, along with how to make some Mean Girls conversation hearts!

Look at all those fabulous quotes just waiting to get out there into the world!

Cricut iron-on vinyl is actually pretty simple to use, as long as you know which way the vinyl goes and how to make sure your letters aren't backwards. Click for the full tutorial, along with how to make some Mean Girls conversation hearts!

4. Once your document has finished cutting on the Cricut machine, carefully cut around each quote. It's best to cut as close as you can to the letters, and try to make the border around each side even. This will make it easier to center them on the conversation hearts.

Cricut iron-on vinyl is actually pretty simple to use, as long as you know which way the vinyl goes and how to make sure your letters aren't backwards. Click for the full tutorial, along with how to make some Mean Girls conversation hearts!

5. Peel off the remaining vinyl, aka the extra red background. You'll be left with the clear liner and your letters. To do this, I take my Cricut hook tool and scrape a corner to make a hole.

Cricut iron-on vinyl is actually pretty simple to use, as long as you know which way the vinyl goes and how to make sure your letters aren't backwards. Click for the full tutorial, along with how to make some Mean Girls conversation hearts!

Then, I carefully and slowly peel away the liner to reveal the letters beneath. I found that peeling the vinyl from left to right was easier, since most of the letters face that way. Otherwise, you're going against the grain. So, aka... not the way I'm doing it in the photos.

Cricut iron-on vinyl is actually pretty simple to use, as long as you know which way the vinyl goes and how to make sure your letters aren't backwards. Click for the full tutorial, along with how to make some Mean Girls conversation hearts!

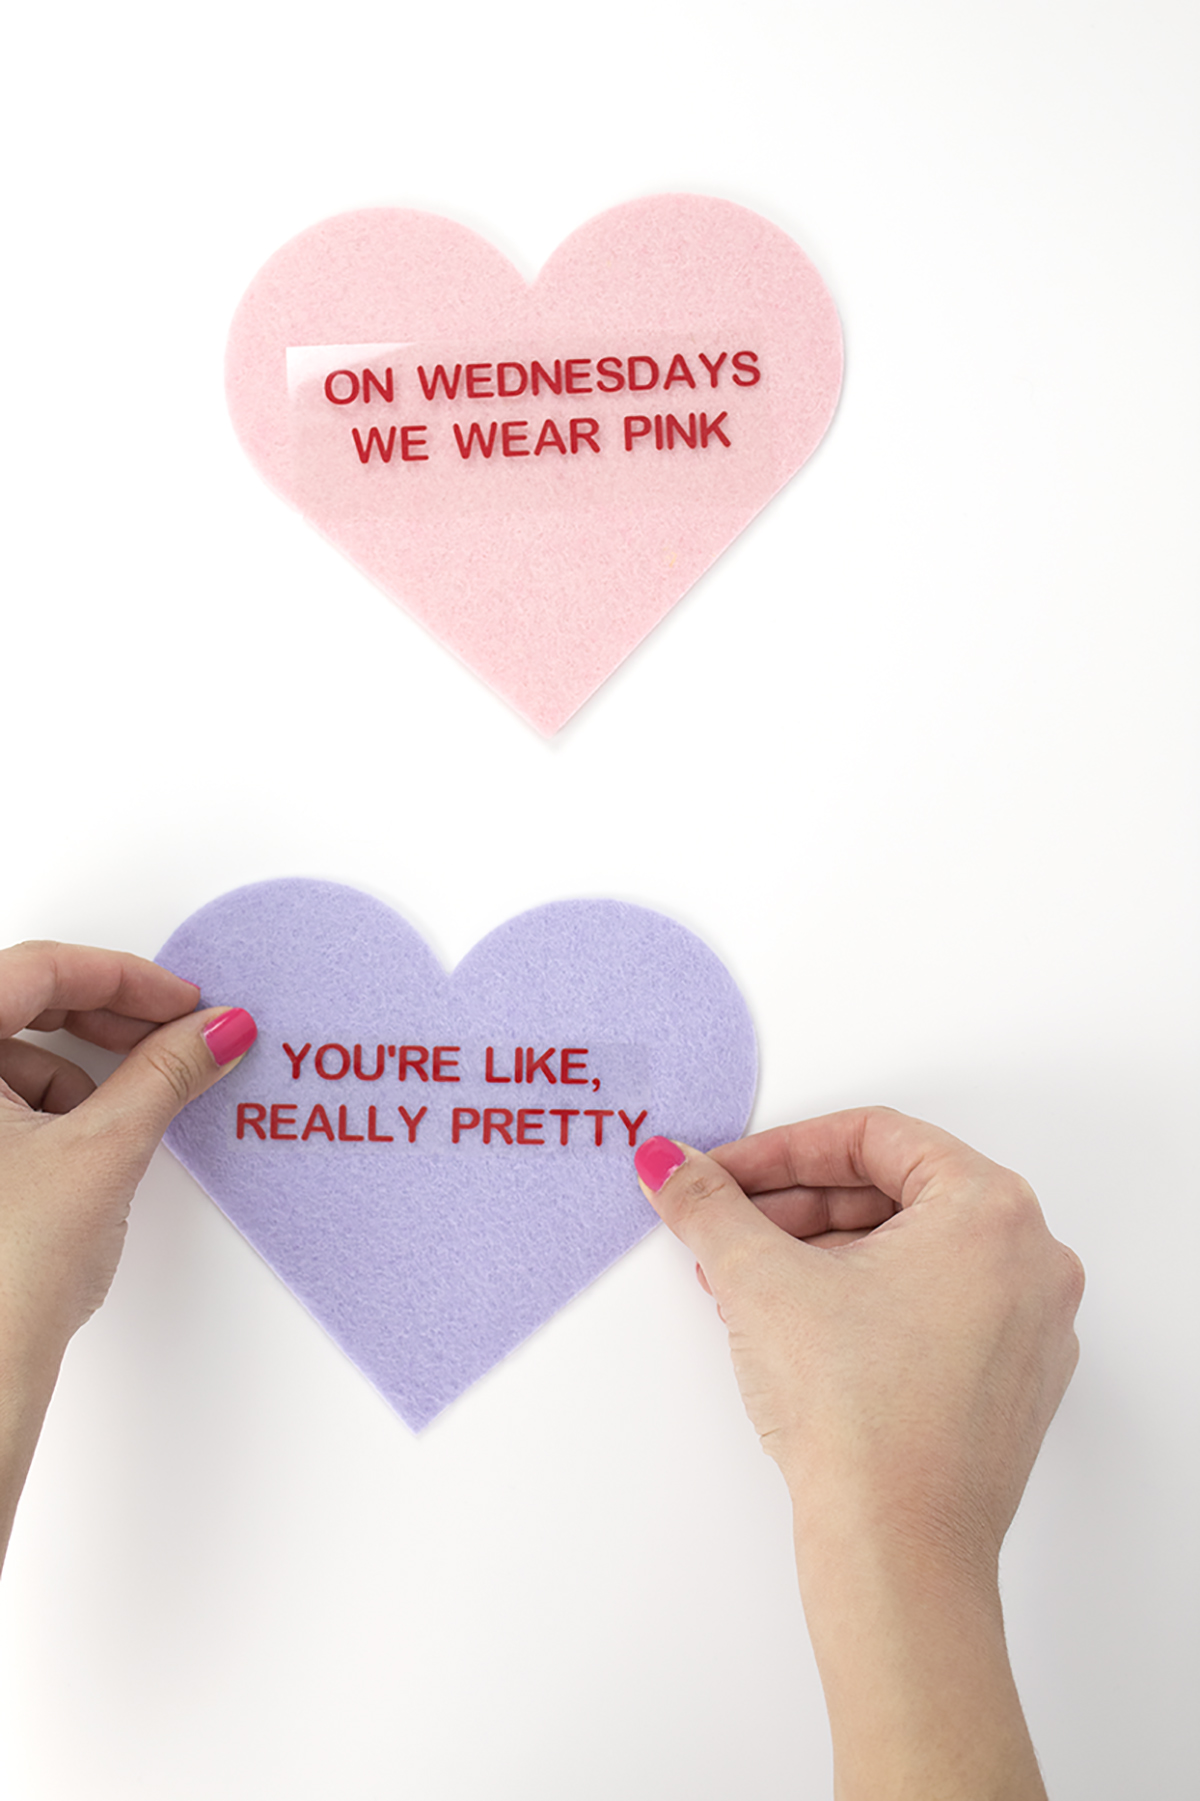
See how the E and the D in "Wednesday" are connected? That's because I'm peeling it the "wrong" way and it ripped the vinyl. It's not a big deal at all, because that's a scrap section anyway, but it makes it easier to peel if you go with the grain.

Cricut iron-on vinyl is actually pretty simple to use, as long as you know which way the vinyl goes and how to make sure your letters aren't backwards. Click for the full tutorial, along with how to make some Mean Girls conversation hearts!

6. Once you've pulled away the excess Cricut vinyl, go back and remove the excess vinyl in the letter holes, or any that was left over. Flip it over and double check that everything is where it should be.

Cricut iron-on vinyl is actually pretty simple to use, as long as you know which way the vinyl goes and how to make sure your letters aren't backwards. Click for the full tutorial, along with how to make some Mean Girls conversation hearts!

7. Center your quote on your conversation heart and press it down. To make sure it's evenly centered, I would look at a few things, like which word is in the center of the heart, how much distance is on either side, and how far it is from the top. If you're still not sure, take a quick picture with your phone to see if it's off center or crooked.

Give your sweetheart candies a little bit of attitude this year by making them into Mean Girls Conversation Hearts. So Fetch! Click for the full tutorial, along with how to use Cricut iron on vinyl.

8. Use your iron to carefully iron your quote onto the heart. Use the wool/low setting and place a cloth over it so you don't scorch the felt. Then, flip your heart over and iron the underside. If you have a small craft iron, you may be able to do it without a cloth like I did.

Give your sweetheart candies a little bit of attitude this year by making them into Mean Girls Conversation Hearts. So Fetch! Click for the full tutorial, along with how to use Cricut iron on vinyl.

9. Let it cool, then peel the liner off from the corner. Do this carefully to make sure all the letters fully adhered. If not, go back over it again, let it cool, and continue peeling.

Give your sweetheart candies a little bit of attitude this year by making them into Mean Girls Conversation Hearts. So Fetch! Click for the full tutorial, along with how to use Cricut iron on vinyl.

Once all your quotes are ironed on, you can begin arranging your banner! See how I did that below.

Give your sweetheart candies a little bit of attitude this year by making them into Mean Girls Conversation Hearts. So Fetch! Click for the full tutorial, along with how to use Cricut iron on vinyl.
Cricut iron-on vinyl is actually pretty simple to use, as long as you know which way the vinyl goes and how to make sure your letters aren't backwards. Click for the full tutorial, along with how to make some Mean Girls conversation hearts!

Making your banner

1. Arrange your hearts in the order you'd like to see them, or by color.

Give your sweetheart candies a little bit of attitude this year by making them into Mean Girls Conversation Hearts. So Fetch! Click for the full tutorial, along with how to use Cricut iron on vinyl.

2. Cut a small piece of ribbon. This will act as a "tape" to hold the hearts together.

Give your sweetheart candies a little bit of attitude this year by making them into Mean Girls Conversation Hearts. So Fetch! Click for the full tutorial, along with how to use Cricut iron on vinyl.

3. Glue the ribbon onto the hearts at the widest part. Be sure to hold them as close together as you can to prevent a gap from forming between the hearts. I used pink ribbon, but a white one will probably camouflage the best. You can't really see it when you flip the banner over, so technically it doesn't matter.

Give your sweetheart candies a little bit of attitude this year by making them into Mean Girls Conversation Hearts. So Fetch! Click for the full tutorial, along with how to use Cricut iron on vinyl.

I also recommend adding some extra ribbon or twine at the ends to hang it. I originally didn't want to do that, but taping felt on a wall is basically impossible.

Give your sweetheart candies a little bit of attitude this year by making them into Mean Girls Conversation Hearts. So Fetch! Click for the full tutorial, along with how to use Cricut iron on vinyl.

Woohoo! Now, hang up your banner and revel in the joy of a Mean Girls Valentine's Day. You can also paste up some hearts as a party backdrop! This is my best Mean Girls face. Slightly friendly, slightly fierce, 100% Fetch. 

Give your sweetheart candies a little bit of attitude this year by making them into Mean Girls Conversation Hearts. So Fetch! Click for the full tutorial, along with how to use Cricut iron on vinyl.

P.S. "And none for Gretchen Weiners. Bye!" is basically my favorite Mean Girls quote, and I use it in everyday life. It has so many practical uses.

Give your sweetheart candies a little bit of attitude this year by making them into Mean Girls Conversation Hearts. So Fetch! Click for the full tutorial, along with how to use Cricut iron on vinyl.

So you agree? You think you're really pretty?

Give your sweetheart candies a little bit of attitude this year by making them into Mean Girls Conversation Hearts. So Fetch! Click for the full tutorial, along with how to use Cricut iron on vinyl.

I really need to start wearing pink on Wednesdays. I mean, that's just like, the rules of feminism

Give your sweetheart candies a little bit of attitude this year by making them into Mean Girls Conversation Hearts. So Fetch! Click for the full tutorial, along with how to use Cricut iron on vinyl.

So what's your favorite Mean Girls quote? Is it one I missed? Let me know in the comments below!

DIY 90's Pun Valentines

Remember when you were younger and you'd be watching TGIF while flipping through a magazine to find your favorite celebrities? Then, once you were done reading, you'd cut them out of the magazine and stick them onto everything and anything you owned? Well, this year we are making Valentines that your 13-year old self would approve of. Plus, since the pictures are being printed (instead of cut out of a magazine) you can make as many as you need. These Valentines are so fun to make because pretty much everything is computer-based these days, and these are so hands-on. You can't center the text or copy and paste. Each letter has to be placed on individually. It's equal parts horrifying and enjoyable. In the end, you've got a one-of-a-kind Valentine for all your BFF's.

This year, make Valentines that your 13-year old self would approve of. They're perfect for your best friend, your boyfriend, or Galentines Day! Click for the full tutorial.

You will need:

This year, make Valentines that your 13-year old self would approve of. They're perfect for your best friend, your boyfriend, or Galentines Day! Click for the full tutorial.

Sticker letters (I got mine from Michael's, similar here)
Blank cards (from the Dollar Tree for only $1, or similar here)
Photo glue stick (this one is my fave!)
Scissors (here)
Rhinestones (here)
print outs of your fave celebs
an awesome 90's playlist

How to:

1. Find your favorite pics of 90's celebs, and put them in a word doc to make them an appropriate size. Print.

2. Cut out the images around the celebs' heads, cutting off the backdrops. If you're anything like me, you're a seasoned pro at this, and it'll be a piece of cake. If not, don't worry, the memories will all come flooding back to you ;)

This year, make Valentines that your 13-year old self would approve of. They're perfect for your best friend, your boyfriend, or Galentines Day! Click for the full tutorial.

3. Arrange the cutouts and letters onto your card and adhere. HINT: Make sure you are sticking things on the right way otherwise your card will be upside down. 

This year, make Valentines that your 13-year old self would approve of. They're perfect for your best friend, your boyfriend, or Galentines Day! Click for the full tutorial.

4. As a bonus, add some awesome yet cheesy stickers onto the card or the front of the envelopes. I got my heart shaped rhinestone stickers from the Dollar Tree (similar here).

This year, make Valentines that your 13-year old self would approve of. They're perfect for your best friend, your boyfriend, or Galentines Day! Click for the full tutorial.

Although they take a little time, these cards are super cheap to make. Plus, it's so different than everything we are used to. Once you stick the letters down, they're pretty much stuck there. It won't be perfect, and that's what makes them great. If you want to add some super fun straws, try these!

This year, make Valentines that your 13-year old self would approve of. They're perfect for your best friend, your boyfriend, or Galentines Day! Click for the full tutorial.

Fact: I had this Mandy Moore song stuck in my head for a solid 2 weeks while I was creating and posting these Valentines. I still have it stuck in my head, and I listen to it at least twice a day now. There's some debate as to whether Mandy Moore was as successful as some of the other pop stars of the 90's. Ummm... she became a Disney Princess in my favorite movie, so that makes her most successful in my book!

This year, make Valentines that your 13-year old self would approve of. They're perfect for your best friend, your boyfriend, or Galentines Day! Click for the full tutorial.

I'm not sure if No Doubt did a Valentine's Day shoot, but this photo is quite perfect for Valentines. Plus... I still want pink hair someday!

This year, make Valentines that your 13-year old self would approve of. They're perfect for your best friend, your boyfriend, or Galentines Day! Click for the full tutorial.

There are tons of pictures of NSYNC out there, but I think using ones with heartthrobs holding puppies is so classically 90's.

This year, make Valentines that your 13-year old self would approve of. They're perfect for your best friend, your boyfriend, or Galentines Day! Click for the full tutorial.

This is a perfect Valetine to give your crush, because I think all the guys had a crush on Britney at some point in the 90's.

This year, make Valentines that your 13-year old self would approve of. They're perfect for your best friend, your boyfriend, or Galentines Day! Click for the full tutorial.

Aww, Zack and Kelly. Even though they may not have remained together, we were always rooting for them as a couple.

This year, make Valentines that your 13-year old self would approve of. They're perfect for your best friend, your boyfriend, or Galentines Day! Click for the full tutorial.

The best part of this card is that the video for All the Small Things is basically mocking all the 90's boy bands we loved in the best way possible. PS- Travis will forever be my crush.

This year, make Valentines that your 13-year old self would approve of. They're perfect for your best friend, your boyfriend, or Galentines Day! Click for the full tutorial.

In the classic *NSYNC vs BSB fight, I always picked *NSYNC. It was the first CD I ever bought, I had the biggest crush on Justin Timberlake, and I thought their songs were better. But, I always thought AJ was kinda cute. I think I had a thing for bad boys as a pre-teen.

This year, make Valentines that your 13-year old self would approve of. They're perfect for your best friend, your boyfriend, or Galentines Day! Click for the full tutorial.

Aww. Christina Aguilera before she got Dirrty. She used to have such a boho vibe. But I guess everyone did in the late '90's.

This year, make Valentines that your 13-year old self would approve of. They're perfect for your best friend, your boyfriend, or Galentines Day! Click for the full tutorial.

Did anyone else watch the Clueless tv show? I think I saw it before I saw the movie, so I was pretty confused as to why the Horowitzes seemed to shape shift. Interestingly enough, pretty much everyone else stayed the same.

This year, make Valentines that your 13-year old self would approve of. They're perfect for your best friend, your boyfriend, or Galentines Day! Click for the full tutorial.

And, of course, my personal FAVORITE, The Spice Girls. Any other Spice Girls super fans out there?! I had so many dolls, stickers, and magazines about the Spice Girls. My dad just kinda brought home the cassette tape one day because he saw that it was popular and wow... my sister and I were hooked! My favorite was Ginger Spice ;)

This year, make Valentines that your 13-year old self would approve of. They're perfect for your best friend, your boyfriend, or Galentines Day! Click for the full tutorial.

So what were your favorite things about the 90's? I'd also add in TGIF, platform shoes (which I wasn't allowed to wear), roll on glitter, and butterfly clips.

Are you planning to make some 90's pun Valentines for your BFF? What would they say? Let me know in the comments below!