DIY Monogram Christmas Stocking

About 6 years ago, my husband I grabbed some stockings from Target to hang up on our TV unit. They were cute and simple- red and white stockings with a letter for each of our names. As our family grew, we added additional stockings for cats, babies and a dog. The result was 7 matching stockings that I didn’t even necessarily like anymore! It seemed silly to buy new stockings when I had 7 perfect good ones, so I’ve just been putting them up year after year. However, this year I decided I would give them a bit of an update so that they can match my style more! This is something you can easily do to update any stocking, include those ordinary cheap red and white ones you can find anywhere. And it’s SO affordable that it’s almost free- I bet you have most of this stuff at home already!

*This post contains affiliate links

diy-monogram-stocking-12.jpg

You will need:


Yarn (similar here)
Glitter paper (similar here)
Felt (similar here)
Scissors (similar here)
Glue gun (similar here)
Pencil & wax paper /printer (similar here)
Pom-pom maker (here)
Cardboard 
Old stocking (similar here)

collage 1.png

Directions:

  1. The first step is to create your letter for your stocking. You have 3 options:

    • If your stocking already has a letter: Trace over your current letter by using wax paper.

    • Already has a letter, option 2: Print out a template on your computer of a similar sized font that will cover it completely.

    • If your stocking doesn’t have a letter: Print out a template of a letter you like and a slightly larger version of it. A great option for this would be to use a font with an outline, since it will naturally have 2 sizes within it. Something like this.

  2. Cut your glitter paper slightly larger than your felt. In the end, you want to create a felt letter that is slightly larger than your original letter on your stocking.

  3. Glue your felt letter onto your glitter card stock.

  4. Place a piece of cardboard inside your stocking to prevent the glue from seeping to the backside. Glue your letter in the center or over your old letter.

  5. Create pom-poms using a pom-pom maker. You can find directions for that here. You can also create tassels by following this this tutorial here. Feel free to embellish using jingle bells too!

  6. Attach the pom-poms, tassels and any other embellishments to the hook that is used to hold your stocking up. You can also either glue or sew them onto the inside flap, or use a safety pin!

before after.png
diy-monogram-stocking-10.jpg

Then, hang up your fancy “new” stocking and admire your handiwork. You can totally change up your old holiday decor with this! I was able to take my traditional stockings in basic Christmas colors and change them to match my more colorful and fun aesthetic. They definitely feel more “me” now!

And that’s all there is to it! Now you’re got a great monogram stocking, or spruced up an old stocking to have a new look! Will you be giving your old stockings a new look? What colors do you use to decorate? Let me know your plans in the comments below!

DIY Pennant Flag Puns

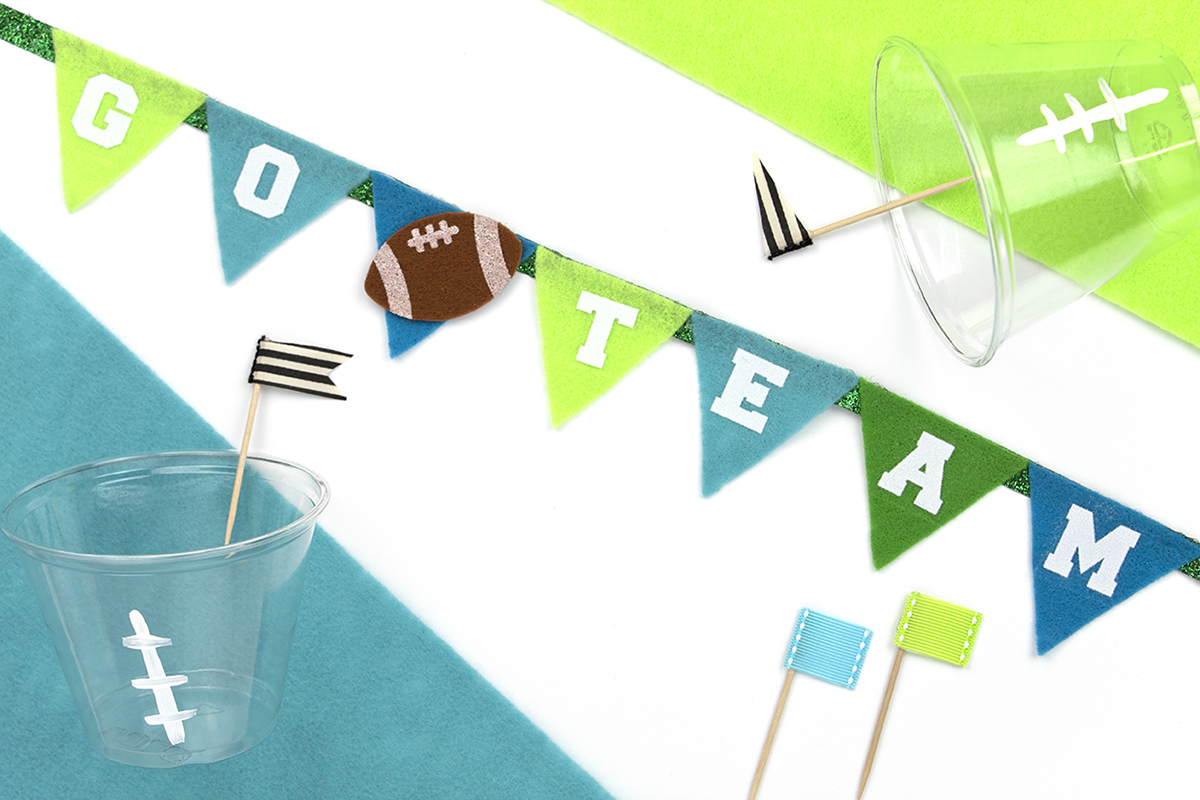
Everyone is super excited about the Super Bowl, and I’m like cool... an excuse to have a party and eat! I’ve never really been into sports (or good at them...) so I figured for Super Bowl, I’ll just do what I do best... crafting! Since I don’t even know who’s playing, I figured I’d keep it nice and generic with some colorful, silly pennant flags that you can use for pretty much any football game in the future. And since I’m ridiculous, they’re full of funny sayings. That’s right- you can make some PUN-nant flags for your home! (see what I did there?!)

Pennant Flag Puns 18.jpg

You will need:

Pennant Flag Puns 5.jpg

Felt (similar here)
Cricut (here)
White iron-on vinyl (here)
Printer (I have this one and love it!)
Pennant template (here)
Cricut Template (here)
Iron (here)
Felt Scraps
Brown acrylic paint (here)
Glue gun
Cricut supplies & fabric scissors (here and here)
Felt football stickers (similar here)

Directions

Pennant Flag Puns Collage.jpg
  1. Cut out your vinyl on the cricut and get it ready for ironing. To learn more about using Cricut iron-on vinyl (with full instructions!) check out this post.
  2. Using your template, cut your pennant flags out of felt. If you position them efficiently, you can get at least 2 flags out of 1 piece of felt. 
  3. Iron your quotes onto the pennant flags. Let cool fully before peeling. See this post for more info.
  4. Create your felt embellishments as per the instructions below.
  5. Glue your embellishments onto the pennant flag using a glue gun.

For the finger:

Pennant Flag Puns 13.jpg

Cut a hand and finger shape out of pink felt. If you’re not sure of the shape, use a photo from online and trace it as a template onto the felt. Add a perimeter with white paint, then paint little triangles below the perimeter for knuckles. Once your paint has dried, iron the #1 onto the foam finger, then glue onto your flag. 

For the cookie:

Pennant Flag Puns cookies.jpg

Cut a squiggly oval out of tan felt. Using brown paint, add small dots for chocolate chips. My paint was named Melted Chocolate- how perfect! Let dry, then glue onto the flag. 

For the beer cup:

Pennant Flag Puns beer.jpg

Cut the shapes out of felt- a cup with handle, an oval with a flat top for the beer, a smaller oval with a flat top for the accent color, and white foam. I also cut an additional cup handle for more depth, which was basically a C-shape. Fold the cup in half, then cut the middle out of the handle. Trim as needed. Glue the felt pieces together and then glue your cup onto your flag. 

Pennant Flag Puns 14.jpg
Pennant Flag Puns 17.jpg
Pennant Flag Puns 16.jpg
Pennant Flag Puns 15.jpg

So what do you do with these now? Add a ribbon and hang them up! Or, add a stick and let your pun-nant flag fly! Or, uh... wave? What great football puns did I miss? Let me know in the comments below!

DIY Brightest Crayon Costume

Back in high school, my sister, my friend and me had matching screen names on AOL Instant Messenger. Remember AIM? RIP.... Anyway, we used to always get BFF necklaces and stuff, which always came with 3 colors- blue, pink and purple. We all had our colors that we usually wore, so we matched them on our screen names. Unfortunately, PURPLECRAYONS182 was too long, so I had to switch it up. I was going through a punk rock phase (insert laughing emoji here) so I went with black crayons. After that, we were known in our high school as The Crayons by pretty much everyone. If someone didn't know who we were they would say "she's one of the crayons" and then people would know. I realize this makes us sound popular or something, but I guarantee you, we were not. People actually hated us, for no good reason, but that's a story for another day....

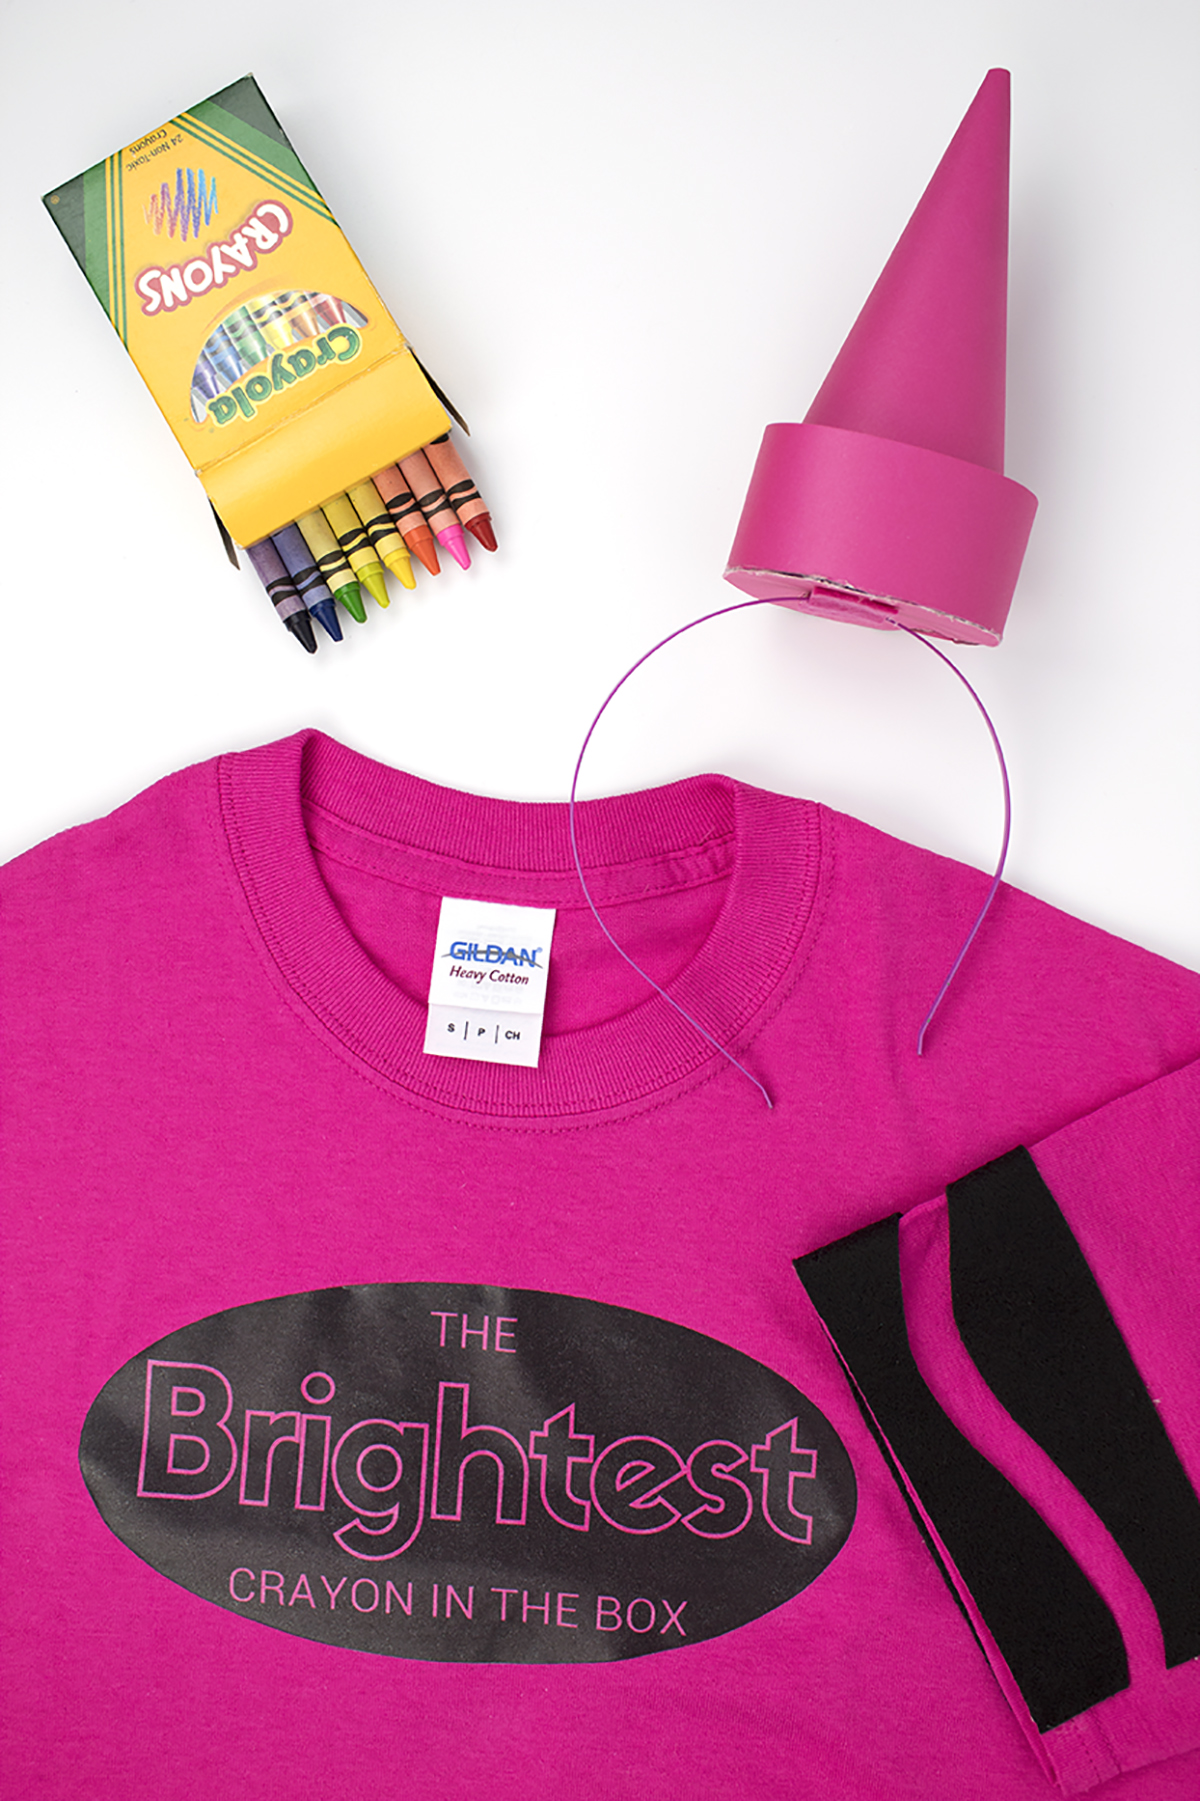
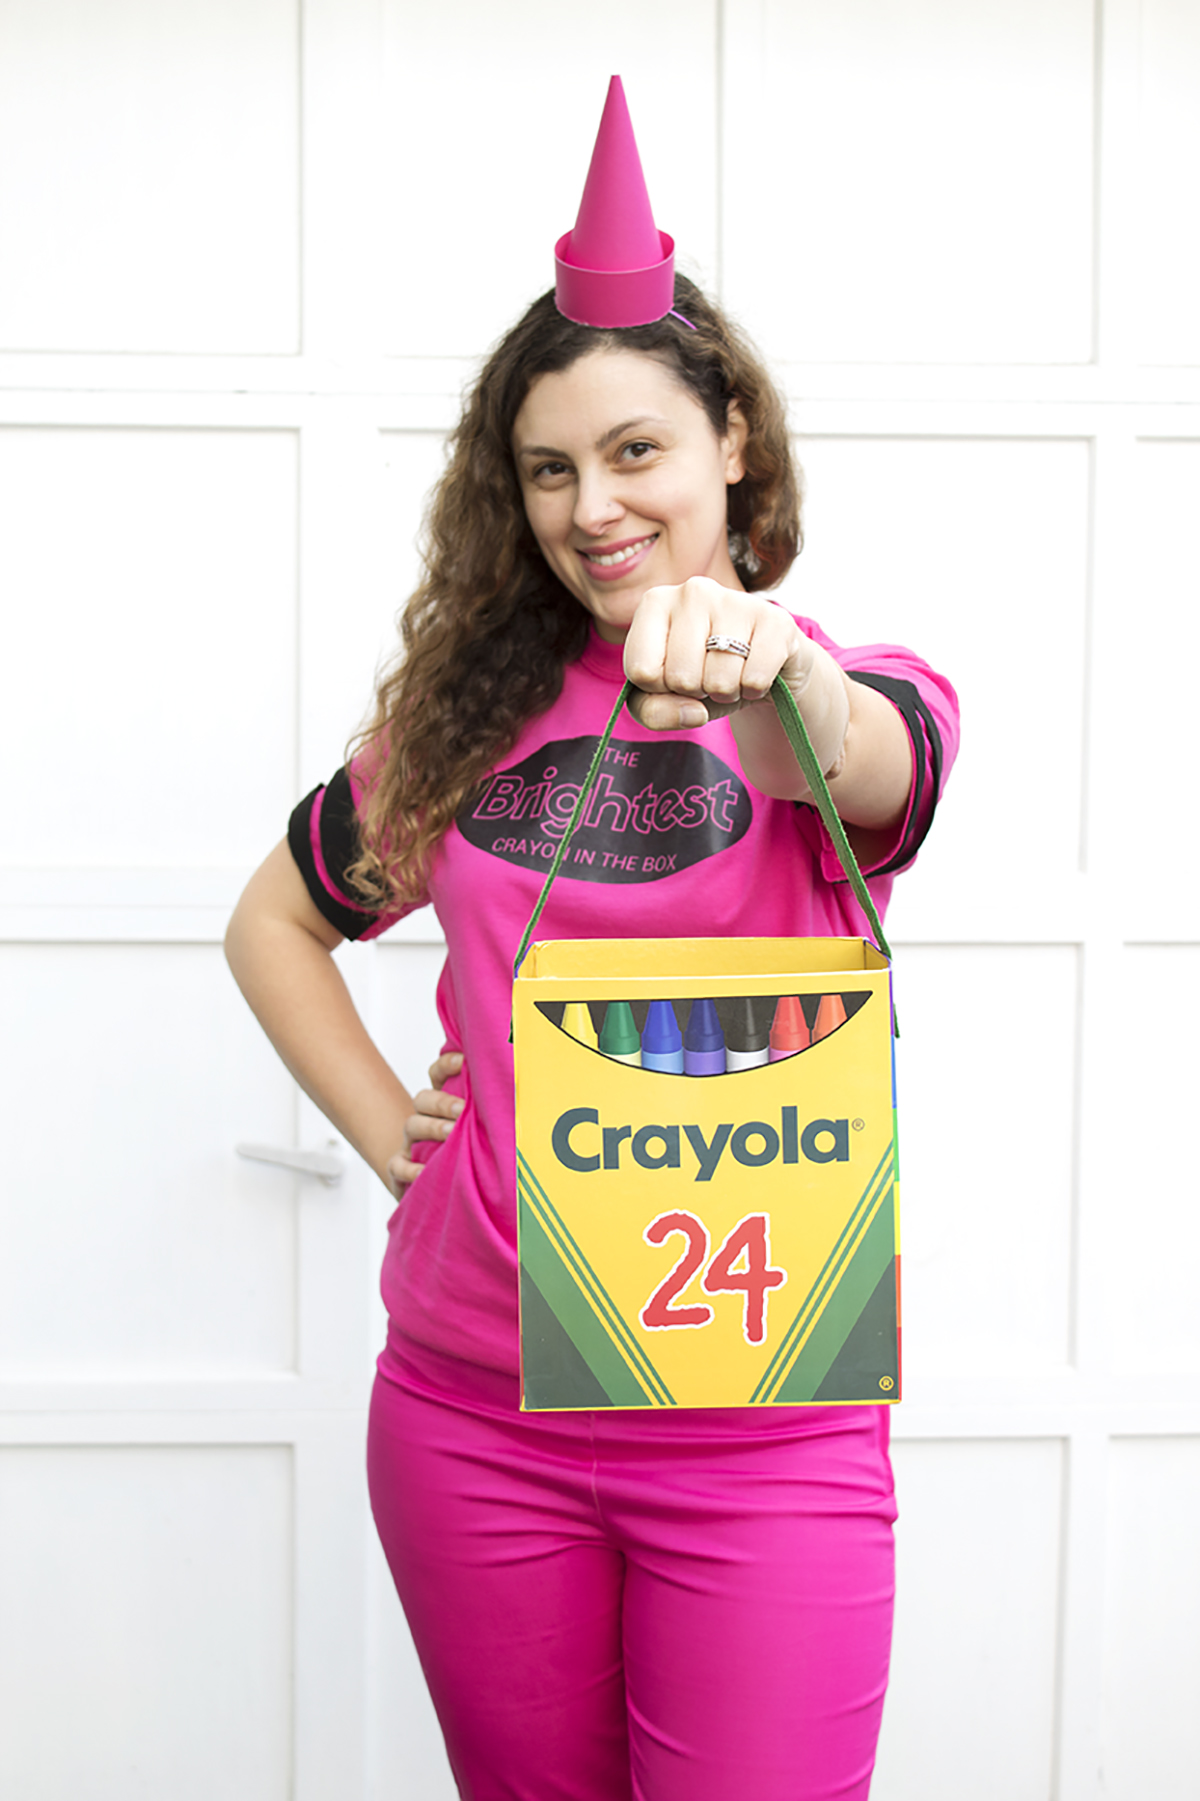
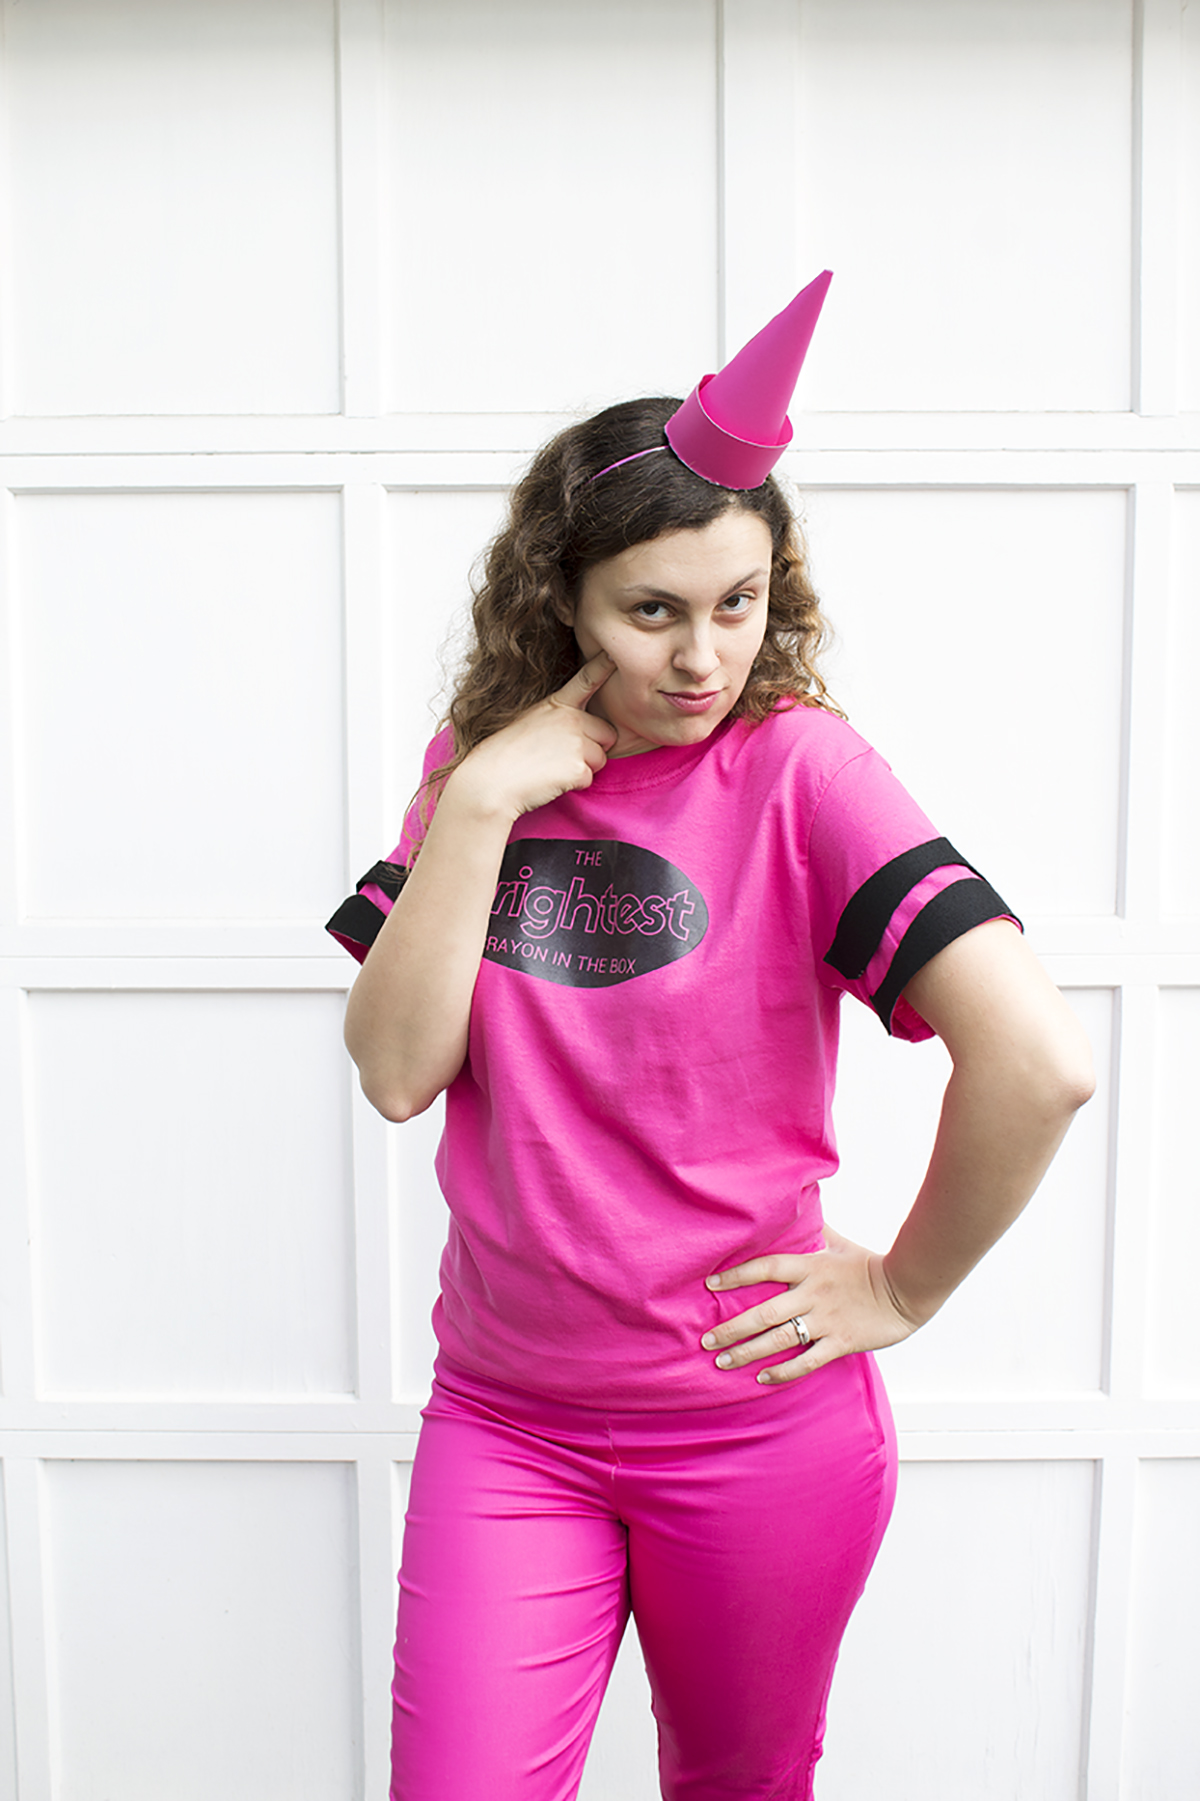
To commemorate my time as a crayon in high school, I knew I had to make a crayon costume for the blog. And, since I was a black crayon in high school, I knew I now had to change my look and be the BRIGHTEST crayon in the box. Because let's face it, I'm usually wearing the brightest colors of everyone I know, a la Kimmy Schmidt. This is sadly my last T-shirt costume of the year, but I'm so excited to show it to you! Plus, unlike most costumes, this is not "one size fits most". I've got the printable in a whole BUNCH of sizes, so you can make one for each member of the family!

Why be an ordinary crayon when you can be the BRIGHTEST crayon in the box?! Check out this DIY crayon costume project, and download the free printable so that you can be the brightest crayon too! Click for the full DIY. #crayoncostume #lastminutecos…
Why be an ordinary crayon when you can be the BRIGHTEST crayon in the box?! Check out this DIY costume project, and download the free printable so that you can be the brightest crayon too! Click for the full DIY. #crayoncostume #lastminutecostume #g…

You will need:

Why be an ordinary crayon when you can be the BRIGHTEST crayon in the box?! Check out this DIY costume project, and download the free printable so that you can be the brightest crayon too! Click for the full DIY.

For the outfit:

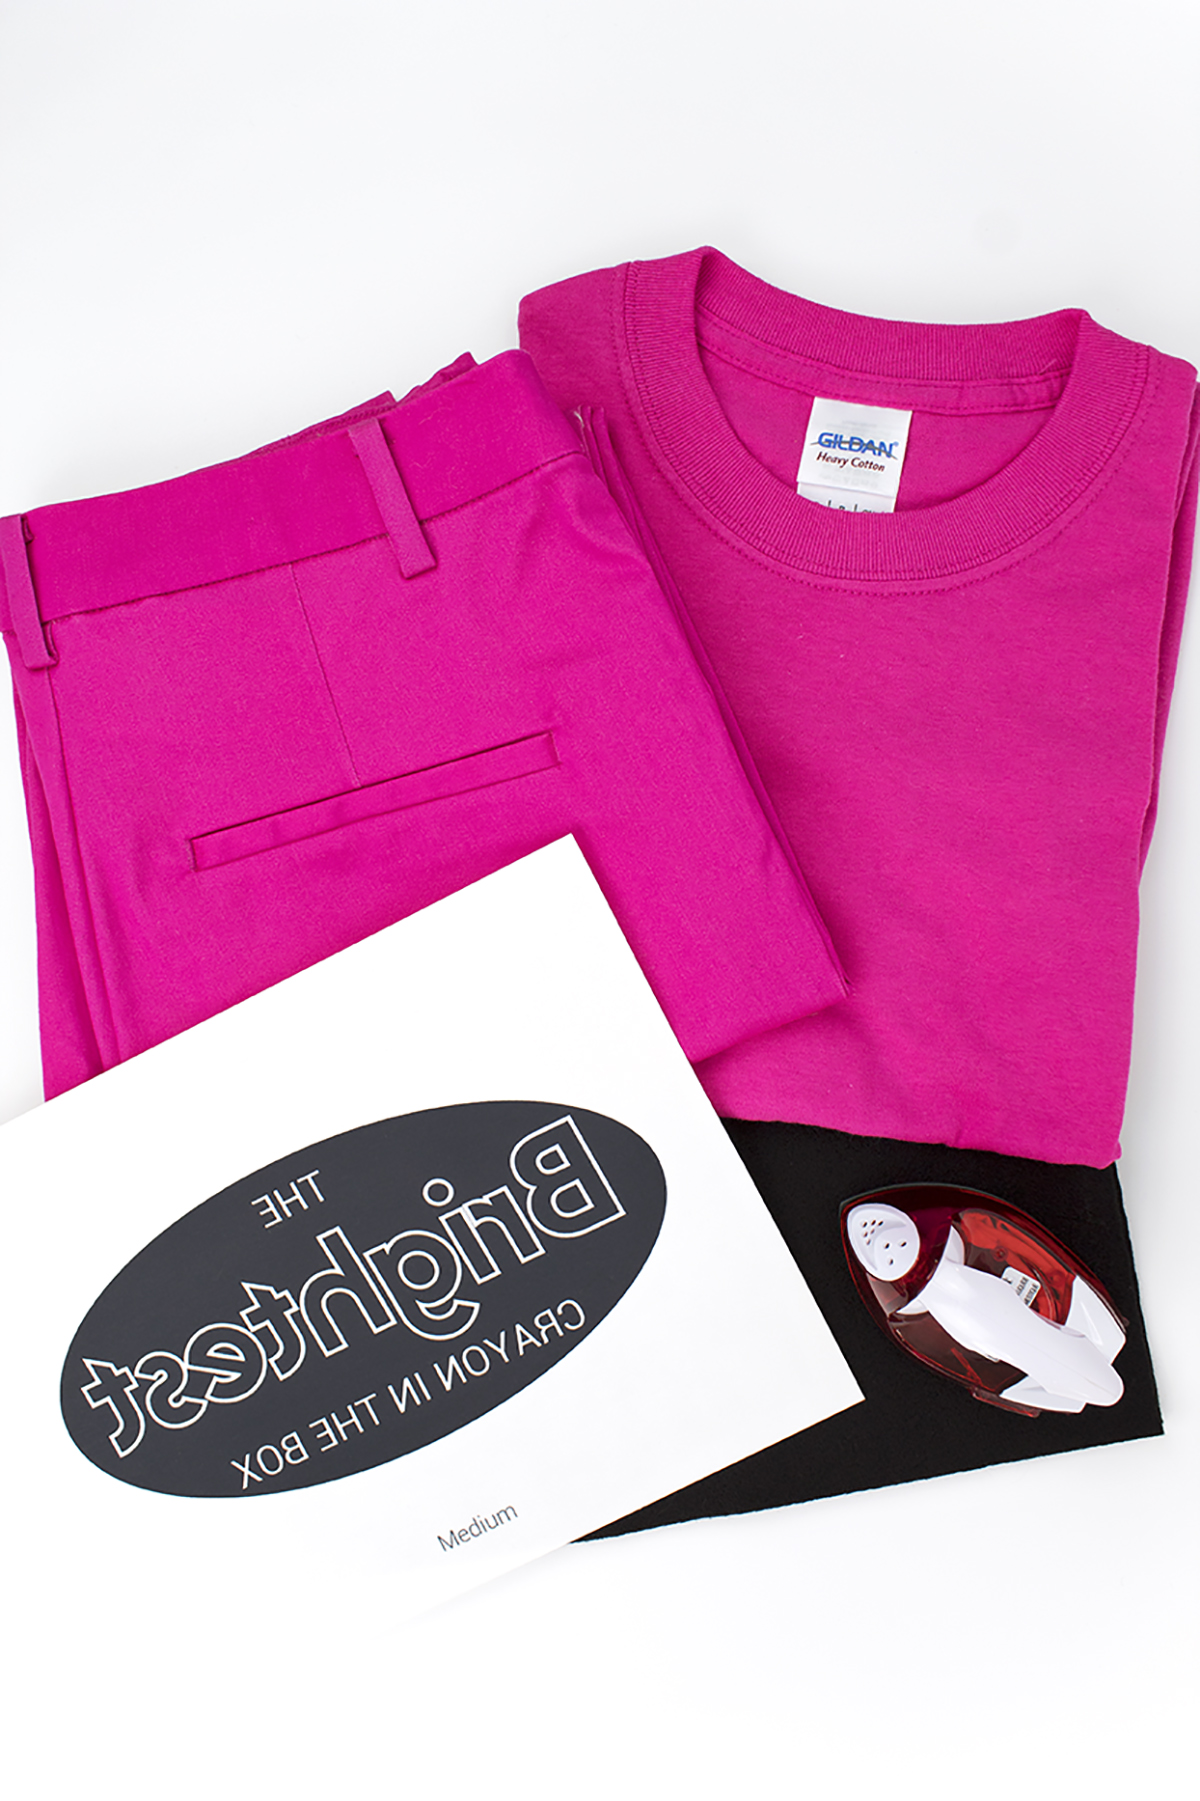
Cotton t-shirt (Gildan recommended)
Matching pants (mine are from H&M)
Iron-on transfer paper (here)
Black felt (1 sheet)
Chalk (here)
Printable (FREE! See below for more info)
Printer (I have this one and love it!)
Needle & thread
Iron
Glue gun
Scissors (here)

For the hat:

Matching cardstock (mine was double sided pink & light pink)
Glue gun
Pencil
Ruler
Scissors (here)
Large bowl (optional)

The printable is available in my resource library, which you can get totally FREE access to, just by signing up. What exactly do you get? Access to all my printables, including party planning guides, checklists, and my projects. By signing up, you'll have access to all projects- past, present and future! 


For the Shirt & Pants:

Why be an ordinary crayon when you can be the BRIGHTEST crayon in the box?! Check out this DIY costume project, and download the free printable so that you can be the brightest crayon too! Click for the full DIY.
  1. It's recommended to prewash your fabric. Run a lint roller over the part where the logo will go. I learned from last time any stray hairs or lint will get permanently embedded under your iron-on transfer.

  2. Print out your iron on transfer in the appropriate size (it comes in 5 sizes!) and cut it out as close to the edge as you can. This iron-on paper is intended for light fabrics, but I wanted one that was clear so that the shirt color would peek through on the font.

  3. Plan out where on your shirt you want to place the logo. Following the instructions, iron it on and let fully cool before peeling.

  4. Take your felt and fold in half the long way, then half again the long way. If your shirt is on the larger side or it's for a man, it might work better to fold it in thirds instead.

  5. With chalk, draw a squiggle pattern & cut it out.

  6. Using your glue gun, secure your felt onto your shirt. I advise putting the seam of the felt (where the 2 ends meet) along the seam of your shirt sleeve. If it's a little short, it'll be covered under your armpit.

  7. For the pants, you can also glue it on but I stitched mine with a needle and thread. I used large, simple stitches so that I can remove the felt and wear the pants again :)


For the Hat

Why be an ordinary crayon when you can be the BRIGHTEST crayon in the box?! Check out this DIY costume project, and download the free printable so that you can be the brightest crayon too! Click for the full DIY.
  1. Create a template for your hat onto white paper. As a hack, you can use a large bowl or round object and trace it onto the white paper, but I found that drawing a sweeping line did the trick for me.

  2. Trace your template onto the back side of your colored paper. Mine was double sided pink and light pink, which was helpful for the crayon base.

  3. Trace a small round object to be the bottom of your hat. I used the top from my fruit container, which was a great size. You want an item that is slightly larger than your cone.

  4. Draw a long rectangle, about 2-3 inches wide for your crayon hat base. I made mine as wide as the space that was left after drawing my cone.

  5. Cut out your parts, then cut the small tip off your flattened cone. You want it to have a flat pointed edge, like a crayon.

  6. Roll your hat into a cone and glue it shut. Trim off any excess paper that prevents it from being flat at the bottom.

  7. Glue the cone onto your base, and trim off the excess.

  8. Glue your rectangle ends together to make a "bracelet", then slip it onto your hat. Glue in place.

  9. Add a clip or headband to secure the hat onto your head. Be sure to add a piece of felt to hold it together, since the paper won't glue onto the headband well. (Check out the crown in this DIY for more info)

Why be an ordinary crayon when you can be the BRIGHTEST crayon in the box?! Check out this DIY costume project, and download the free printable so that you can be the brightest crayon too! Click for the full DIY. #crayoncostume #lastminutecostume #g…
Why be an ordinary crayon when you can be the BRIGHTEST crayon in the box?! Check out this DIY costume project, and download the free printable so that you can be the brightest crayon too! Click for the full DIY.  #crayoncostume #lastminutecostume #…

T-shirt: $4
Headband/Hair Clip: $1
Felt: $1
Caardstock Paper: $2
Iron-ons: $9

Total cost: $17

I'd say that's a pretty good cost for a Halloween costume! If you already have a pair of colored jeans, I recommend starting there so that you can save some moolah overall. I actually had these pants already, and the shirt was the exact perfect color to match! I borrowed the crayon box bucket from my neighbor, who was super sweet and let me take some pics in front of her nice white garage door. She got it at a Halloween store, but I bet you could even make a similar one with a picture from online! Overall I'm pretty darn happy with this crayon costume, and I hope you guys are too!

Easy Football Party Crafts

Is it football season yet? I only know the fall for pumpkin picking, apple cider everything, and the ability to totally switch up my wardrobe. However, I know there's a whoooole bunch of people that love it for football! My fiancé is one of those people, so once in a while we hang out with the gang and watch a football game. He's a "less is more" type of guy, and I'm a "what else can we add?" type of gal, so I came up with a happy medium. 

Is it football season yet? I whipped up these easy crafts for your next football gathering. They're quick to make, and feature craft supplies you probably have at home. They're perfect for a mini football party! Click for the DIY.

I whipped up these easy crafts for Mariah at Giggles Galore. They're quick to make, and feature craft supplies you probably have at home. They're perfect for a mini football party. This month, I did not one, but TWO blog posts for her! You can find them here and here.

Is it football season yet? I whipped up these easy crafts for your next football gathering. They're quick to make, and feature craft supplies you probably have at home. They're perfect for a mini football party! Click for the DIY.

So be sure to head over to Giggles Galore now to see how to make these Easy Football Party Crafts and Football Flag Stirrers and Cups.

DIY Mean Girls Conversation Hearts Banner (and how to use Cricut Iron On Vinyl!)

There are some movies that you watch once and enjoy, but never really have the desire to see again. Then, there are those movies that you watch over and over again until you've memorized practically every word. Mean Girls is one of those movies. If you can't recite at least one of those memorable quotes, then you can't sit with us! It's got Lindsay Lohan at the peak of her career, Tina Fey's comedy, Rachel McAdams & Amanda Seyfriend before they were super famous, and Lacey Chabert from everyone's favorite show, Party of Five (people liked that show, right? I never watched it...). Combine that with the awesome 2004 fashion sense, the catchy lines, the harsh reality of frenemies, and the fact that you always wanted to be popular, and you've pretty much got the makings of a FANTASTIC movie. It was basically made by girls, for girls, so there's no way it wouldn't succeed. PS, can we talk about how everyone in Mean Girls wore lip gloss?! I'm not sure about you guys, but I don't wear lip gloss anymore. Is that just a high school thing? Idk...

Give your sweetheart candies a little bit of attitude this year by making them into Mean Girls Conversation Hearts. So Fetch! Click for the full tutorial, along with how to use Cricut iron on vinyl.

With Valentine's Day coming up, I wanted to make something fun with some felt hearts I picked up at Target. They look to me like Conversation Hearts candy, which are usually boringly sweet. "U R CUTE"? "CALL ME"? C'mon.... But, what if they were sorta sassy instead? PERFECT OPPORTUNITY for a Mean Girls DIY. Just sayin'.

Go grab some popcorn, your Mean Girls DVD, and your glue gun. This is going to be Grool!

You will need:

Cricut iron-on vinyl is actually pretty simple to use, as long as you know which way the vinyl goes and how to make sure your letters aren't backwards. Click for the full tutorial, along with how to make some Mean Girls conversation hearts!

Cricut Explore Air Machine (here)
Pastel felt hearts (from Target)
Iron (here)
Red iron-on transfer (here)
Cricut tool kit or Tweezers (here)
Ribbon
Glue gun

I know what you're thinking..."How do I use Cricut iron on vinyl?" I knew you'd ask, so I have just the tutorial for you. How did I know? I have a fifth sense... It's like I have ESPN or something. The iron on vinyl is actually pretty simple to use, as long as you know which way the vinyl goes and how to make sure your letters aren't backwards.

How to Use Cricut Iron-On Vinyl

1. Open the Mean Girls Conversation Hearts Candy document in Cricut Design Space. 

Cricut iron-on vinyl is actually pretty simple to use, as long as you know which way the vinyl goes and how to make sure your letters aren't backwards. Click for the full tutorial, along with how to make some Mean Girls conversation hearts!

2. Take your red iron-on vinyl and place it on your cutting sheet, liner side down. You'll be cutting the vinyl (matte side), so that means the shiny side goes down.

Cricut iron-on vinyl is actually pretty simple to use, as long as you know which way the vinyl goes and how to make sure your letters aren't backwards. Click for the full tutorial, along with how to make some Mean Girls conversation hearts!

3. Set up the file to cut on your Cricut machine by following the steps below. 

a. Set your Cricut machine mode to vinyl +

Cricut iron-on vinyl is actually pretty simple to use, as long as you know which way the vinyl goes and how to make sure your letters aren't backwards. Click for the full tutorial, along with how to make some Mean Girls conversation hearts!

b. Press Go

Cricut iron-on vinyl is actually pretty simple to use, as long as you know which way the vinyl goes and how to make sure your letters aren't backwards. Click for the full tutorial, along with how to make some Mean Girls conversation hearts!

c. Set to mirror image! This is very important, since your text needs to be backwards so that it'll be the right way when you finish.

Cricut iron-on vinyl is actually pretty simple to use, as long as you know which way the vinyl goes and how to make sure your letters aren't backwards. Click for the full tutorial, along with how to make some Mean Girls conversation hearts!

c. Load your Cricut cutting mat and start cutting.

Cricut iron-on vinyl is actually pretty simple to use, as long as you know which way the vinyl goes and how to make sure your letters aren't backwards. Click for the full tutorial, along with how to make some Mean Girls conversation hearts!

d. Wait for the Cricut machine to cut your file. Mine wouldn't cut the full document in one shot (annoying!) so after it stopped each time, I would remove the ones it cut from the document/cutting mat, reload the mat, and start cutting again.

Cricut iron-on vinyl is actually pretty simple to use, as long as you know which way the vinyl goes and how to make sure your letters aren't backwards. Click for the full tutorial, along with how to make some Mean Girls conversation hearts!

Look at all those fabulous quotes just waiting to get out there into the world!

Cricut iron-on vinyl is actually pretty simple to use, as long as you know which way the vinyl goes and how to make sure your letters aren't backwards. Click for the full tutorial, along with how to make some Mean Girls conversation hearts!

4. Once your document has finished cutting on the Cricut machine, carefully cut around each quote. It's best to cut as close as you can to the letters, and try to make the border around each side even. This will make it easier to center them on the conversation hearts.

Cricut iron-on vinyl is actually pretty simple to use, as long as you know which way the vinyl goes and how to make sure your letters aren't backwards. Click for the full tutorial, along with how to make some Mean Girls conversation hearts!

5. Peel off the remaining vinyl, aka the extra red background. You'll be left with the clear liner and your letters. To do this, I take my Cricut hook tool and scrape a corner to make a hole.

Cricut iron-on vinyl is actually pretty simple to use, as long as you know which way the vinyl goes and how to make sure your letters aren't backwards. Click for the full tutorial, along with how to make some Mean Girls conversation hearts!

Then, I carefully and slowly peel away the liner to reveal the letters beneath. I found that peeling the vinyl from left to right was easier, since most of the letters face that way. Otherwise, you're going against the grain. So, aka... not the way I'm doing it in the photos.

Cricut iron-on vinyl is actually pretty simple to use, as long as you know which way the vinyl goes and how to make sure your letters aren't backwards. Click for the full tutorial, along with how to make some Mean Girls conversation hearts!

See how the E and the D in "Wednesday" are connected? That's because I'm peeling it the "wrong" way and it ripped the vinyl. It's not a big deal at all, because that's a scrap section anyway, but it makes it easier to peel if you go with the grain.

Cricut iron-on vinyl is actually pretty simple to use, as long as you know which way the vinyl goes and how to make sure your letters aren't backwards. Click for the full tutorial, along with how to make some Mean Girls conversation hearts!

6. Once you've pulled away the excess Cricut vinyl, go back and remove the excess vinyl in the letter holes, or any that was left over. Flip it over and double check that everything is where it should be.

Cricut iron-on vinyl is actually pretty simple to use, as long as you know which way the vinyl goes and how to make sure your letters aren't backwards. Click for the full tutorial, along with how to make some Mean Girls conversation hearts!

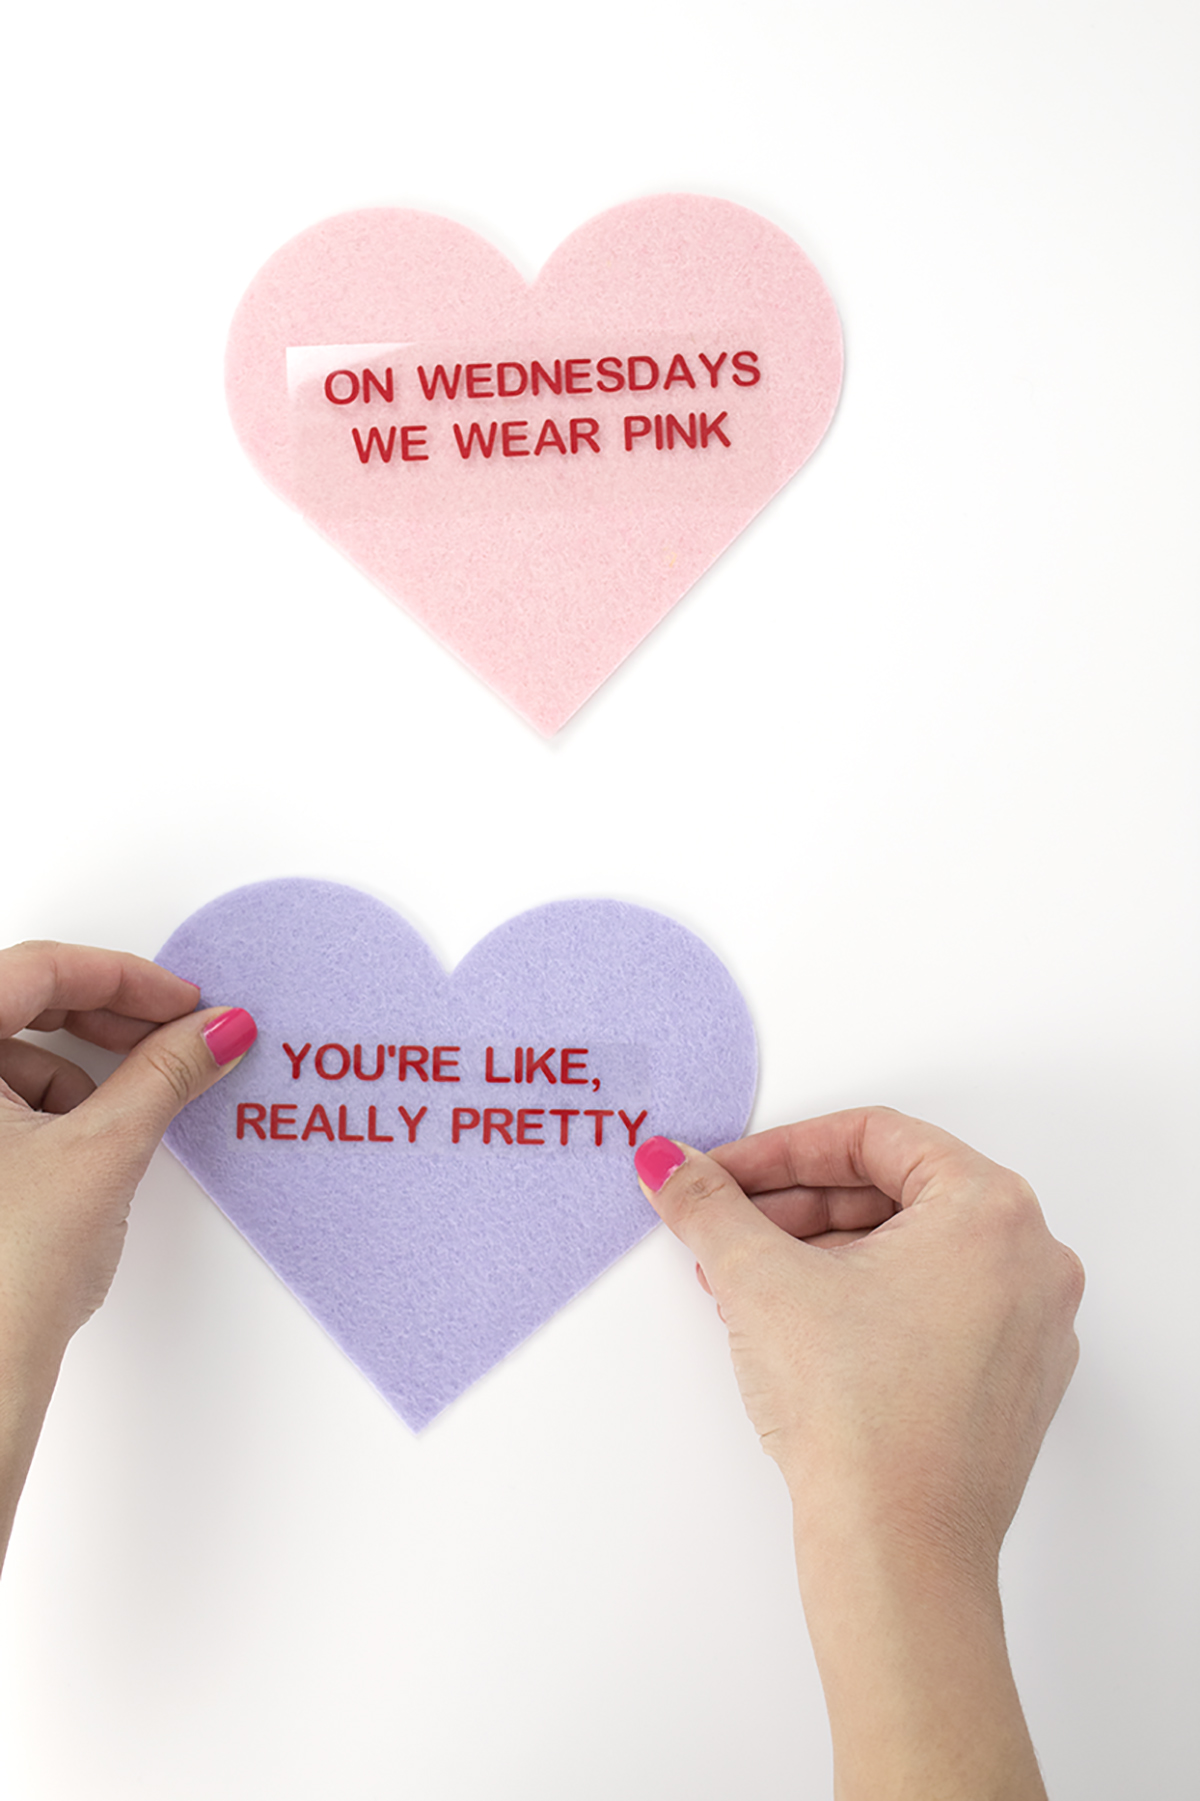
7. Center your quote on your conversation heart and press it down. To make sure it's evenly centered, I would look at a few things, like which word is in the center of the heart, how much distance is on either side, and how far it is from the top. If you're still not sure, take a quick picture with your phone to see if it's off center or crooked.

Give your sweetheart candies a little bit of attitude this year by making them into Mean Girls Conversation Hearts. So Fetch! Click for the full tutorial, along with how to use Cricut iron on vinyl.

8. Use your iron to carefully iron your quote onto the heart. Use the wool/low setting and place a cloth over it so you don't scorch the felt. Then, flip your heart over and iron the underside. If you have a small craft iron, you may be able to do it without a cloth like I did.

Give your sweetheart candies a little bit of attitude this year by making them into Mean Girls Conversation Hearts. So Fetch! Click for the full tutorial, along with how to use Cricut iron on vinyl.

9. Let it cool, then peel the liner off from the corner. Do this carefully to make sure all the letters fully adhered. If not, go back over it again, let it cool, and continue peeling.

Give your sweetheart candies a little bit of attitude this year by making them into Mean Girls Conversation Hearts. So Fetch! Click for the full tutorial, along with how to use Cricut iron on vinyl.

Once all your quotes are ironed on, you can begin arranging your banner! See how I did that below.

Give your sweetheart candies a little bit of attitude this year by making them into Mean Girls Conversation Hearts. So Fetch! Click for the full tutorial, along with how to use Cricut iron on vinyl.
Cricut iron-on vinyl is actually pretty simple to use, as long as you know which way the vinyl goes and how to make sure your letters aren't backwards. Click for the full tutorial, along with how to make some Mean Girls conversation hearts!

Making your banner

1. Arrange your hearts in the order you'd like to see them, or by color.

Give your sweetheart candies a little bit of attitude this year by making them into Mean Girls Conversation Hearts. So Fetch! Click for the full tutorial, along with how to use Cricut iron on vinyl.

2. Cut a small piece of ribbon. This will act as a "tape" to hold the hearts together.

Give your sweetheart candies a little bit of attitude this year by making them into Mean Girls Conversation Hearts. So Fetch! Click for the full tutorial, along with how to use Cricut iron on vinyl.

3. Glue the ribbon onto the hearts at the widest part. Be sure to hold them as close together as you can to prevent a gap from forming between the hearts. I used pink ribbon, but a white one will probably camouflage the best. You can't really see it when you flip the banner over, so technically it doesn't matter.

Give your sweetheart candies a little bit of attitude this year by making them into Mean Girls Conversation Hearts. So Fetch! Click for the full tutorial, along with how to use Cricut iron on vinyl.

I also recommend adding some extra ribbon or twine at the ends to hang it. I originally didn't want to do that, but taping felt on a wall is basically impossible.

Give your sweetheart candies a little bit of attitude this year by making them into Mean Girls Conversation Hearts. So Fetch! Click for the full tutorial, along with how to use Cricut iron on vinyl.

Woohoo! Now, hang up your banner and revel in the joy of a Mean Girls Valentine's Day. You can also paste up some hearts as a party backdrop! This is my best Mean Girls face. Slightly friendly, slightly fierce, 100% Fetch. 

Give your sweetheart candies a little bit of attitude this year by making them into Mean Girls Conversation Hearts. So Fetch! Click for the full tutorial, along with how to use Cricut iron on vinyl.

P.S. "And none for Gretchen Weiners. Bye!" is basically my favorite Mean Girls quote, and I use it in everyday life. It has so many practical uses.

Give your sweetheart candies a little bit of attitude this year by making them into Mean Girls Conversation Hearts. So Fetch! Click for the full tutorial, along with how to use Cricut iron on vinyl.

So you agree? You think you're really pretty?

Give your sweetheart candies a little bit of attitude this year by making them into Mean Girls Conversation Hearts. So Fetch! Click for the full tutorial, along with how to use Cricut iron on vinyl.

I really need to start wearing pink on Wednesdays. I mean, that's just like, the rules of feminism

Give your sweetheart candies a little bit of attitude this year by making them into Mean Girls Conversation Hearts. So Fetch! Click for the full tutorial, along with how to use Cricut iron on vinyl.

So what's your favorite Mean Girls quote? Is it one I missed? Let me know in the comments below!